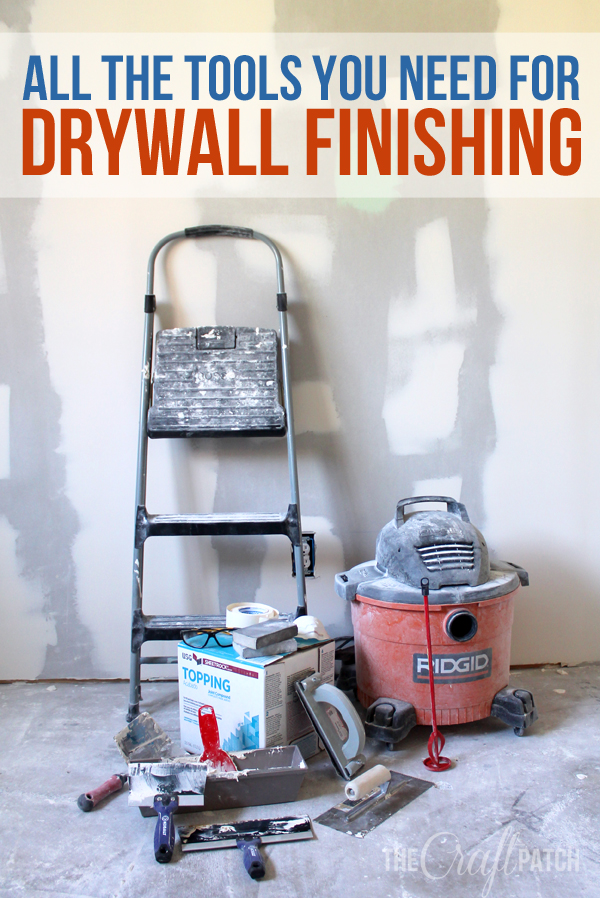
Drywall finishing. Have you ever done it before? We are on our second remodeling project that required new drywall and boy, have we learned a lot. Today I thought I’d share a list of tools you will need if you plan to tape and mud drywall some time.
I’m not going to give you a full tutorial on how to finish drywall, but in case you aren’t familiar with the process, you are basically trying to cover up the cracks between drywall pieces. You tape, mud and sand (and repeat) until the wall looks perfectly smooth.

As you can tell, these tools have been well-loved. Between The Pantry Project and the craft room remodel, we’ve spent a lot of time with them!
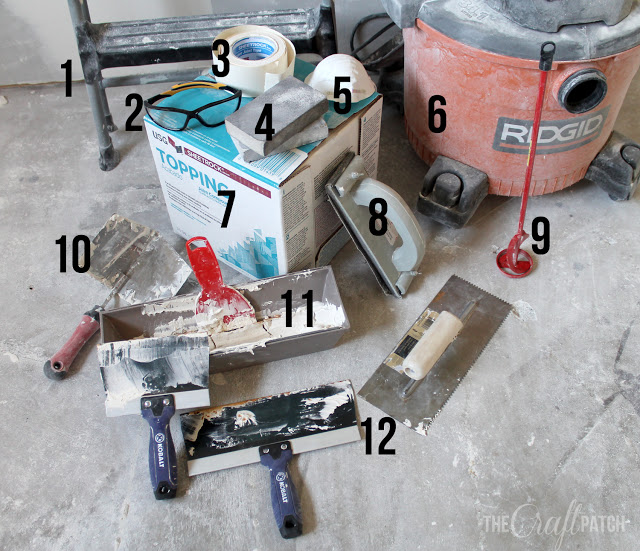
Here’s a close up of everything we use when taping and mudding drywall:

I’ve included affiliate links to Amazon in case you want to buy any of this stuff for your next project.
1. Step stool. Necessary so you can reach the tops of every wall. If you are 6’5″, you could probably skip this tool, otherwise it’s a must.
2. Saftey glasses. When you sand drywall, the dust is outrageous. The glasses help protect your eyes from getting filled with drywall dust.
3. Joint tape. You put it over the cracks between drywall pieces. We tried both the mesh kind and the paper kind and we prefer the paper kind.
4. Drywall sanding blocks. They are like foam with sandpaper on the outside and they are what you use to sand the mud and make all the seams perfectly smooth and invisible.
5. Dust mask. I was shocked how much dust is involved in finishing drywall. When you sand the joint compound, it creates a ridiculous amount of fine, white dust. You don’t want to breathe that stuff in. I’m sure you would die of miner’s lung or something. A dust mask is also great for protecting your Bluetooth speaker. Don’t want dust clogging that up and you gotta have tunes while sanding!

6. Shop Vac. We bought a special extra-fine filter so that we could vacuum up all that drywall dust and not have it come shooting right back out at us. I would not use your regular vacuum because that darn stuff clogs them up so fast.
7. Drywall joint compound. We tried buying the powder and mixing it ourselves and we tried buying the premixed stuff. Premixed is SO much easier. If you mix it yourself, you end up with too-thick, too-thin, too much, too little, blah blah blah. The premixed is not that much more expensive and it was worth every penny.
8. Mesh drywall sander. This is the bad boy that does the heavy labor when you’re sanding. It removes a lot of joint compound quickly. Some models come with a spot to attach a long pole so you can easily sand up high.
9. Mixer paddle. It to your drill. If you plan to mix your own joint compound (see #7), you will need this to mix it evenly.
10. Corner trowel. This saved our bacon doing the corners and the seam between walls and ceiling. You could do without it, but it made the job so much easier.
11. Joint compound trough. I’m sure that’s the technical name. But whatever it’s called, you need one that is big enough so that you can scoop your biggest trowel in to get mud.
12. Flat edged trowels. We had three different sizes and used all of them. Each new layer of mud is supposed to be wider than the last layer so you get a gradual taper of mud. Different sized trowels help you achieve this.
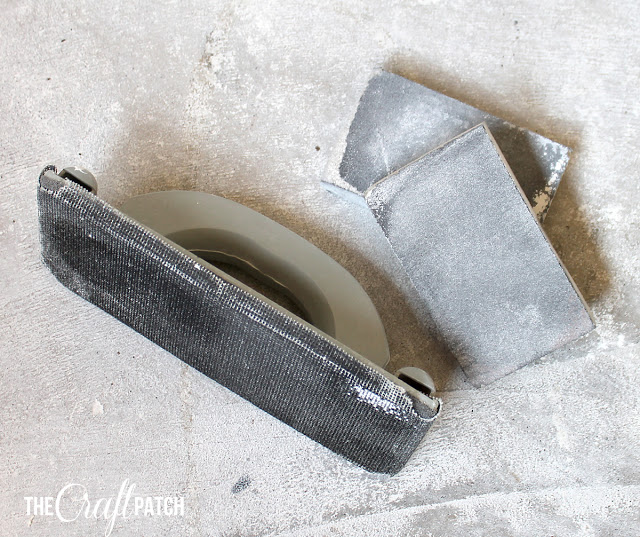
One more pic for you, a close-up of the two types of sanders:

Use the mesh sander for the first two sandings and the foam sanders for the final finishing.
I’m not going to lie: drywall finishing is a pain in the butt. It’s messy and exhausting. BUT you can save a ton of money doing it yourself and you absolutely can do a quality job that looks as good as a professional.
Can’t wait to show you the craft room! I’m finishing the final sanding today, then I’ll start on texture and once it’s painted, I’ll post pics! Hurray!

Comments & Reviews
Thank you for the tips. I’m brand new at this and not looking foreword to do it but am excited to get it finished.