The best paint to use for kitchen cabinets and how to get a professional, smooth finish painting your kitchen yourself.
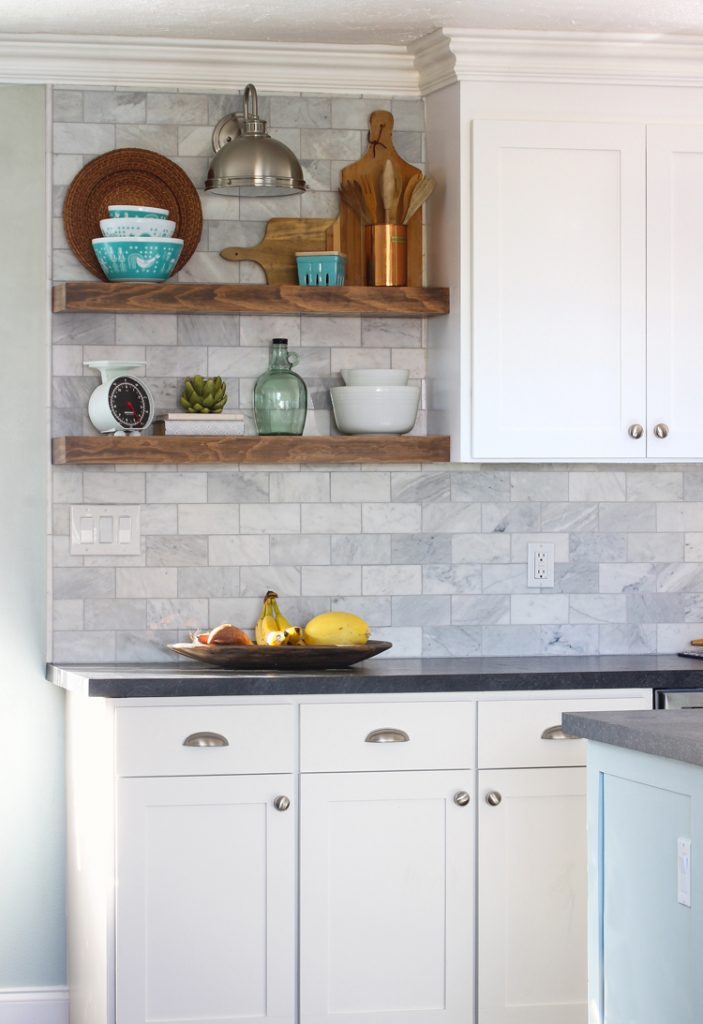
Let’s talk about painting kitchen cabinets, shall we?
Painting kitchen cabinets has been extremely popular over the last few years. And it’s no wonder… it’s a relatively inexpensive way to give your kitchen a completely new look. I’ve probably read at least 30 tutorials on painting kitchen cabinets and I was still nervous to actually DIY my own kitchen. It’s one thing for it to look good in photos, but I didn’t really know if I could get a real life professional finish that was durable enough to hold up to scrubbing and daily use.
Well, guess what? I painted my kitchen cabinets.
And they look awesome.
I mean, REALLY awesome.
The paint looks completely smooth and professional and I couldn’t be happier.
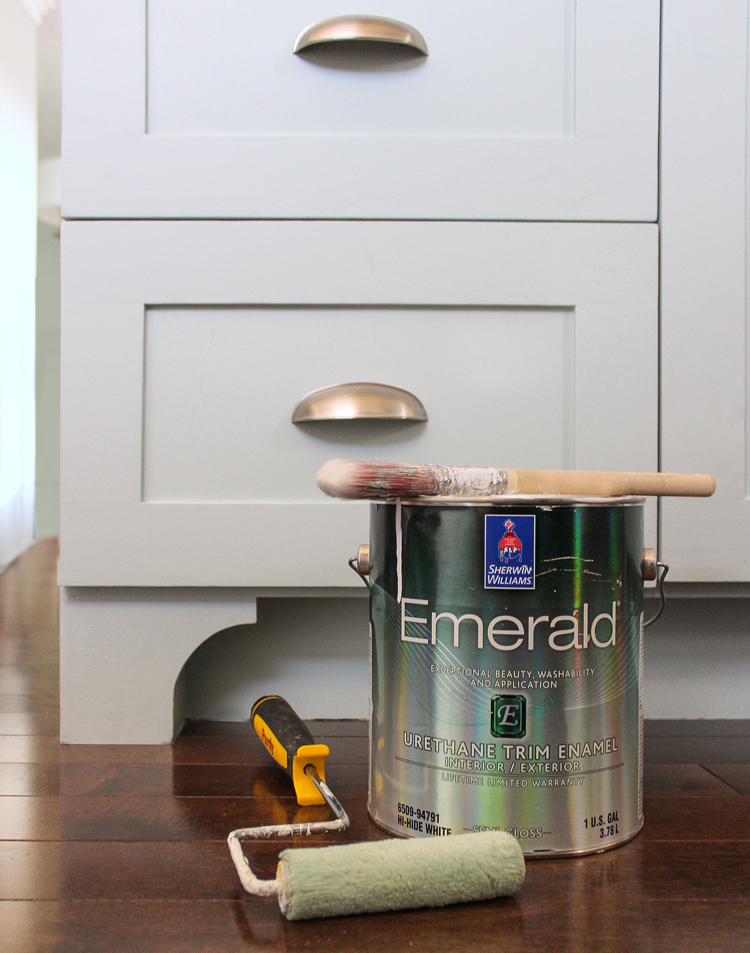
The PAINT COLORS I used are Sherwin-Williams Pure White and the island is painted Sherwin-Williams Rainwashed.
Today I want to talk about how I achieved such good results and share with you all that I I had learned in the process of painting my kitchen cabinets. Are you ready for information overload? Let’s dive right in!
How to Paint Kitchen Cabinets
Timing. This is not a one weekend project. It takes time to do it right, but the results will be worth it. Don’t skip steps or get lazy… go slow now and do it right the first time so that you don’t have to re-do it a few months from now.
Wear Paint Clothes. If you say to yourself, “Oh, it’s okay. I’ll just touch up this bit of paint while wearing my prom dress” I guarantee you’re prom dress will be ruined. Get yourself one outfit you don’t care about and wear it the whole time so all of your yoga pants aren’t covered in paint splats by the end.
Protect Floors and Counters. I thought I could paint my upper cabinets without any trouble, but I totally splattered paint all over my brand new kitchen counters and it was a pain to clean up. Don’t be like me. Cover your floors and counters with drop cloth or butcher paper and save yourself a headache.
Preparation = Success. Paint makes every bump and imperfection noticeable, so sand, fill, caulk and then do it all again. You don’t want to ruin a good paint job with sloppy prep work! If your cabinets are glossy wood, sand away the gloss. We reused our cabinet bases and built new doors from scratch, so I sanded off the old finish on the bases, but didn’t need to on our doors. Some people say sanding is unnecessary, but I have regretted it every time I’ve tried to skip this step, so I recommend sanding before painting no matter what. Just do it.
Use Oil-Based Primer. Oil-based paint smells really bad and it’s a pain to clean up after, but this is one time when you just have to deal with it. I can’t even stress how glad I am that I used oil-based primer. The main reason is because you can sand it after it dries to achieve a smoother finish, but it also just sticks really well and will give you longer lasting results.
Pick the Right Paint. After researching like a crazy lady, I ruled out oil-based paint. It yellows over time and I did NOT want my crisp white cabinets to turn yellow. Gag.
I also ruled out traditional latex paint (regular old wall paint) because it’s really not meant for cabinetry and tends to ding easily.
Then I began looking at alkyd enamel paints. I settled on Sherwin-Williams Emerald Urethane Trim Enamel. It has a lot of the same great qualities as an oil-based paint. It’s self-leveling (which helps even out brush strokes as the paint dries) and dries to an extremely durable finish, but because it’s water-based paint, it’s easy to clean your brushes. It is specially designed for heavy traffic surfaces like cabinets, doors and trim.
The Urethane Trim Enamel is more expensive than the cheap stuff at Home Depot, but I promise it’s worth it. It also goes on so much better that you end up using less paint. I’ve found this to be true with the Emerald wall paint as well. It’s just better paint with more pigment in the formula and higher quality ingredients and some things are worth spending more on. I’ve heard good things about Benjamin Moore Advance paint, but I have had such a good experience with Sherwin-Williams Emerald line that I’ll be using it for life.
This paint went on like a dream! I can’t say enough good things about it. My husband insisted on a semi-gloss finish and I was worried that my cabinets would be too shiny, but it’s actually perfect. It’s not a high gloss finish at all. It’s just the right amount of sheen! I would say they look like velvet, not silk. Does that make sense? The finish is rich and beautiful but not in-your-face shiny. It’s perfect! And after about two months of living with it, I can say that it is easy to scrub clean, even with three messy kids in the house.
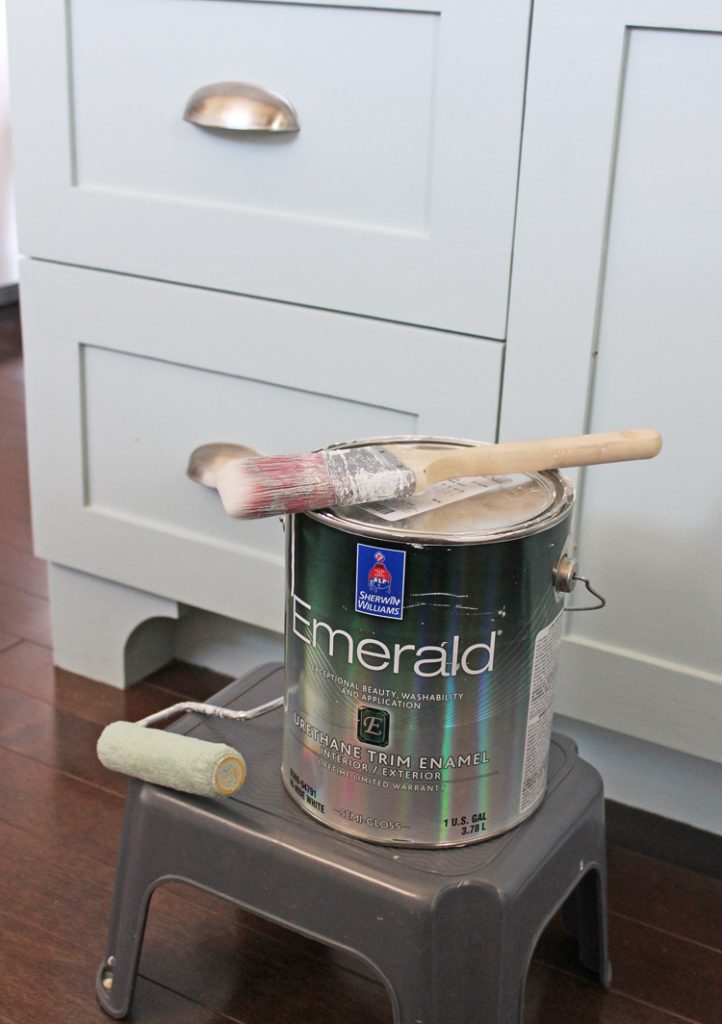
Application. The thought of taping off my entire kitchen so that we could use a paint sprayer was just too overwhelming since we kind of need to use it every day, so I rolled the paint onto the cabinet bases and island and used a paint sprayer for all of the cabinet doors. I was able to get good results using both techniques and I completely attribute that to the paint. I told you the stuff was dreamy.
To get good results with a roller, use a high quality angled brush to get in any cracks and around the edges, then use a mohair roller cover to roll the paint across the flat surfaces.
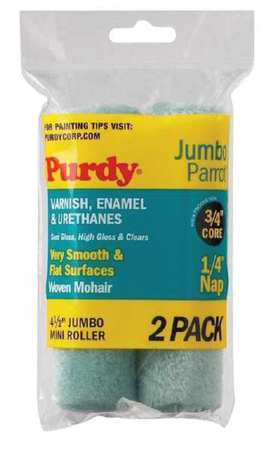
This was my first time using a mohair roller and I have no idea why it’s so amazing, but it is. The paint went on so smoothly and there was no bumpy texture. I was shocked how well it worked and I am now a mohair roller believer.

You can buy the roller covers and the roller handle at your local Sherwin-Williams store.
Using a paint sprayer to paint 30+ cabinet doors was no small task. Our garage is a workshop and storage unit more than a place to park cars, so I had to get creative with finding enough space to paint. If we had an empty garage, I would have just laid all of the cabinets out on tarps on the floor and sprayed them in place.
Instead, I ended up using the HomeRight Spray Shelter for the actual painting area. I set it up with the opening facing my garage door and put a folding table covered in plastic inside the tent.
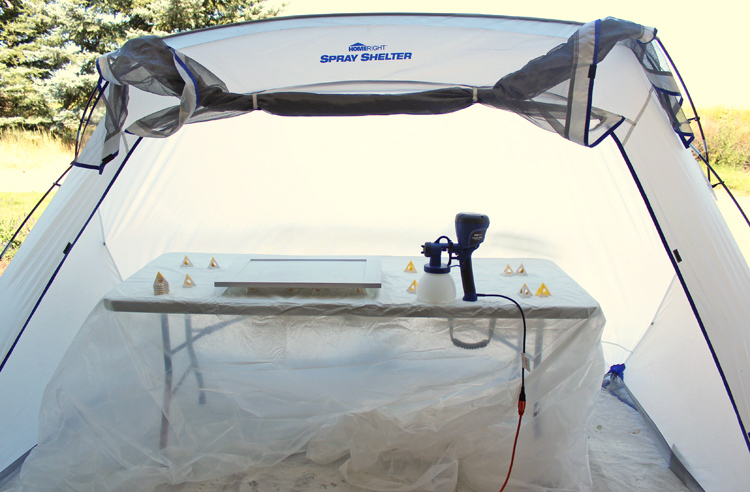
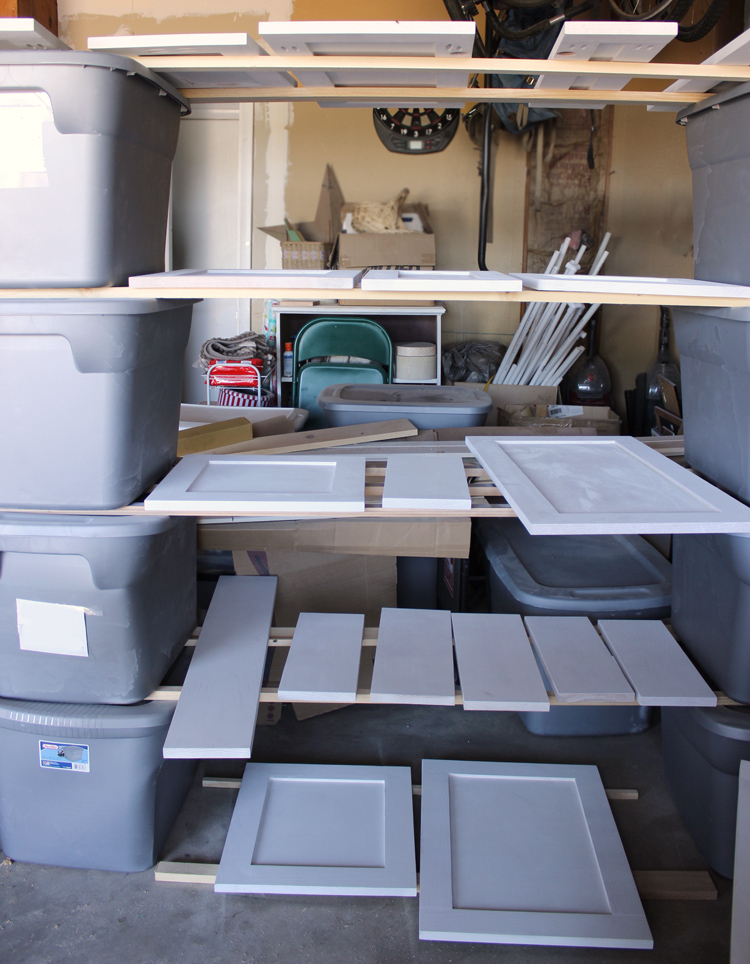
I would set up a few doors in the spray booth, spray one side of them, then carefully transfer them to a makeshift drying rack I made in the garage. I sandwiched long wooden boards between stacks of storage totes and it actually worked pretty well, but it was awfully nerve-wracking to move freshly painted cabinet doors.
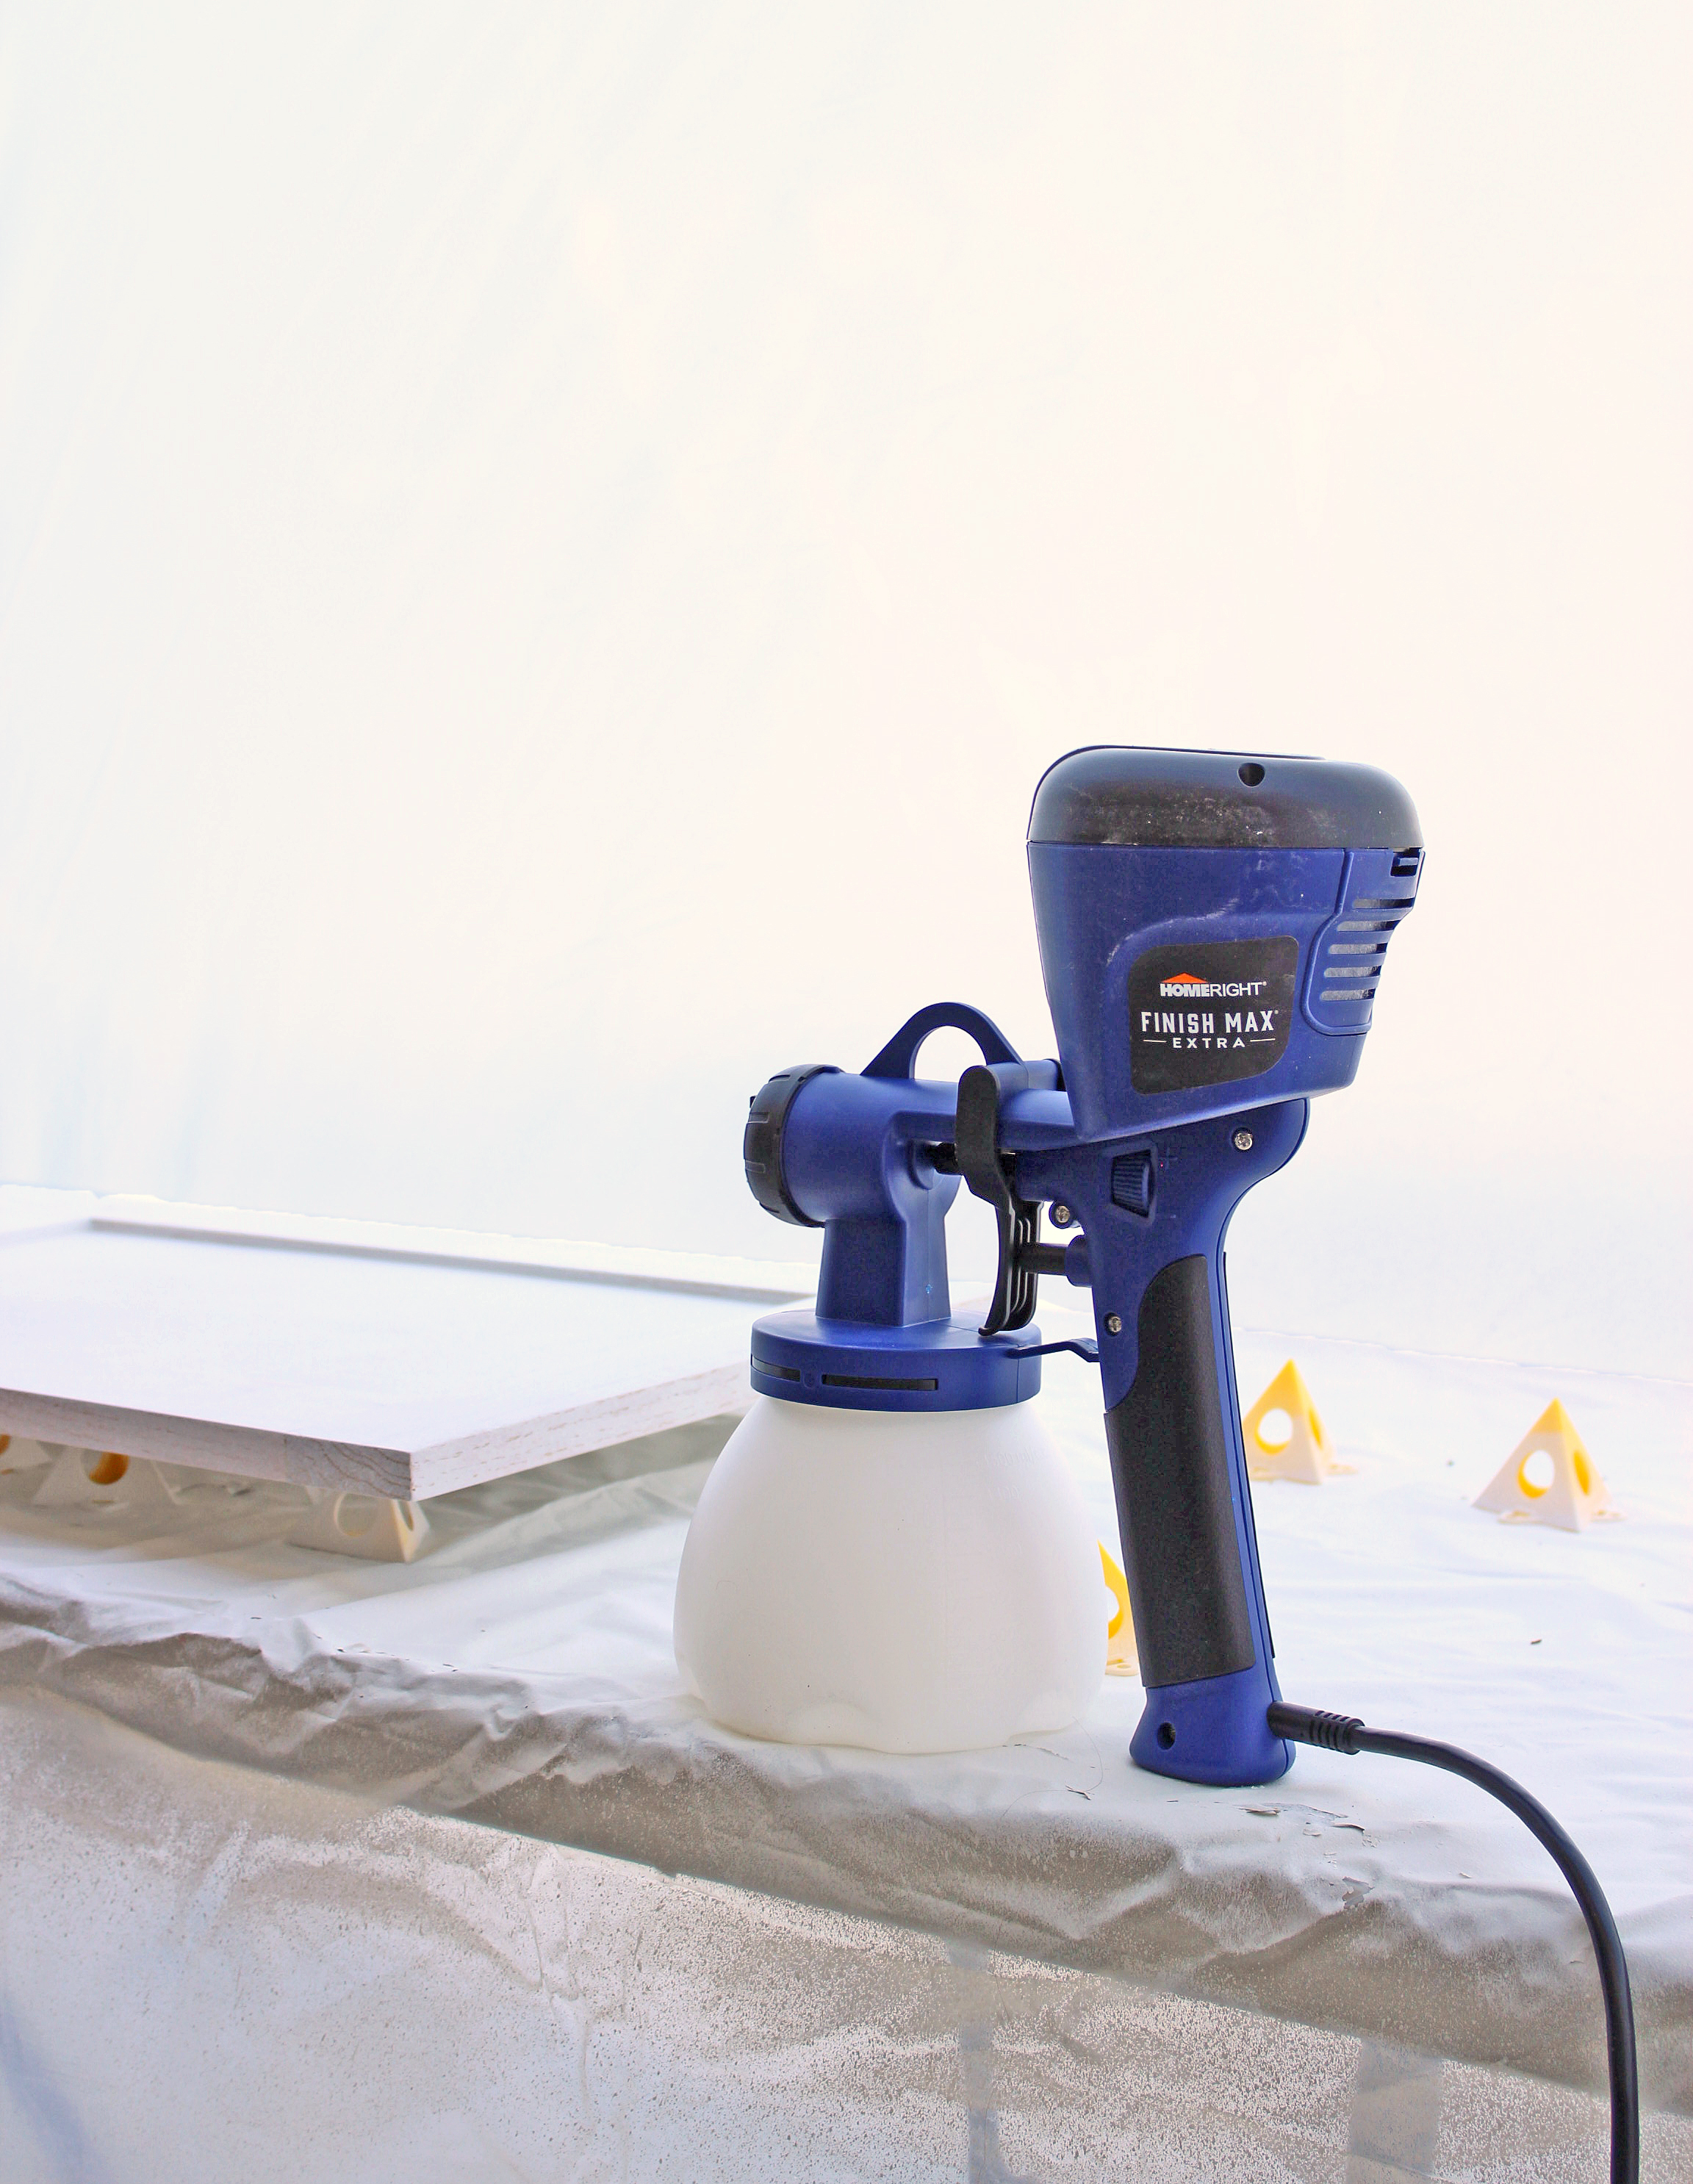
I used the HomeRight Finish Max Extra and once I got the hang of it, I think it worked great. I would definitely do some test runs on a piece of cardboard to get all the settings right. Also, please wear a respirator or mask of some kind while spraying to protect your lungs. I also suggest wearing a scarf or hat to keep your hair from getting dusted with tiny paint particles.
The little yellow triangles you can see in the picture below were awesome. They’re called Painter’s Pyramids and I bought them on Amazon. They held the cabinets up off of the plastic but only the teeny tiny tip touched the doors so I didn’t have to worry that they were messing up my paint job underneath. I saved them after this job and still use them all the time, even for small crafting paint projects. They are so handy.
Paint, Wait, Sand, Repeat. After you’ve applied a coat of paint (rolled or sprayed), you’ll need to let it dry for at least four hour, more if you live in a really humid climate. This is not a suggestion. THIS IS NECESSARY. If you re-coat too quickly, you’ll end up with “sticky” paint and it’s the worst. After four hours, very lightly sand the paint to remove any imperfections, then repeat the process. I did three coats for maximum durability. Do not sand the final coat.
Clear Coat. Here’s some good news… Sherwin-Williams Emerald Urethane Trim Enamel doesn’t need a clear coat so you have one less step to worry about! No clear coat! Boom shaka laka.
Patience is a Virtue. All latex paints take approximately 30 days to fully cure and harden, so if you can leave the cabinet doors safely tucked away in the garage, they will be less likely to dent or scratch during those first crucial days. If not, just try to baby them for the first 30 days.
So there you go. That’s how I painted my kitchen. Do you have any questions? Leave me a comment and I’ll get back to you!
*** UPDATE February 2023 – It’s been over six years since we painted our kitchen and I am thrilled with how the paint has held up. We have one or two places where the kids have dinged through the paint, but I can easily touch those spots up with the leftover paint. There is absolutely no bubbling or peeling paint or major flaws. The cabinets still look amazing and have exceeded my expectations for durability and cleanability. I attribute that to diligent sanding, using oil-based primer, and the power of Urethane Trim Enamel.


Comments & Reviews
Fabulous timing and instructions or tips. I am getting ready to paint new unfinished kitchen cabinets in a few weeks, I am a basket case since I have never done this before and I hate painting. I won't be using a sprayer and intend to do it all with roller and brush. I will definitely take your advice and use the SW paint even though I never buy that brand due to their higher price point. But Ithink this time I will take the plunge. Thank you. Can you tell me what grit sandpaper you used in between paint coats?
It's such a big project that you don't want to have to redo it any time soon. Totally worth getting the higher quality paint! Since you'll be rolling your paint, definitely get the mohair roller. It was amazing. Good luck with your project. You can do it!
I used this paint in Denim on a bath vanity and adjacent linen cabinet, and am having terrible problems with water spots. Any time water gets on the painted surface, a white spot develops that won't go away. Have you experienced any problems with this? It is especially upsetting because I spent so long on the prep and painting.
Oh no! That is a really weird problem and I'm so sorry. That would be so frustrating. I haven't had any problems with mine and I've already had to scrub all kinds of kid-related food spills off the cupboards.
This issues is due to your area having “hard water”, which is water that contains higher volume of tiny mineral deposites.
Water spots occur when the water evaporates, leaving behind calcium and other minerals which often become embedded on the substrate.
The best way to avoid unwanted water spots is to remove any water from the area – using a towel – before the water dries by own it’s own.
As a professional automotive detailer I am always paranoid of letting water sit for too long on any given surface and have the made it a habit of always wiping down surfaces after purposely or accidentally showering them in water.
Which white did you use?
The white I chose was one I color matched to the existing doors in our home so that I wouldn't have to repaint all of them as we've been changing out the door casings, so I can't tell you exactly what it is. BUT… it is a very bright white, not a cream or gray at all. Sorry I can't be more helpful! If you really want, I can dig out a paint can and try to give you the formula on the lid.
I would love the formula! This is awesome! Curious – I have two small boys and I am worried about those first 30 days. Do I really have to live without cabinet fronts for 30 days? I don’t want something to get screwed up in those first 30 days!
I kept our doors out in the garage for about a week, then hung them up and we haven’t had problems.
Your article says you SW Pure white. Your comment says you color matched. I’m confused. You also say you used semi-glass. Im nervous it may be too shiny . I was thinking of using satin.
I was also worried about it being shiny, but this paint is not shiny… it’s just right for cabinetry. I had my paint color-matched, but after years of people asking me what color it was, I finally got a swatch book from Sherwin-Williams and found the exact match so I could give people a name. Pure White is a dead ringer for my cabinet color.
what kind of sprayer did you use?
I used the Home Right finish max and loved it!
Did you have to thin the Emerald paint any for that sprayer? If so what did you use? I have purchased the same everything! What color tip did you use on your sprayer? Thanks!
Yes, I thinned the paint. There are directions for thinning the paint in the manual of the sprayer. I followed the manual religiously for everything. I used the green tip for painting.
Is is possible to distress cabinets using this paint?
I have not personally tried it, but I think it would work.
This stuff is about $90/gallon. I would recommend using the cheap stuff for a distressing project.
Yes, this paint is the highest quality, so it’s best for projects you need to last for years to come. If you’re going to distress it anyway, you could probably get away with cheaper paint. Be sure to watch for sales… Sherwin-Williams often puts their paint 40% off, so that’s when I buy mine!
How much did you have to thin (and with what? Water? Floetrol?) the Emerald trim paint for it to spray in your sprayer? Also, after seeing how the paint performs with roller application, would you recommend rolling the doors? After looking at painter forums, it seems pros don’t like this paint. I only got it because the guy at Sherwin Williams recommended it. Now I’m hesitant on which way to proceed. I prefer a more professional looking sprayed finish but can’t find any info on thinning for an hvlp sprayer. Your cabinets look great. Thanks for sharing your experience.
Hi Melissa,
My sprayer has a little flow cup. I fill the cup, then time how long it takes for the paint to drain out, then compare it with a little chart in the user manual. I used water to thin the paint.
I would definitely recommend this paint. It has held up beautifully so far and we're maybe six months in at this point. I would also recommend spraying it. The sprayed finish looks SO good!
Your cabinets look beautiful. Where did you find your floating shelves.
We built them! I wrote about it here: https://www.thecraftpatchblog.com/2017/03/how-to-install-floating-kitchen-shelves.html
Love your cabinets and all your tips! Question: did you roll the primer? I don’t want to clean out the sprayer from oil based primer!
I actually did BOTH. I rolled the cabinet bases and sprayed the doors. Both worked well. The advantage of using oil-based primer is that it sands up beautifully! And it really wasn't as bad as I thought to clean out my sprayer after using oil-based paint… I just ran paint thinner through until it came out clear. I have heard people who have one sprayer for oil-based and one for water-based and I think that's a great idea. Hope that is helpful!
I used the same paint as you on my kitchen cabinets. Except I used a satin sheen, and I tinted it in Alabaster. Absolutely love the way mine turned out and I only used a brush and a roller. However it’s been about 25 days since I painted them and the paint still doesn’t seem very durable. It gets scuff marks very easily. It’s making me sad and stressed out. I contacted the company but they’re saying it’s probably not fully cured yet. Did you have issues white scuffing? How long does it take for them to cure? I thought it was 14-30 days but at 25 days they’re still getting scuff marks every time my ring or nails bump the painted surface 😩
Hey Brikena, I know cure time can vary quite a bit depending on the weather. Is it humid where you live or has it been raining a lot? Also, how long did you wait between coats of paint? That can affect dry and cure time too.
I have my fingers crossed that your paint just needs a bit more time. I don't blame you for being stressed!
I have practiced this paint on a coffee table, and this paint must cure at 70 degrees. I at first did it in my garage and it was chipping,scratched with my nail, etc. I called SW and we talked.
I stripped, resanded, reprimmed, then moved it inside to paint, and whallla, it’s amazing, cured hard and works great, this is a coffee table so I thought it’s be a good test to cabinets. I believe this Is the paint I will use
I did everything the “right way” I de-greased the cabinets, then I sanded everything then I primed with BIN shellac based primer. 2 coats of primer and 2 coats of paint and I sanded between coats. I waited 48 hours between each coat of primer and paint. (I saw that in one of Sherwin Williams tutorials) It has been raining here lately but still, I’m really hoping they will cure because like I said I really love the way they turned out and I was really hoping this paint would be durable since it’s an interior/exterior trim paint. Which Is one if the seasons i went with it. I’m wondering if I should put a clear coat on them? But I was hoping I didn’t have to.
It sounds like you followed the directions perfectly, so they should set up. I would wait just a little bit longer and hopefully the paint will harden fully. But give it another 30 days just to be sure, then you'll know if they need a clear coat or not. Then maybe call the guys at your local store again. Good luck!
what clear cost do you use?
I didn’t use a clear coat. With this paint, you don’t need to worry about that step!
Okay thank you so much 😊 I’m going to be patient and wait another 30 days to make sure they had plenty of cure time before I put a clear coat on them. And thank for putting me at ease, I was kind of freaking out 😆
I love your cabinets. Could you tell me what kind of back splash you have?
Thank you! The backsplash is my favorite part of our whole kitchen. I wrote a post with all the details: https://www.thecraftpatchblog.com/2017/02/diy-marble-subway-tile-backsplash-tips.html
this was super helpful! i just got the first coat of paint (same kind as you, but in a greenish gray) up, and i was FREAKING OUT because it was NOT passing the fingernail test. but my friend mentioned that she had read some blogs that noted that the cure time could be super long. you’ve saved my sanity, and i will now get back to sanding and painting! thank you! oh, and i’m off to buy a sprayer, i think. the paint store guys convinced me i didn’t need one, but… i think i might.
thanks for sharing your process!
I admit I always chuckle at these blog posts labeled, “THE best…” SW is great stuff, and that’s a very quality paint.
However.
You’ve not tried Cabinet Coat, have you? It’s for (wait for it) cabinets, trim and molding. It has a couple hours cure time, clean up is a breeze and it dries as HARD as a rock. It’s MADE for cabinets. It was made by Inslx, but it’s such a good product, BM bought them, along with their adhesive primer, Stix.
I admit, I have great luck with most adhesive primers (SW being convenient). But truly, if you need to clear coat cabinet paint? You’re (insane) doing it wrong. Cabinet paint should dry and cure within hours, if not days. It should be hard enough you don’t NEED that extra step. (Just like sanding is a big waste of time with the great deglossers out there.)
Next time you have to paint woodwork (or foam-work, too!) give it a try. Goes on like Buttah.
I’ve painted over 250lf of cabinets, some twice until I learned about paint and the lighting at all different times of the day. I don’t have woodwork in my 2000sf house yet, but will. (Rebuilding MYSELF from a fire.) And I’ll shell out the bucks and get Cabinet Coat. SW goes for my walls.
Hey Christine, thanks for sharing your opinions!
I did NOT add a clear coat to my cabinets and they are holding up so well. I am very pleased and still stand behind my recommendation of this paint.
Really nice job on the cabinets. Did you use satin or semi gloss paint?
Semi-gloss
Sorry to chime in so late on this post
Just doing some research. I used this product and agree the results are amazing. But I thought you had said your husband insisted on semi-gloss? The reason I ask is I did choose satin and I am finding it (it’s been 24 hours since first coat) flat and a bit chalky dull looking. Wondered if it gets a bit shinier with time? Looks more matte finished than satin.
I just checked the cans of paint and I used semi-gloss.
Does this work on veneer type cabinets. They aren’t solid wood
I have cabinets that have been faced with a plastic like coating and the color is darker than the base. Should I remove the covering before I paint
That’s a tough question to answer without seeing your cabinets in person. Would you be able to peel off the coating evenly for sure? Is the material underneath the coating suitable for paint? Is there a chance that you could damage the cabinets trying to peel the coating off?
The entire trim paint color in my home is antique white, should I paint cabinets the same. If not do you recommend a cream color?
I personally don’t like antique white next to crisp white because then the antique white just looks dirty. I would probably match the cabinetry color to the trim paint so that you don’t have to repaint all of the trim in your house. Bring home lots of paint chips to match with OR even better if you can bring a small piece of the trim into the store for them to color match.
Hi Jennifer—
I’m confused. Did you use semi-gloss or satin? The paint can says semi-gloss and you mention semi-gloss in your initial post. But your post on July 25, 2018 says satin.
I used semi-gloss Sherwin-Williams Urethane Trim Enamel.
excellent post. So i just started my cabinets and I am using the same paint, semi gloss as well. Looking at buying the same paint sprayer for the doors. I have started the primer process after cleaning the cabinets thoroughly. I am using the Extreme Bond Primer. I am loving the primer so far. I plan on Primer, sand, 2nd primer coat, light sand, then using the extra white paint, sand, then 2nd coat. I’ve read many postings on cabinet painting, I appreciate your blog very much.
Sounds like a great plan. Best of luck to you!
Did the Emerald paint smell very much? Did it smell less than the primer? It’s getting cold her in MI and wondering if we can do this same project in November with windows cracked and not wide open or if we need to wait until spring?
The Emerald paint is very average in the amount that it smells. The oil-based primer, however, was SO STINKY!
I used Zinsser oil based cover coat primer which stuck on fantastically, I waited several days, then sanded, before painting first coat of Sherwin Williams Urethane trim enamel, paint went on great, but when I lightly sanded with 400 grit, paint showed primer beneath in many areas. Any suggestions?
I’d say don’t worry about it too much. Sand a bit more lightly on the next coat and keep layering coats until you get an even finish. And don’t forget that you DON’T sand the last coat.
I love this product! Been painting cabinets For the last few years with the Emerald semi gloss urethane enamel and have outstanding results. Only difference in Jennifers process is I use BIN shellac primer due to its fast dry time. Thanks for sharing your process!
Hi Jennifer!
I’m getting ready to dive into the project of painting my kitchen cabinets. Reading tons of blogs because I’m super nervous and want to do it right.
Can you give us an update on how they are holding up? And can you also tell me what brand of primer you used exactly?
They’ve held up beautifully even with three kids who are trying their darndest to ruin them. Haha. The oil based primer we used is by Zinzer.
Once upon a time, serious painters used a sweet little product known as oil based enamel—some like me still do.
Well, Painter Randy, you apparently love two things: spending hours cleaning up after oil-based paint and leaving rude comments!
And oil paint yellows over time, more so than latex or emulsion
What was the color you used? Does it have a gray hue?
It’s a custom mix because I matched my existing doors and trim. It’s a very WHITE white without being cold. It does not have a gray hue.
I was wondering if you are able to see the wood grain through the paint? Also, how long have you had them painted and are hey holding up well?
Your kitchen looks beautiful and I’m inspired!
Thank you!
Jolene, I sanded really well and used wood putty to fill in most of the grain, but there are still some spots where you can see subtle grain. I like it that way— then you know they’re real wood. 😉
Hello just wondering did you do another article on using the spray gun at all?
I never did! Oops! I used the HOmeright Finish Max Pro. It worked really well and is affordable. Follow the directions that come with it and you should be golden.
The other big thing is to plan where you’re going to keep all of the wet painted cabinets while they dry so dust, leaves, bugs can’t land on your fresh paint job. Hope that helps!
Thank you for all the information and encouragement. I just recently painted my front door with SW urethane trim enamel in Tricorn Black. I am disappointed in how many brush marks there are. I am painting the door in place (since hubby was not at all interested in removing it). With the first coat I got a few drips so, with the second, I tried not to apply the paint too thick. I did not know to sand in between. I used a Purdy short nap roller and laid it down with a Purdy synthetic brush. Any suggestions for how to get a smoother finish with the third coat? I was hoping to do my bathroom cabinets next but I would not be happy with this finish for cabinetry. Thank so much
You’ll get the best results with a spray gun. There just really is no substitute for it. The HomeRight sprayers aren’t that much money and TOTALLY worth every penny for the smooth finish they’ll give you! However, the next best thing is the mohair roller that I talked about in this post. I would recommend using that instead of brushing on the paint if you’re unable to get a paint sprayer.
Great post – thank you so much for sharing your tips and advice! Do you remember what grit(s) of sandpaper you’re used between coats?
I used 220 grit.
Can you tell me what color paint this is in your picture? Thank you!
The cabinets are a custom white, but it’s a very bright white. The island is painted Sherwin-Williams Rainwashed.
Could you post or send the formula you have. I initially tried what two stores said was their extra white but it’s just their high hide white and it has the slightest blue/gray to it but I notice it big time. I used satin and am doing my bathroom walls w/ it too…I love it but I am thinking of doing the second coat on the cabinets in semi gloss.
I’d love to get your formula. Thank you! xoxo
I would go with Sherwin-Williams Pure White. I’ve been trying to find a standard white that matches this custom color I’ve used for years and so far, Pure White is the winner. It’s a great, bright white without any weird undertones!
Hi Jennifer, I decided to teach myself to tile during quarantine and stumbled upon your marble backsplash blog post. I used it as my guide the entire way and LOVE the finished product. My next project is to repaint cabinets and I found your blog yet again. Can’t wait to try this paint… thanks so much for providing such great tutorials resources!
Yay! Thanks so much for your kind comment Krysta. I’m so glad that I was able to help. It’s why I do what I do. You made my day!
Did the paint work ok over your moulding? We’ve used this paint other places in our home but only on raw wood and although I’m planning to go over all our cabinet boxes with sandpaper I’m not sure what to do about the moulding. I’m not worried about it being durable because it will never be touched but a lady at Sherwin Williams said this paint could not be used over existing paint. Thoughts or advice?
I don’t know what that lady was thinking. You can DEFINITELY use this paint over the top of existing paint with no problems, especially on something like molding that won’t get a lot of wear.
Hi, I just used SW Enamel Urethane on a 6′ long credenza with intricate detailing on the doors. It took several coats, but worked beautifully! It has been curing in the garage for 4 days (the first coat was two weeks ago). But the smell is still so strong! I thought it was supposed to be low VOC and havent been able to find anyone else online who had an issue with this paint off-gassing. Did you notice an issue with off-gassing? Do you think it will go away as it continues to cure? Really antsy to move my beautiful new piece inside! 🙂 Thx!
TIffany, I’m surprised it still smells. I don’t remember ours being too bad. It will go away as it cures for sure!
Hi I came across your post and was wondering, being that it’s been two year since you painted your kitchen I am interested in finding out how the paint is holding up. We have had different people tell us to use emerald and other tell us to us advance from Benjamin Moore. Interested in your thoughts. Thank you!
Hi Vianca! Our painted cabinets have held up SO well! I think the Emerald Urethane Trim Enamel is amazing stuff, but I also think the oil-based primer and proper sanding helped a ton too.
Thank you for this post. I completed kitchen backsplash and am embarking on the cupboards and am using Sherwin Williams bonding primer and the Emerald paint you recommend. How many gallons did you require?
I bought the primer yesterday but see their 30% off sale ends tomorrow so want to pick up the Emerald paint today or tomorrow but no idea how much I should buy. Hope you can give me an idea how much you used. Thx.
It took me two gallons. Good luck to you! So exciting!
Hey thanks for the post. About how many cabinets do you have? The SW store told me I only needed 1 gallon for 24 doors and 6 drawers. I don’t want to over buy as it’s expensive but also want to get what I need when the sale is going on.
Also do you have any experience using this with Kilz oil based primer?
Jennifer, the paint does go a long way. I used two gallons for my entire kitchen (although I bought three because I used a different color for the island). I haven’t used the Kilz primer. I used Zinsser oil based primer with fantastic results.
Hi Jennifer
Thank you so much for all the details that you mentioned..I loved your kitchen cabinets and so exited to start our cabinet painting at same time so nervous..
I have a quick question I live in austin,Texas do you think December is the right month to paint our cabinets ? Please let me know
There is a temperature range listed in the instructions on the paint can. I would check the weather forecast and see if you’ll be within that range.
I know this is an old post. But I really hope to hear a response. I’ve over loaded my self on posts about painting my kitchen cabinets. I’m soo nervous & want to do everything right the 1st time. You have solidified my choice in SW Emerald Urethane Trim Enamel! I’ve been back & fourth on primer. But I too think an oil base is good…
I’m painting over 20 yr builder installed cabinets that are in fantastic condition. Finally my question is which Zinsser oil based primer did you use if ya don’t mind my asking. Thanks so much for this post.
I used Zinsser Cover Stain Oil Based Primer. Even though your cabinets are in great shape, I strongly recommend sanding or at least using a liquid deglosser. Every step you take to ensure the paint sticks is worth the effort in my opinion. Good luck to you!
Just wondering how you sprayed your zinsser oil-based primer? I purchased the same sprayer but I’ve had no luck spraying it. I thinned it down quite a bit but I’m getting cobwebbing at the lowest possible speeds. Thanks!
I didn’t have that problem that I can remember (it has been several years). Did you follow the instructions in the manual for thinning the paint?
Hm I didn’t look for specific thinning instructions in the manual. I just saw on the primer it said “do not thin” lol, so just kind of winged it. I’ll have to take a look at the Home Right manual before I tackle the doors (did the rest of the cabinet boxes first).
Great instructions and tips! Thank you. I am trying to figure out how many of those yellow triangles to buy for my kitchen cabinet painting project. Did you use 2-4 for yellow triangles for each cabinet door and door front? I have 12 drawer fronts and 32 cabinet doors. How long are the boards for the drying rack? I think I will create a similar system. Thanks for leaving this helpful post up on painting your kitchen cabinets!
Hi Kathy! I used four triangles for every door, but I only had three or four doors on triangles at any given time since I moved them to the drying rack. The boards were about 8 feet long, but really anything would work. We just used what we had lying around.
This paint failed me. I used an oil base primer and then the Sherwin William Emerald Urethane using spray gun 3 times on each side of the cabinets and yet….its yellowing. Patches of yellow. Next time I will go with Benjamin Moore.
I used zinsser oil-based primer too.
That is crazy! I am so sorry to hear that. I wonder if your wood is leaching tannins through the paint?
yeah, I am a contractor i used personely Emerald paint in my kitchen and it’s very easy to paint and i realy like And I learned a lot from your guide.
Hello, I am getting ready to tackle our kitchen cabinets and was planning on spraying them with the home right finish max. Did you have to thin the paint down when you sprayed? Any more info on that process would be super helpful! Thanks!
Yes, I thinned the paint following the instructions in the Home Right manual that came with my machine.
Great Post! We are in the middle of our kitchen project. Did you do 2 coats of primer or just 1?
I did two coats of primer because the cabinet doors were raw wood and soaked up so much primer.
Did it smell for a long time? We just did our cabinets with this paint and the smell is so strong and does not seem to be fading at all.
I have new unfinished maple cabinets, I plan on painting and I am wondering if you know what type of primer to use on the unfinished maple? Did you need to wear a mask during painting. How long did the paint smell continue. The WS is a low VOC but I am unsure if a oil primer is? Any other primer you’d suggest? Is there a reason you did not use a WS primer? Do you think you can get a good finish with using a roller for full cabinet doors?
I used oil based primer specifically because I was painting on raw wood and when water hits wood grain, it raises the grain. You can’t sand latex paint, but you can sand oil-based primer. I have been really happy with how my painted kitchen has held up and I do think the oil-based primer is one of the reasons, as well as the amazing Sherwin-Williams Urethane Trim Enamel. The best finish will always come from spraying, but if you use a mohair roller and the good Sherwin-Williams paint, you’ll get decent results. The paint is key, seriously. I can’t say enough good things about it!
Thank you, I will be painting unfinished cabinets in the future and your help and explanation is so greatly appreciated!