These DIY Felt Christmas Trees feature a beautiful Scandinavian-inspired pattern and hand-stitched edge details and can be made with your Silhouette Cameo 4 machine using our free cut files.
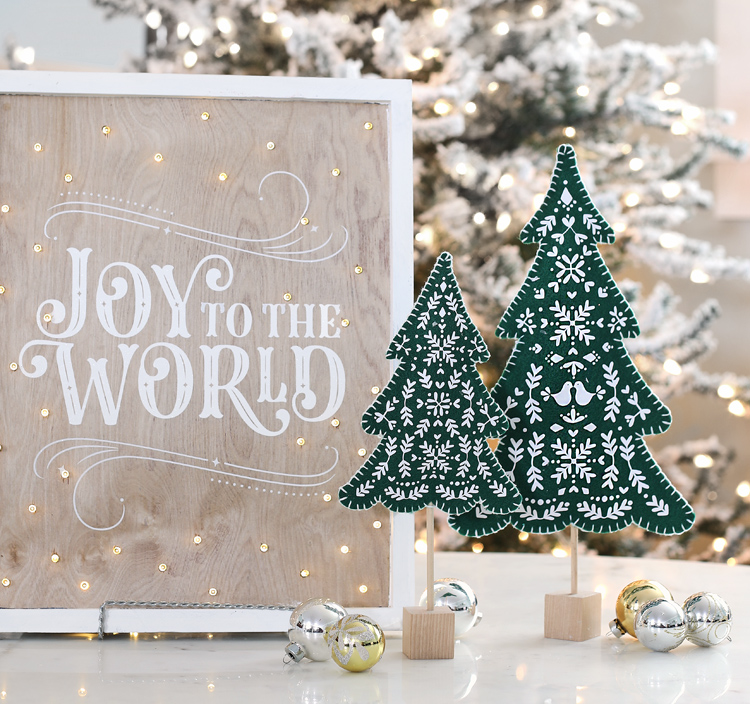
It’s true… I’m obsessed with cutting felt on my Silhouette machine. I made a felt stuffed animal back in September and I just couldn’t get over how easy it was and how cute it turned out and I knew that I just had to try making some Christmas crafts with felt.
And that’s how these darling Scandinavian-inspired felt tabletop Christmas trees were born.

Did you know you can use heat transfer vinyl on felt? Yep! It works beautifully and opens up SO many crafty possibilities. I can’t wait for you to try it, so I’ve created this step-by-step photo tutorial to walk you through exactly how I made the trees and I’ve included free cut files at the bottom of the post.
To make this project, here are the supplies you will need. (Affiliate links added at no extra cost to you).

Materials Needed
- Silhouette Cameo 4
- Rotary Blade
- Auto Blade
- Cutting Mat
- Craft Felt, 6 sheets
- Heat Transfer Vinyl
- Wooden Craft Dowels
- 1 Inch Wood Cubes or Wood Slices
- Batting
- Hot Glue Gun
- Embroidery Floss
You can also find all of these supplies at your local Michaels store. They have Silhouette items in stock with no shipping wait times, so it’s perfect for those times when you NEED a new cutting mat right that minute.
Instructions
Step 1: Download the cut files from the bottom of this post and open them in Silhouette Studio. Ungroup the objects.
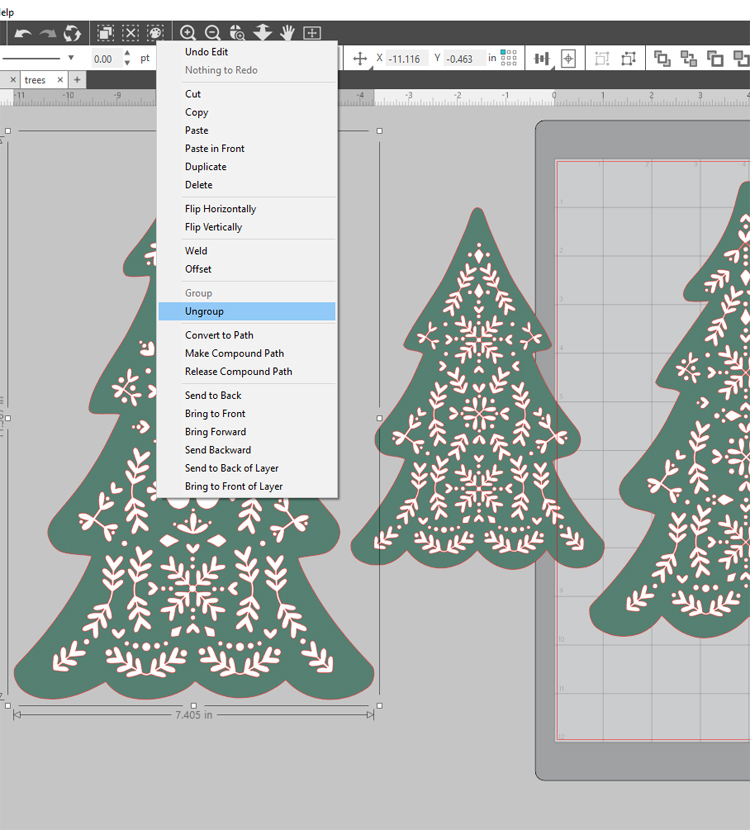
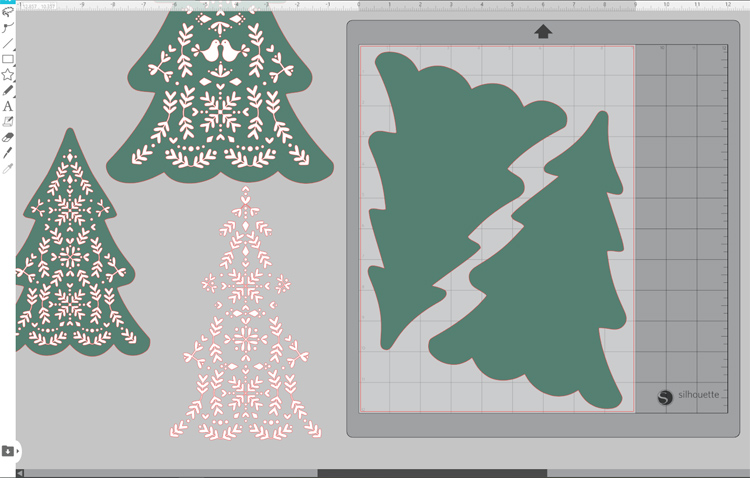
Drag and arrange the green tree shapes onto the cutting mat. These are the parts that will be cut from felt. You’ll need two tree shaped felt pieces for each tree (one front and one back that will be sewn together).
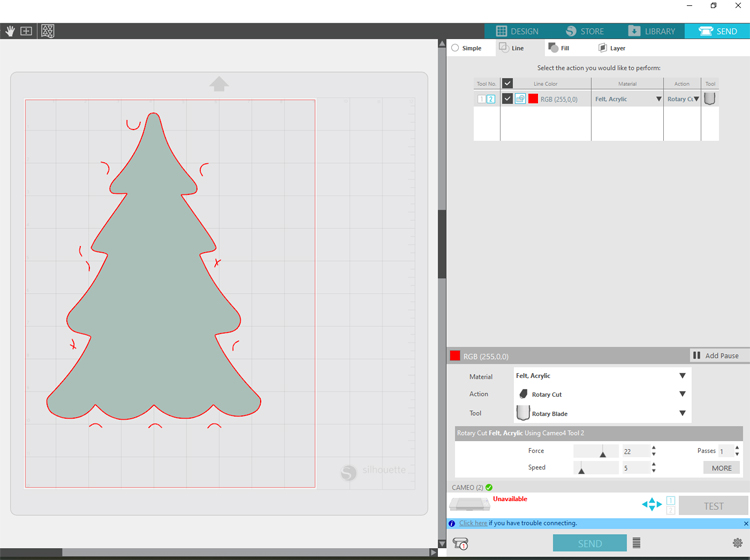
Step 2: Press a piece of felt to the cutting mat, then load it into the Cameo 4 machine. Place the rotary blade in the Tool 2 slot, then click the SEND tab in the upper right hand corner. Click the LINE tab underneath that. Then select tool 2, felt material, rotary blade, rotary cut. I know that’s a lot, so here’s a screenshot of my settings:
Step 3: Press send and watch your Cameo 4 cut through the felt perfectly! Then peel off the designs and repeat the process until you have two felt tree pieces of each size. I made two green and one white tree because I couldn’t decide which one I liked better.
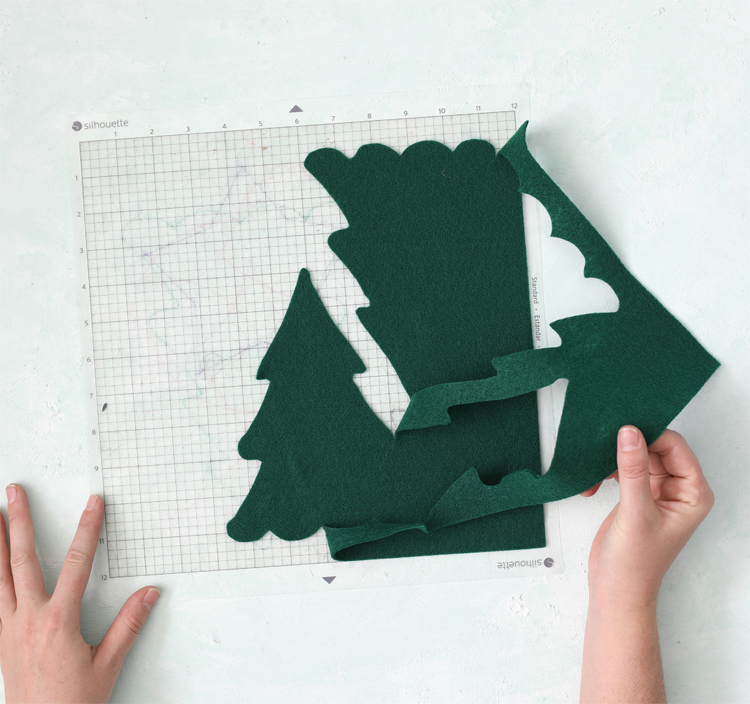
Step 4: Remove all of the green tree shapes from the cutting mat area and drag the white Scandinavian designs onto the cutting mat.
Before sending the entire project to the machine to cut, did you know you could do a test cut? Just load the material you plan to cut into the machine like normal, then go to the SEND tab and click the button near the bottom that says TEST. Your Cameo will cut a small square with a triangle in it out of the top left hand corner of your vinyl. Then you can unload the mat and try peeling off the square. If it peels off easily and the triangle stays in place, you’ve got your cut settings correct!
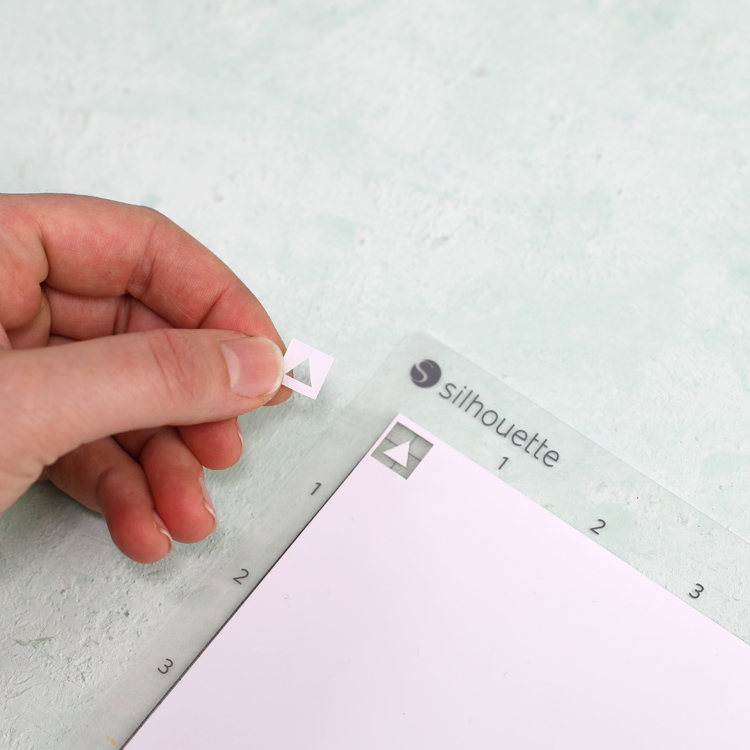
I don’t skip this step anymore because nothing is worse than wasting an entire sheet of vinyl because it didn’t cut deep enough or something. TRY THE TEST CUT! It’s awesome!
Step 5: Adjust the cut settings for heat transfer material, make sure your Autoblade is loaded into the TOOL 1 slot, then send the designs to be cut.
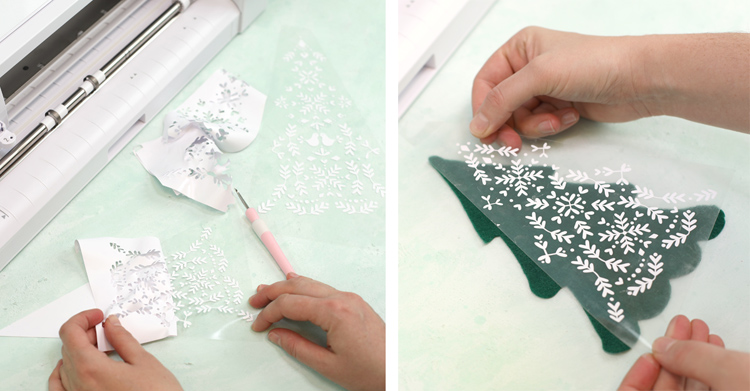
Step 6: Weed excess material away, leaving only the desired design and the clear, sticky carrier sheet. Place the white vinyl design onto the corresponding felt tree shape. When you’re happy with the alignment, use a heat press or iron to attach the vinyl. If you have a heat press, the settings are 305 °F for 10-15 seconds. Peel away the clear carrier sheet.
This is what you should have at this point:
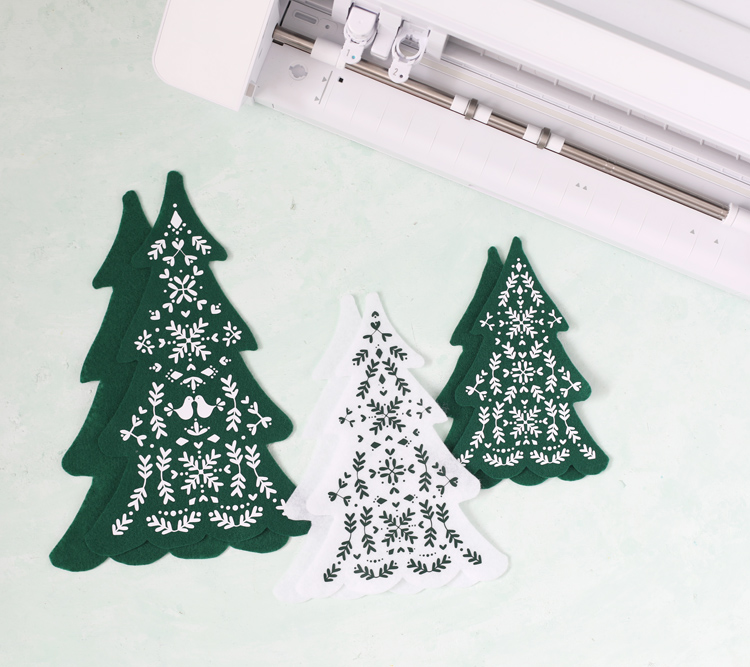
Now it’s time to assemble the trees!
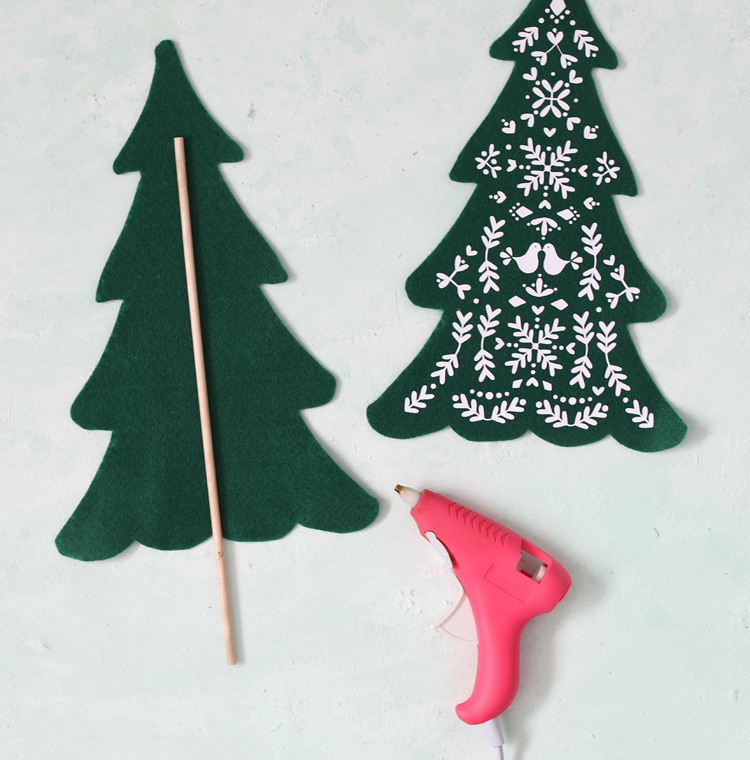
Step 7: Glue a wooden dowel to the inside of the back piece of felt. The design does have a slight assymetry to it, so be sure to check that the two felt pieces line up properly and sandwich the dowel in between.
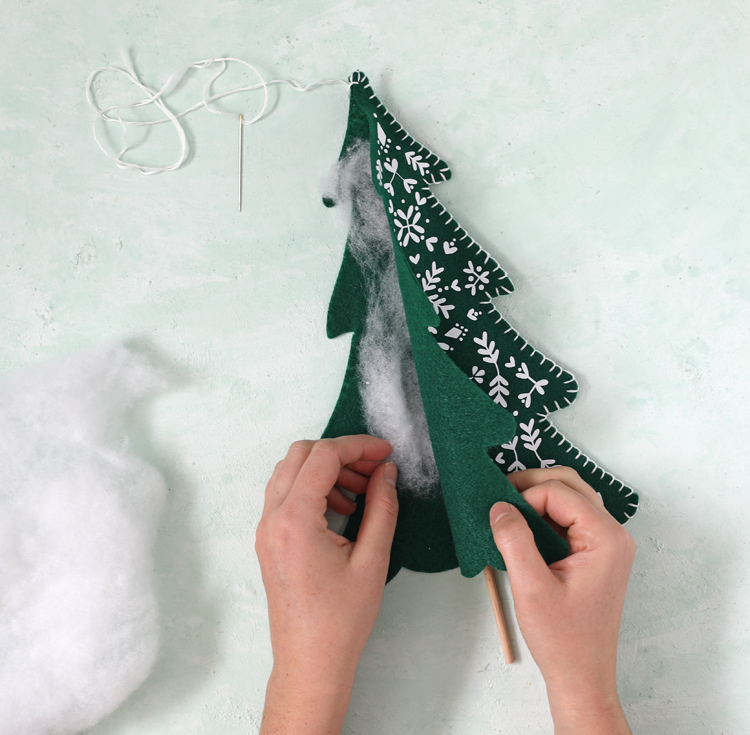
Step 8: Starting near the base where the wood dowel comes out of the bottom, blanket stitch around the edges of the two pieces of felt. This Youtube video walks you through how to blanket stitch if you’ve never tried it before.
When you reach to top tip of the tree, place a small amount of batting between the two pieces of felt, then continue to blanket stitch down the other side to close up the tree.
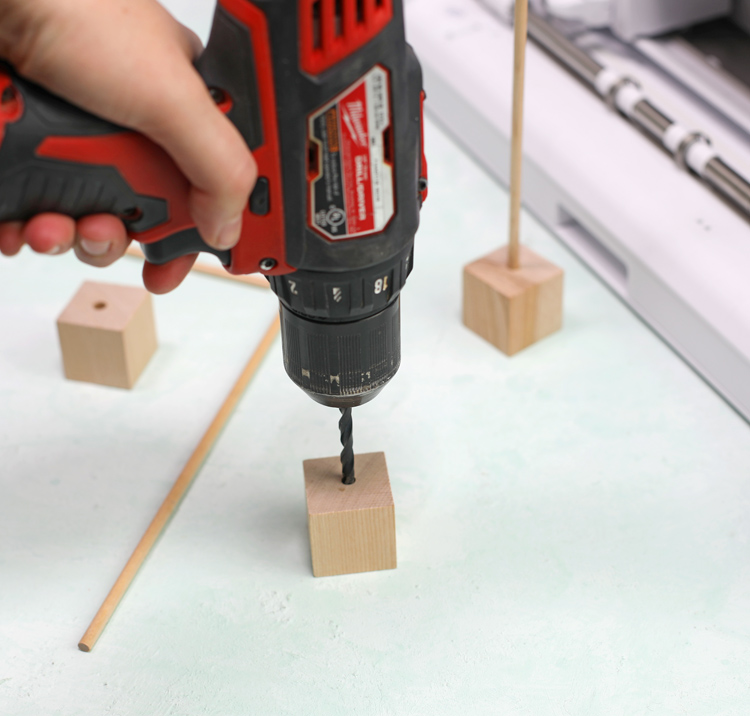
Step 9: Prepare your wood bases. Drill a hole into the top center that is the same size as the dowels you used. Fit the dowel end into the hole and secure with glue, if desired.
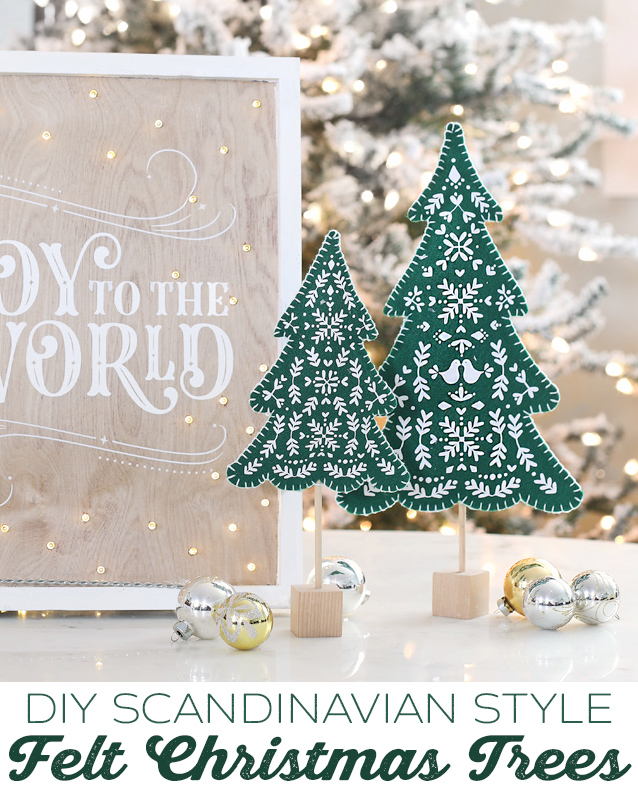
Repeat the process for all three trees and you’ll have a whimsical, homey Christmas decoration to enjoy for years to come.

Like this project? Pin it so you don’t forget it!

Comments & Reviews
Hi, love this project! Your design link only allows to save as svg file. My silhouette won’t work with svg. Can I get it in another file type? Or can you tell me how to use an svg file with my silhouette?
Hi Gina, I just added a Silhouette Studio file to the link so hopefully that will open easily for you.
This is so beautiful! Thank you for sharing
These are awesome! Thank you for the file.
My daughter and I love this project, can I get the svg file. I tried to download it from this site and it didn’t work.
One version of the file is for Silhouette Studio. The other is an SVG file. Have you used either of those formats before?
Is there a version of the Scandanavian Felt Trees compatible with cricut?
The SVG files should be compatible with Cricut.
I love the Scandinavian Felt Trees and maybe I am not downloading them correctly, BUT…I only get the small one and NOT the large tree with the doves on it! What am I doing wrong? Thank you,
Becky
I just uploaded a PNG version to the same folder. Hopefully you can get that one to work!
Thank you for the cut file and instructions for these trees. I saw Courtney from Creative on the Cheap make them. I also was having problems downloading the SVG. That is until I uploaded to Circuit Design space. All three trees were in the file, but when downloading the file from your site it didn’t look that way. So everyone download and upload to design space and it will work. Can’t wait to make them, I will be making them shades of brown for my Gingerbread theme kitchen!
all the files only show 1 tree per type of file. looking for an svg of all three.. the svg only comes up as one tree in the middle, the other two on the sides are cut off.
Did you actually open the file in Silhouette Studio or Cricut Design Space? BI just tested it and the preview image showed cut off trees, but it opened correctly for me with all three trees showing.