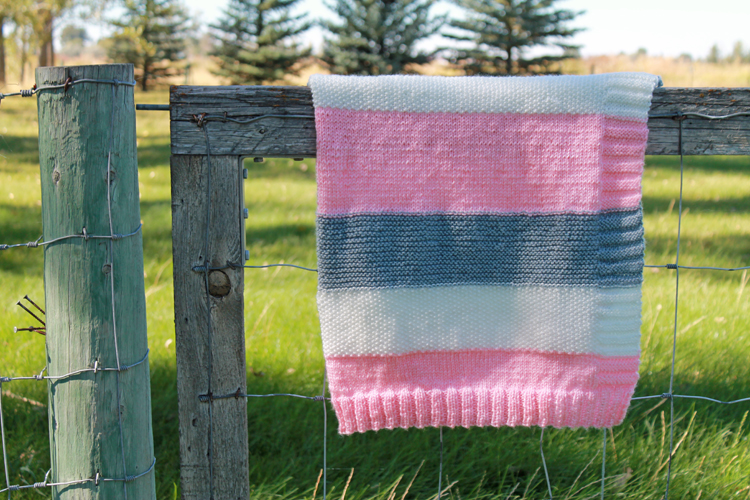
This tutorial will show you how to add a rib knit edging to any knit blanket pattern.
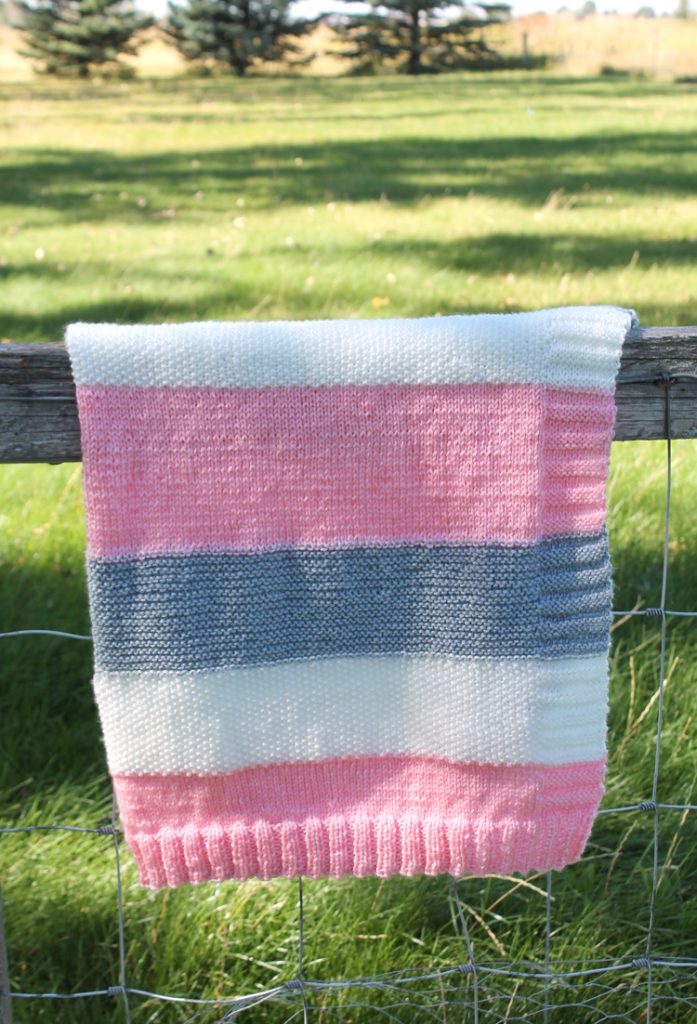
I love the look of a rib knit border, but all of the patterns I was looking at didn’t show how to get that look on all four sides of the blanket. They only had it on the bottom and top of the blanket. So I figured out my own pattern and am sharing the tutorial with you today!
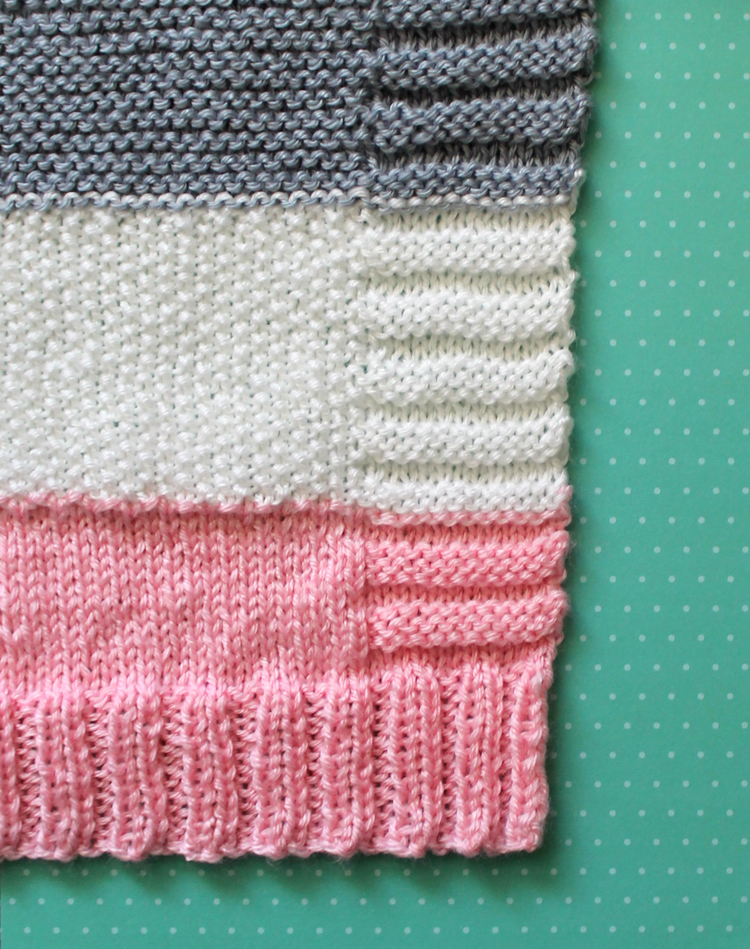
This technique can be used with any stitch combination for the center section and you can change yarn colors to create stripes or whatever your heart desires. In the blanket shown in these photos, I used a different stitch for each colored section to add texture and honestly just to practice my knitting skills.
Here’s the overall pattern summary:
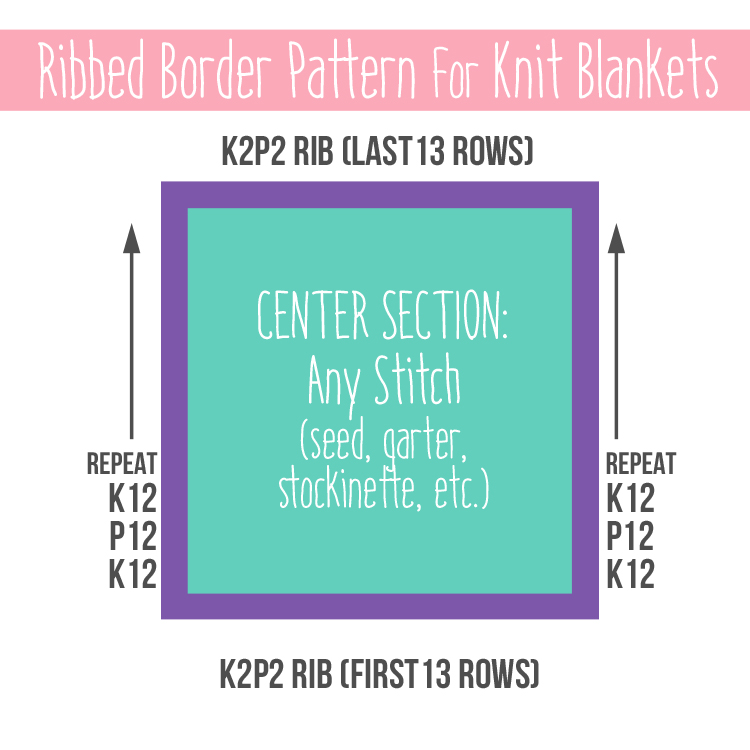
Cast 136 stitches onto circular needles that are the appropriate size for the yarn you’re using. You can change the starting stich number to anything that is divisible by 4.
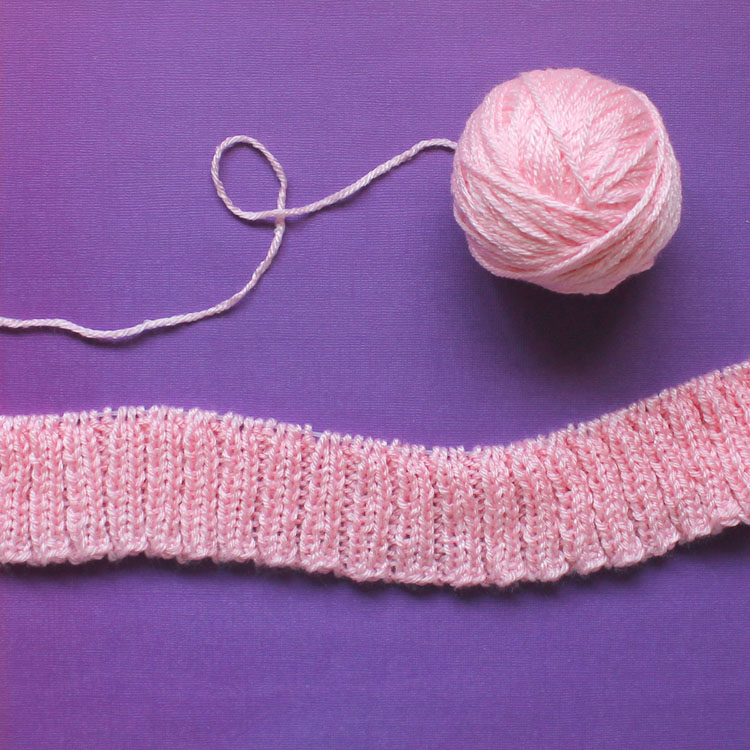
Rows 1-13 K2P2 for the first 13 rows. This is the typical ribbed border that you often see in knitting patterns.
Row 14 K12, then knit the rest of the row in whatever stitch you’ve chosen for the body of the blanket until you get to the last 12 stitches and K12 again.
Row 15 P12, then knit the body of the blanket in your chosen stitch, then P12 the last 12 stitches.
Row 16 K12, stitch the blanket body, then K12 the last 12 stitches.
Repeat Rows 14-16 until you are pleased with the size of your blanket and are ready to add the final border.
Last 13 Rows K2P2 all the way across for all 13 rows to add the final ribbed border.
I hope that made sense. I am not a professional knitter by any means, so I’m just doing my best to share what I’ve done. Happy crafting!

Comments & Reviews
LOVE, LOVE, LOVE this. Great work Jennifer!!!
Thanks, friend!
Hi there! I love This pattern, however when I click on the link for the full pattern, the page doesn’t load. Is this pattern posted anywhere else?
Hi Ciara, I originally created this post for a site that is no longer online. Thanks for bringing it to my attention. I’ve added the full instructions here.
just wondering the best yarn to use for this pattern and how much yarn you used. Just love this pattern and can’t wait to try it
Rita, the great thing about this pattern is that you can make any size blanket with any type of yarn you want! It is completely customizable since it is really just a tutorial for making the border. I would go to the yarn store and pick a yarn you love, then read the directions on the skein to see how many stiches per inch and what sized needles to use. That should give you an idea.
I really like this pattern I will give it a try
i have not made this but like it very much
For the border if you knit 12 then come back with p12 and continue this all you get is stockinette. I am confused on how this is supposed to create a ribbed border. Help someone.
Knit two, purl two, for as many rows you want, second row purl two knit two,
Oh wow simply beautiful thank you for sharing.
It’s gorgeous
Thank you so much for sharing
Yay!! Thanks for this. I have been knitting since I was in my late teens and it has been my go to “xanax” through the years (but better because something beautiful has been created!
Unfortunately I am now in my 70’s and having trouble with complex patterns. This post is the answer to my prayers …. THANK YOU!!!
Wow! I am definitely going to try this! Thanks for sharing.
Has anyone knit this beauty on raverly? Would love to others knitters projects. I’m making this blanket for my daughter’s driving instructor.