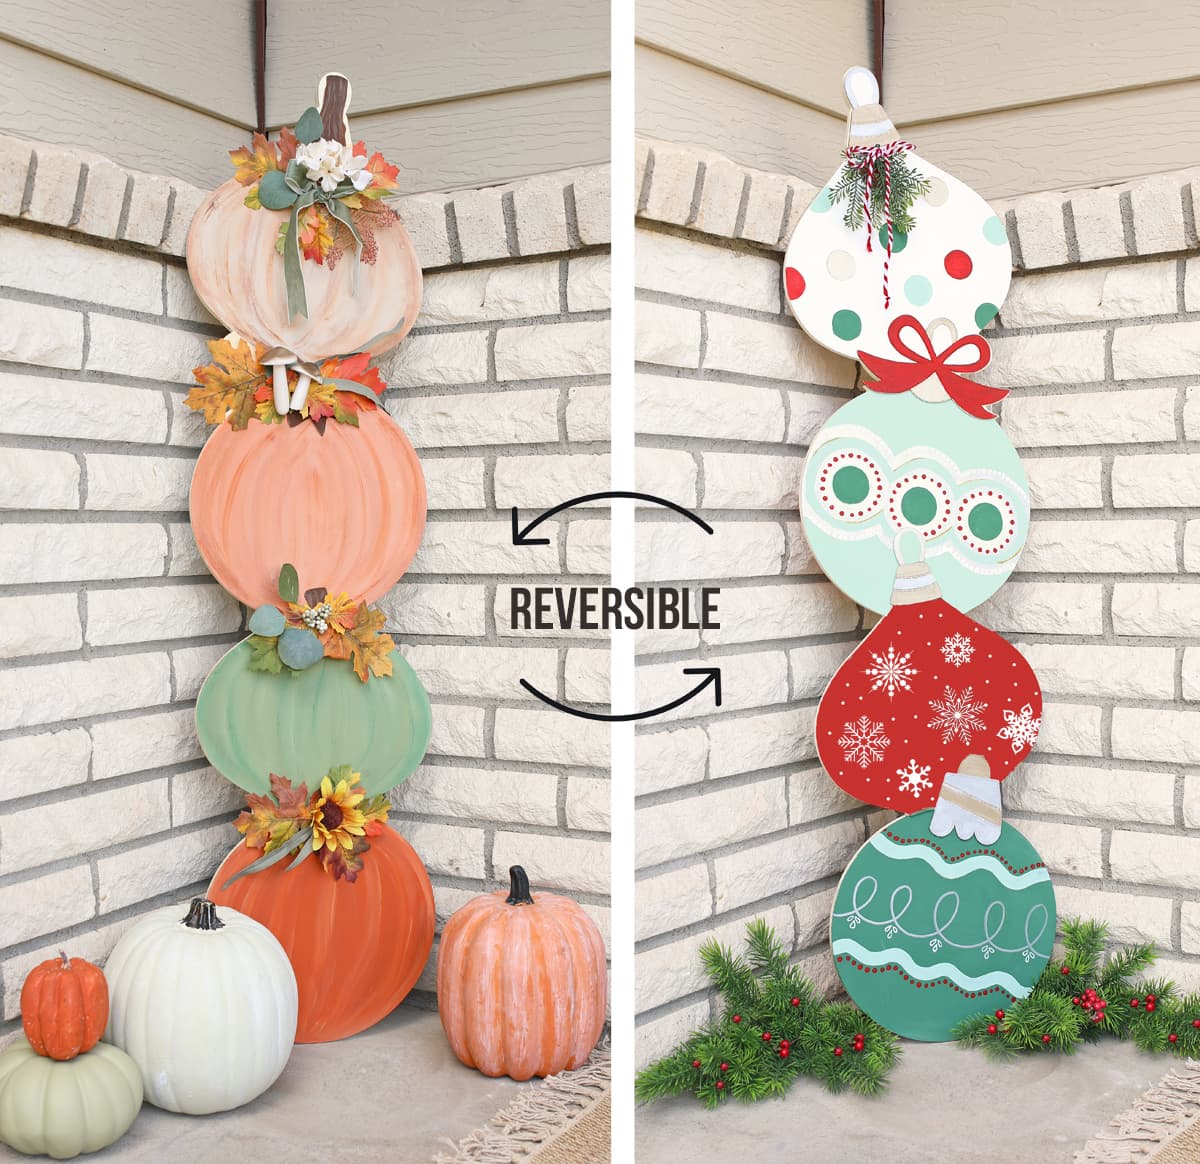
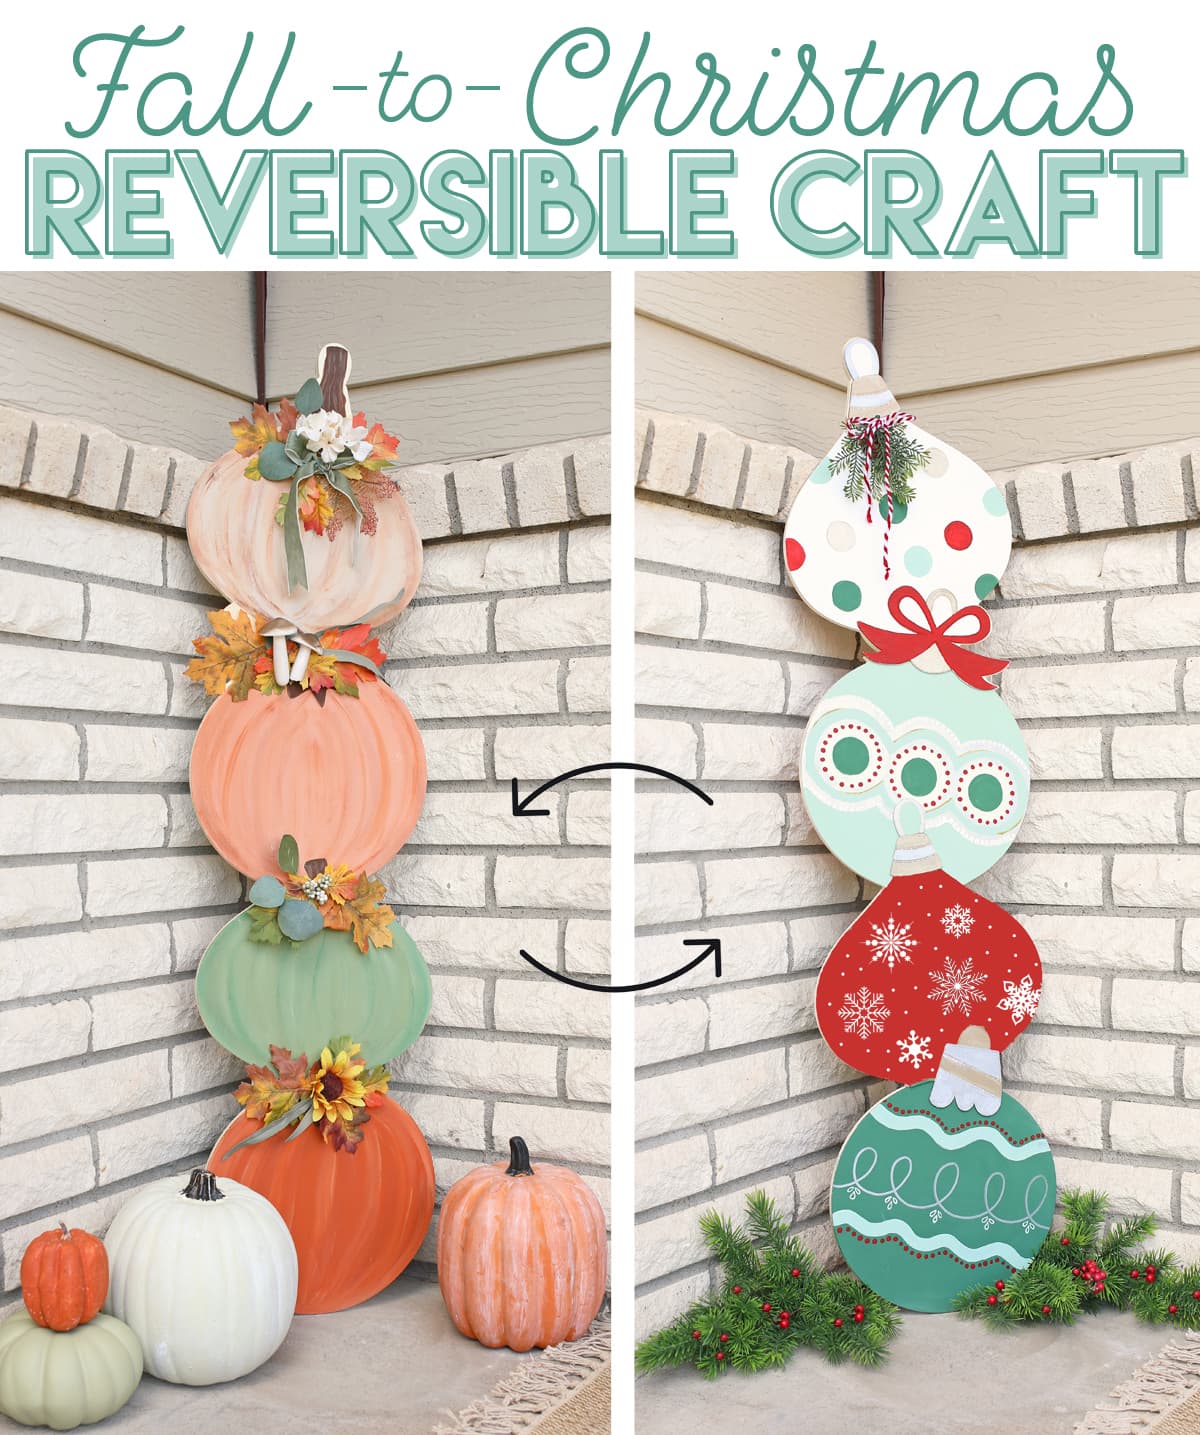
Make a reversible holiday decoration that works for fall and Christmas. One side has pumpkins and the other side has Christmas ornaments.
If you’ve been following The Craft Patch for a while, you know that we really love reversible crafts around here. These are the reversible crafts that I’ve made over the years:
Because these projects have been so popular, I am always on the lookout for new reversible craft ideas. A few weeks ago I saw a blank wooden ornaments sign at Hobby Lobby and grabbed it immediately because I knew it could be made into a two-sided craft. And it turned out so cute! I’m excited to share the tutorial with you today. Let’s go!
To make this reversible craft, you will need:
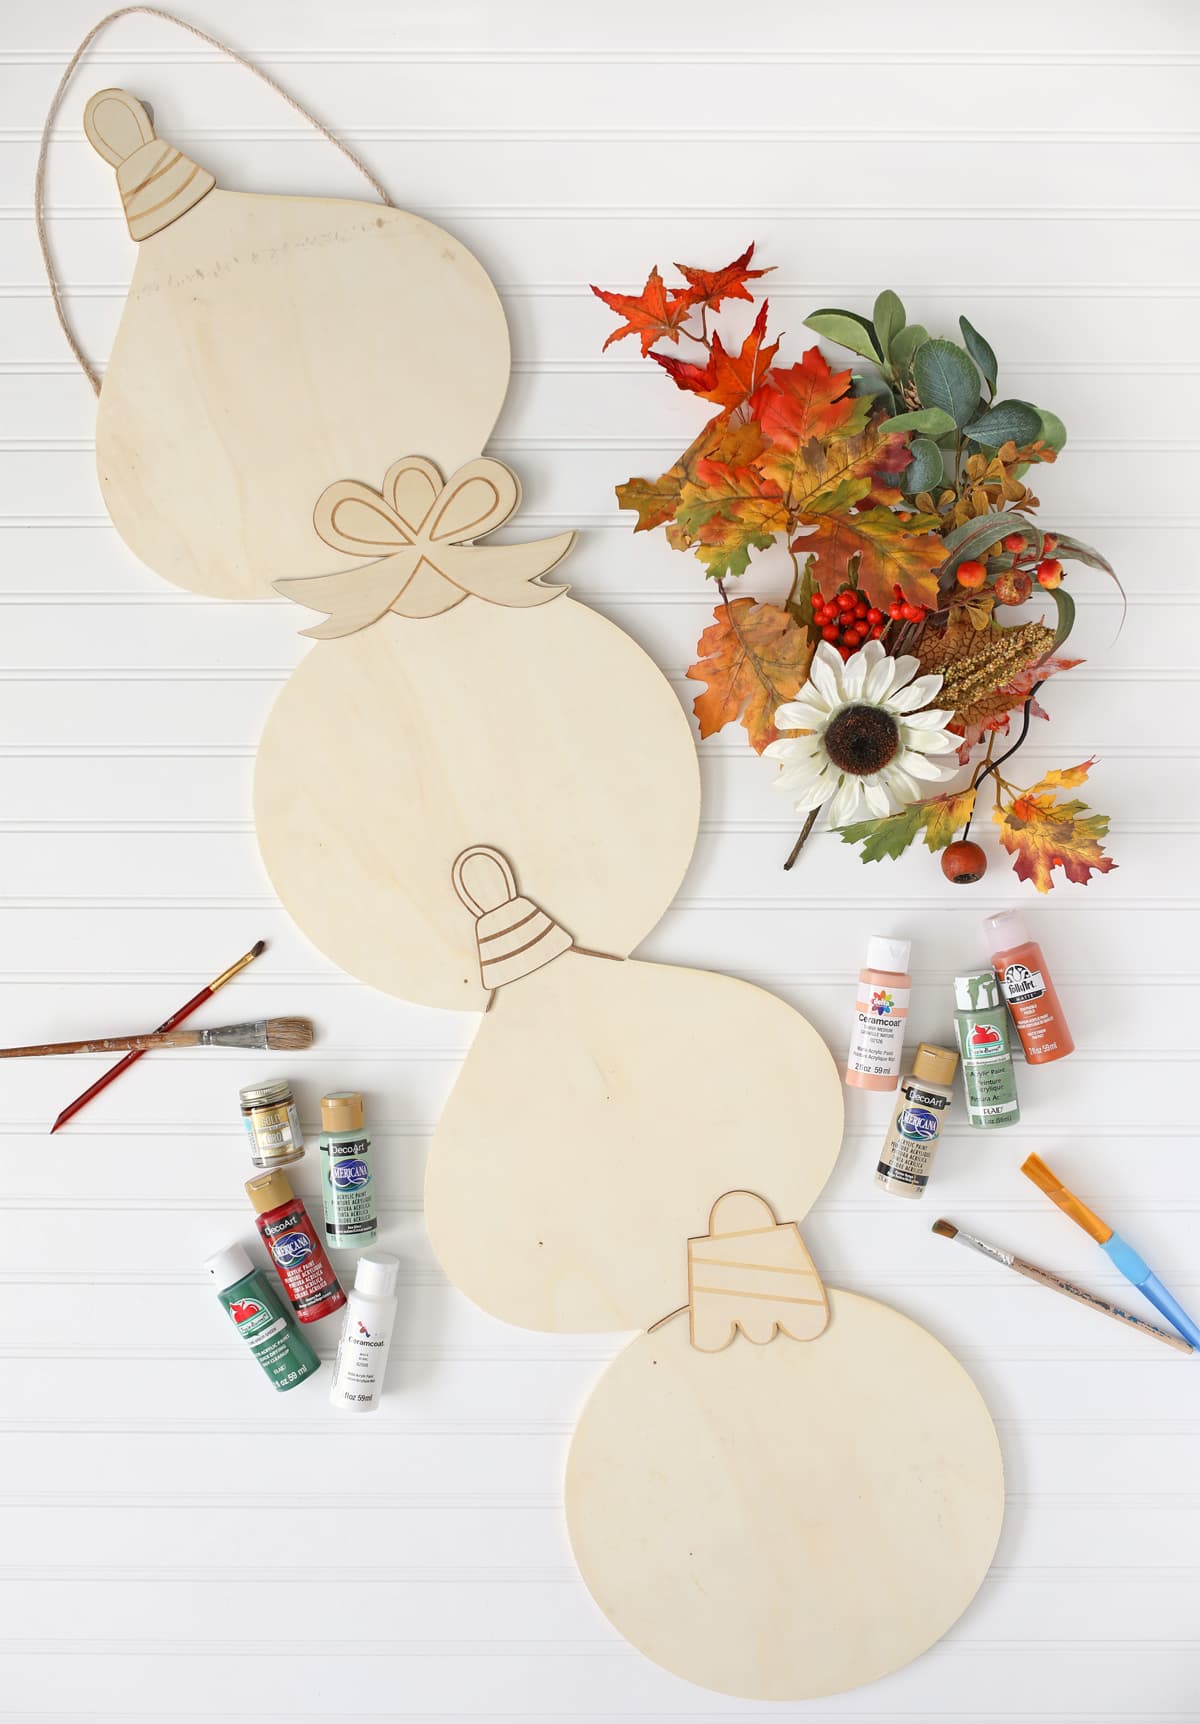
Materials Needed
- Blank Wood Ornaments Sign (see note below)
- Acrylic Craft Paint
- Fall Colors: Ceramcoat Tawny Medium | DecoArt Oyster Beige | Folkart Pueblo | Apple Barrel Wedgewood Green
- Christmas Colors: DecoArt Sea Glass | DecoArt Cherry Red | Apple Barrel Arbor Green | Ceramcoat White
- White and Brown for accents
- Assorted Paint Brushes
- Paint Pens, Optional
- Hot Glue Gun + Glue Sticks
- Fall Floral Picks
- Velcro Tabs
- Thick Craft Foam
Note: I got the wood blank from Hobby Lobby in the Christmas crafts section (not the seasonal decor section.) I looked for it online but I wonder if they don’t sell it online because it’s large? It measures 46 inches tall and 11.6 inches wide. Here’s a closeup of the tag in case that helps you track it down:
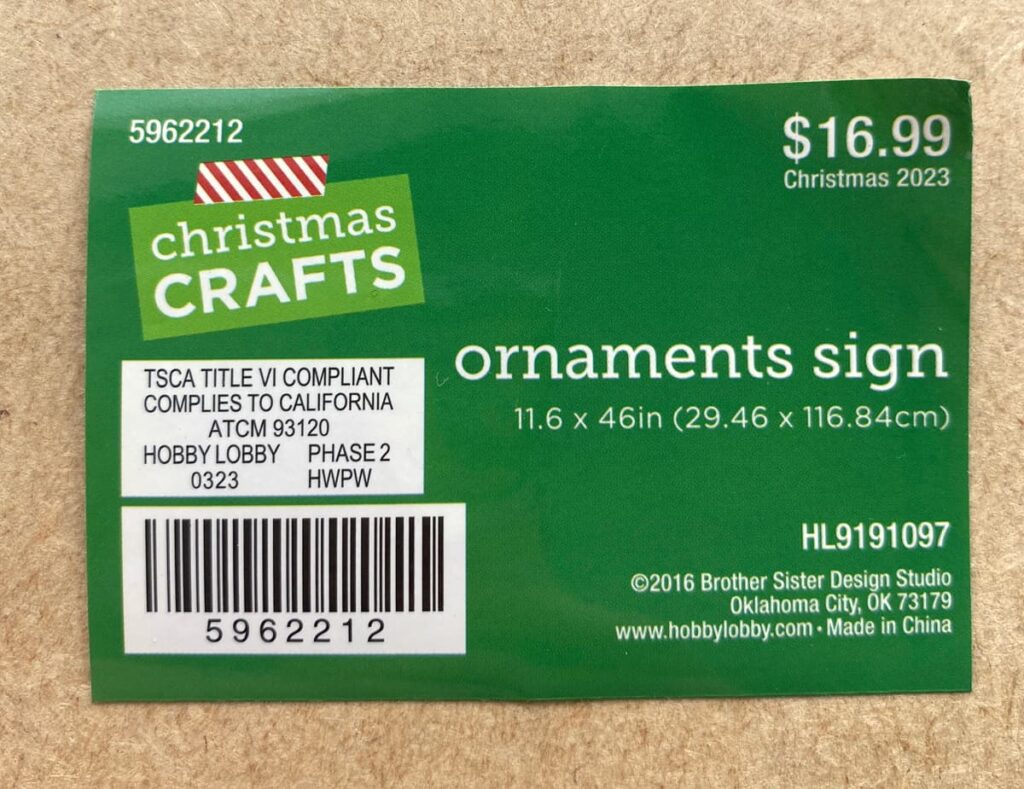
Christmas items are already on sale for half off, so the wood sign was only $8.50! I feel like that’s a great price for such a large decoration.
This Stacked Pumpkin Wood Decoration might work too.
Instructions
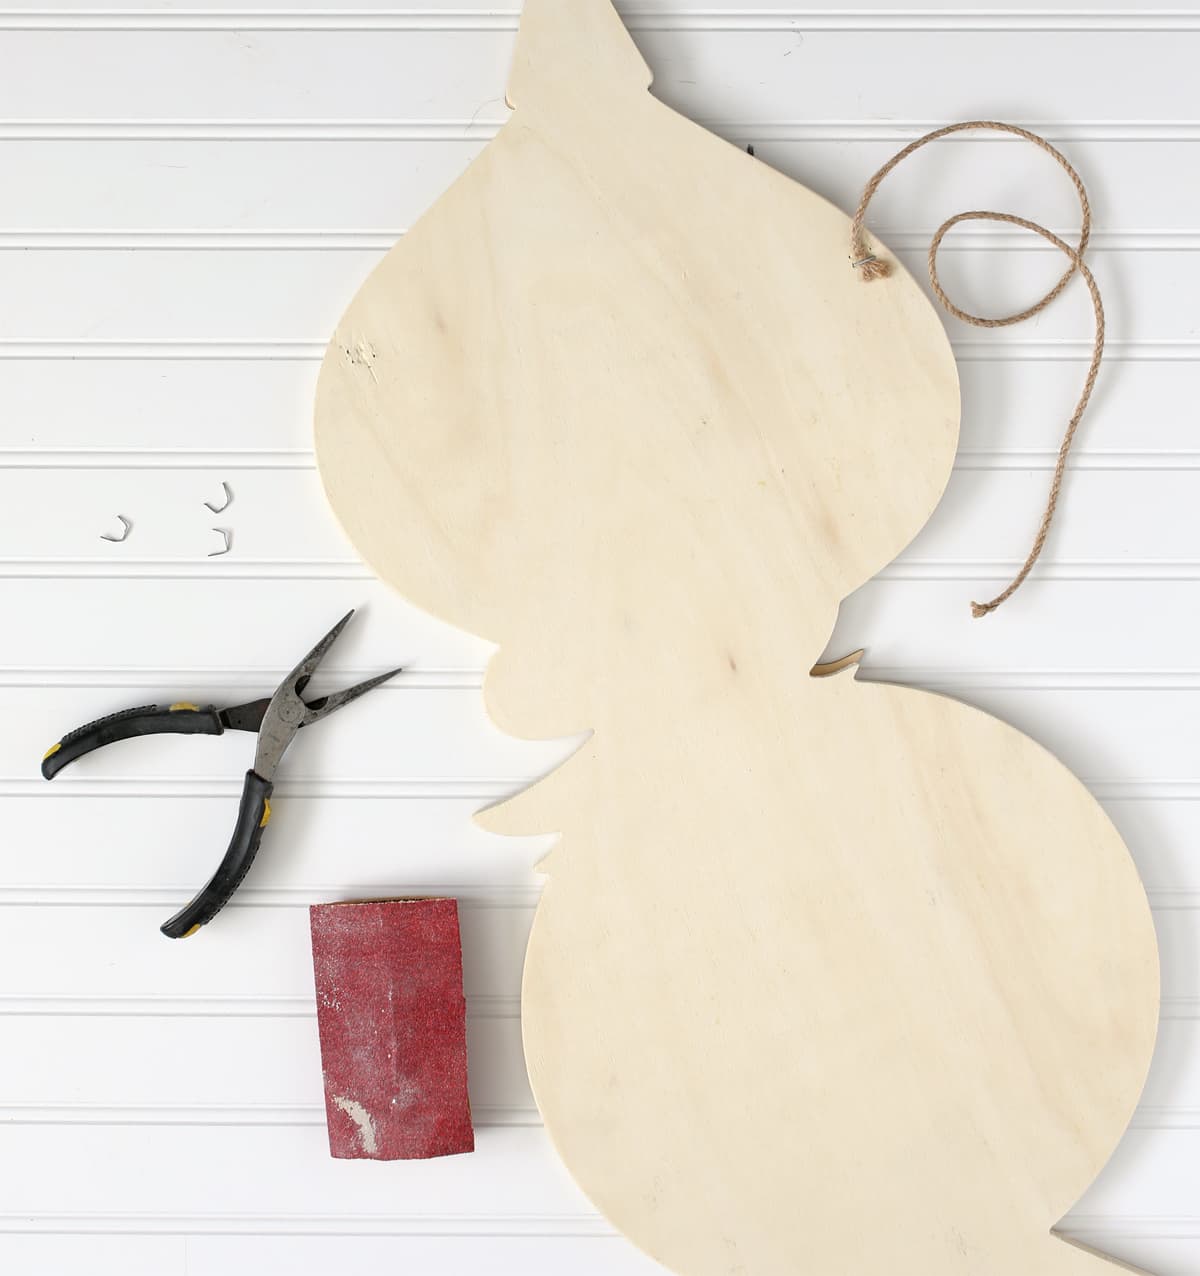
Step 1: Remove the twine used for hanging. It’s attached with staples, so needle nosed pliers work really well. Then lightly sand every surface, especially the edges. This removes any rough spots or jagged edges and will make your finished craft look better.
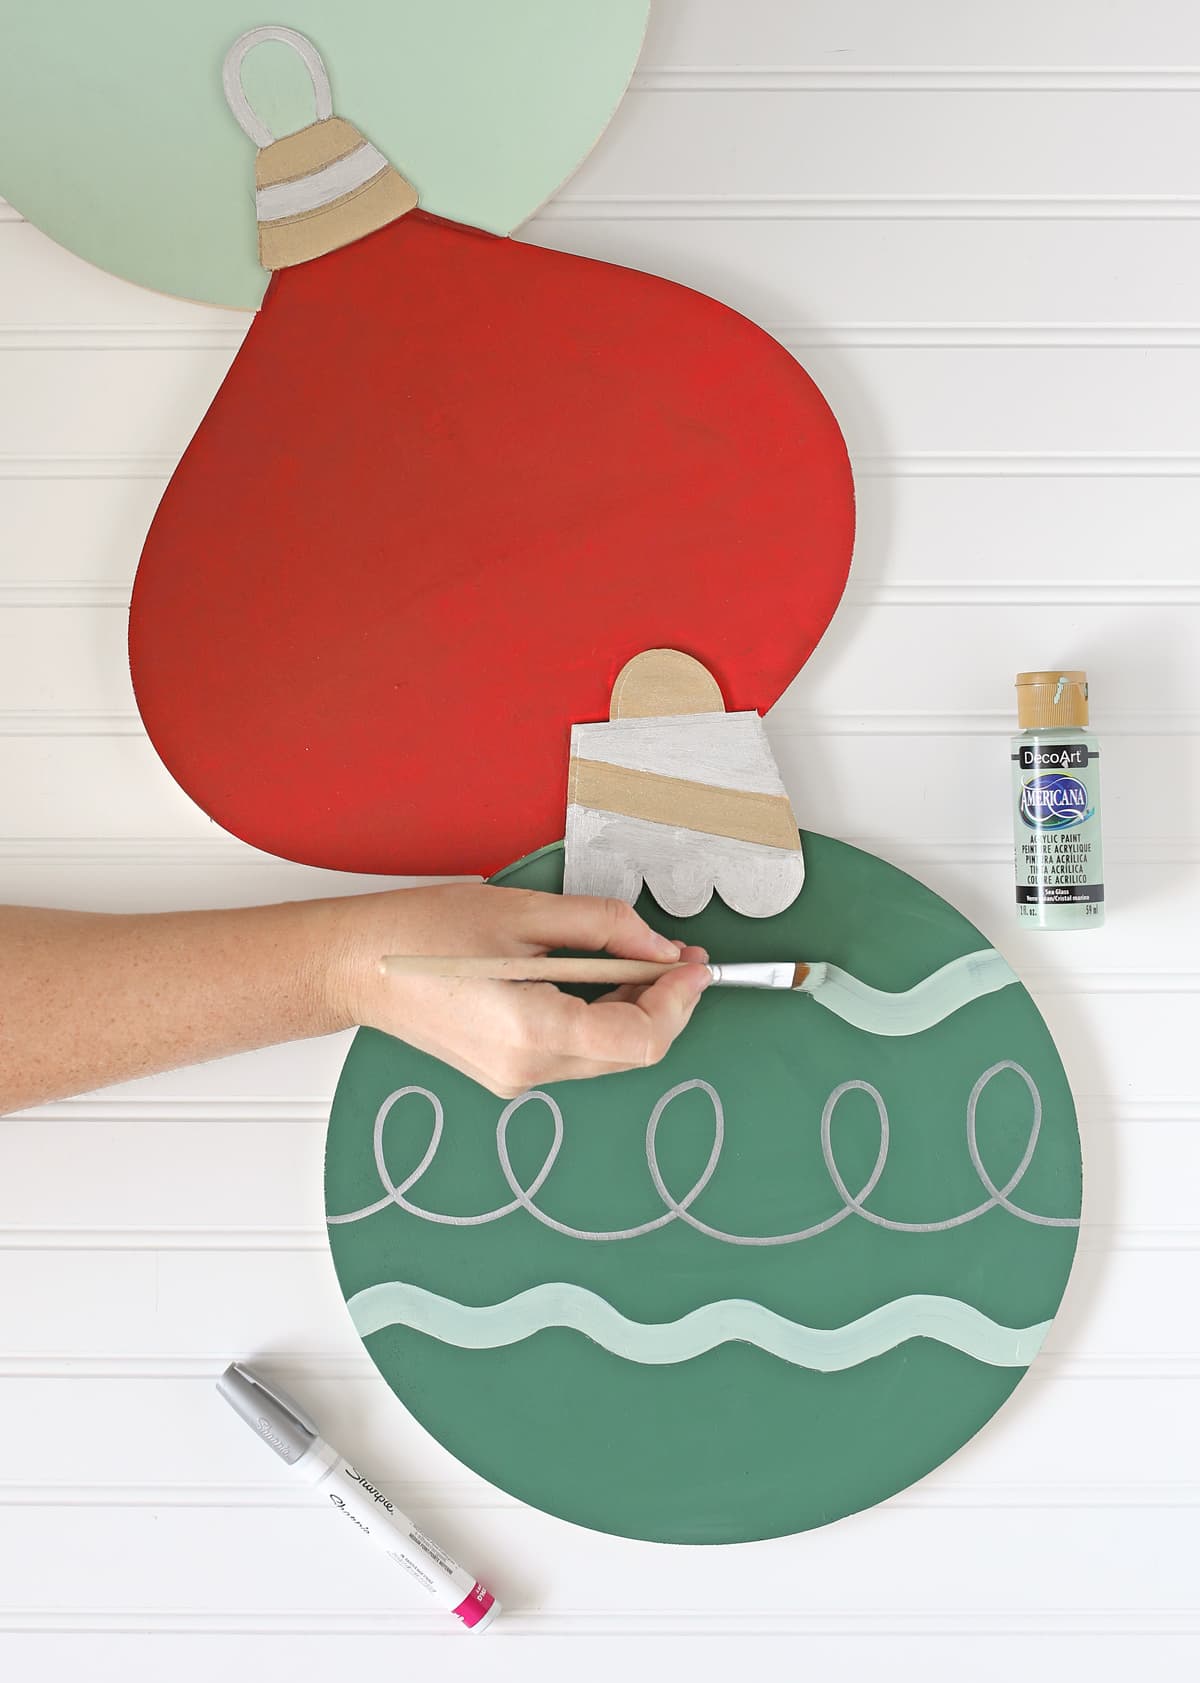
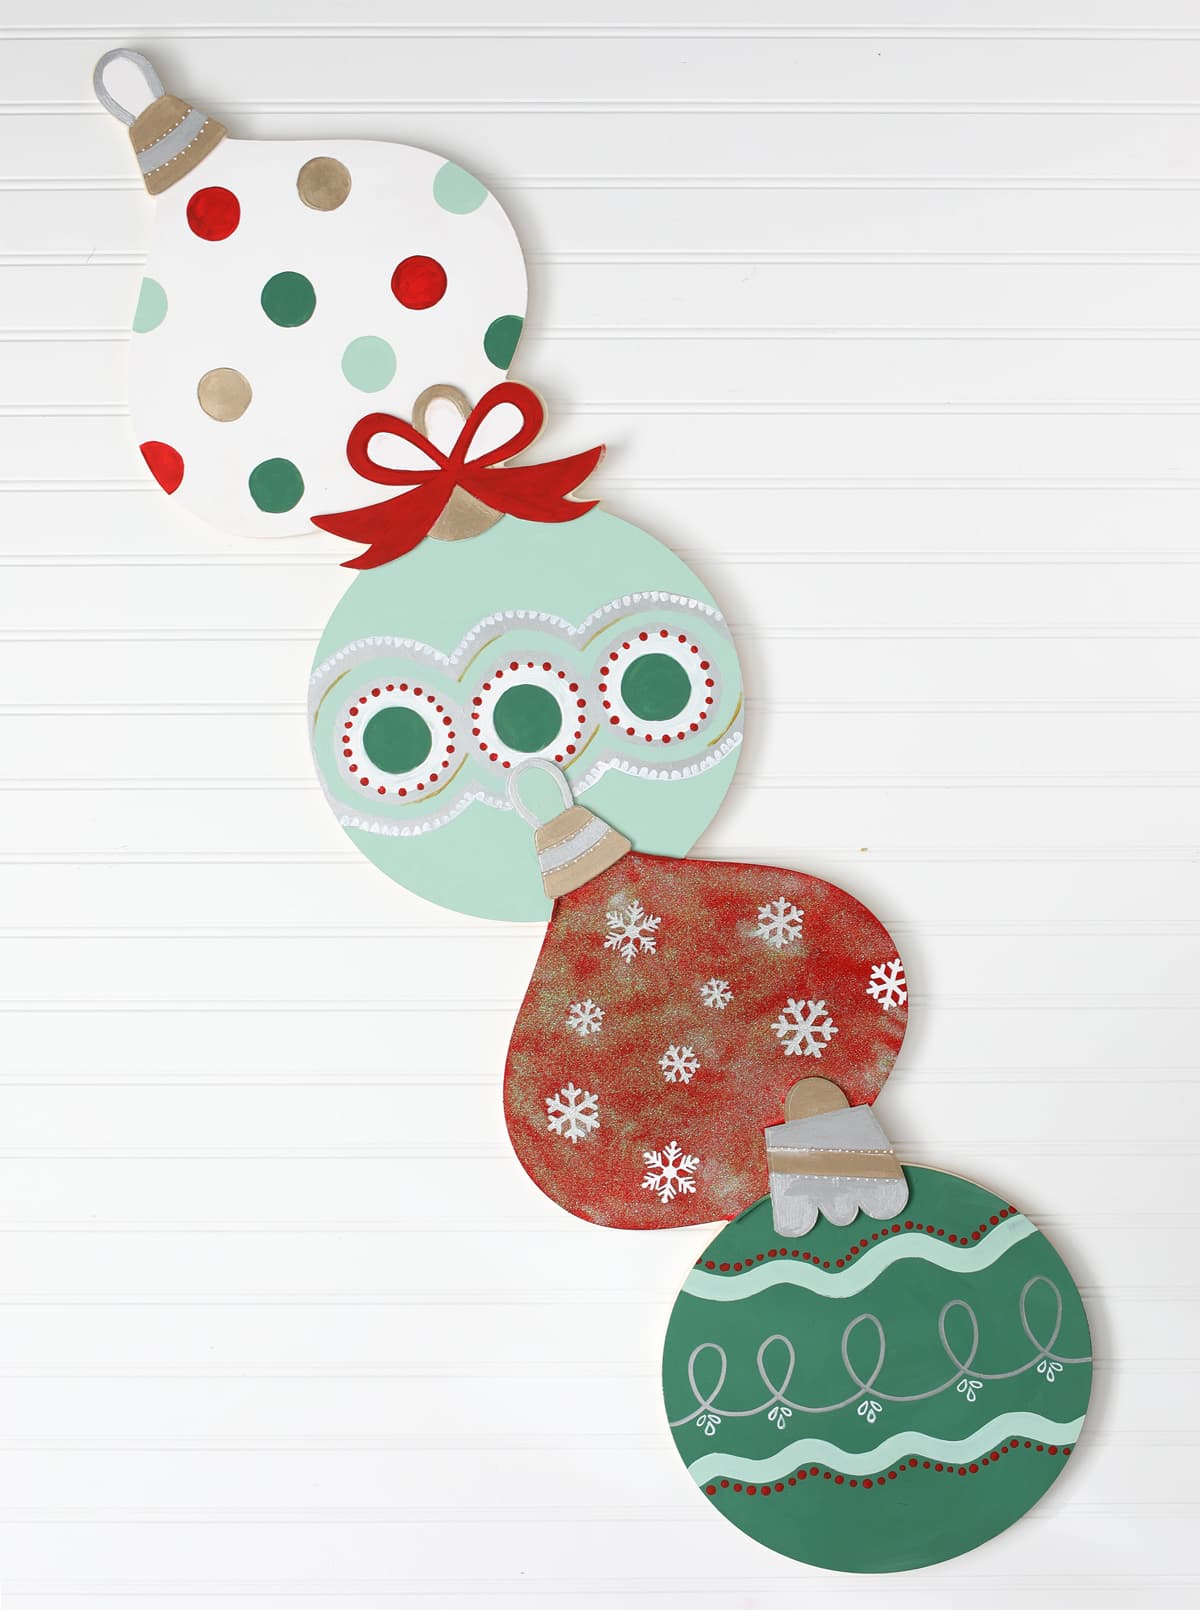
Step 2: Paint the ornaments. Start with the background colors, then add details. I like to use paint pens for smaller details like the loopy design on the green ornament.
If you’re not sure about drawing the designs on by hand, you could also cut out vinyl designs with a Silhouette or Cricut machine and add the details that way. That’s how I added the snowflakes to mine. They’re white vinyl!
I added glitter to the red ornament and admittedly, it’s not my favorite. I really wanted to get this idea up on the site ASAP so you could snag one of these signs before they sell out, so I redid it later for the final photos on my porch.
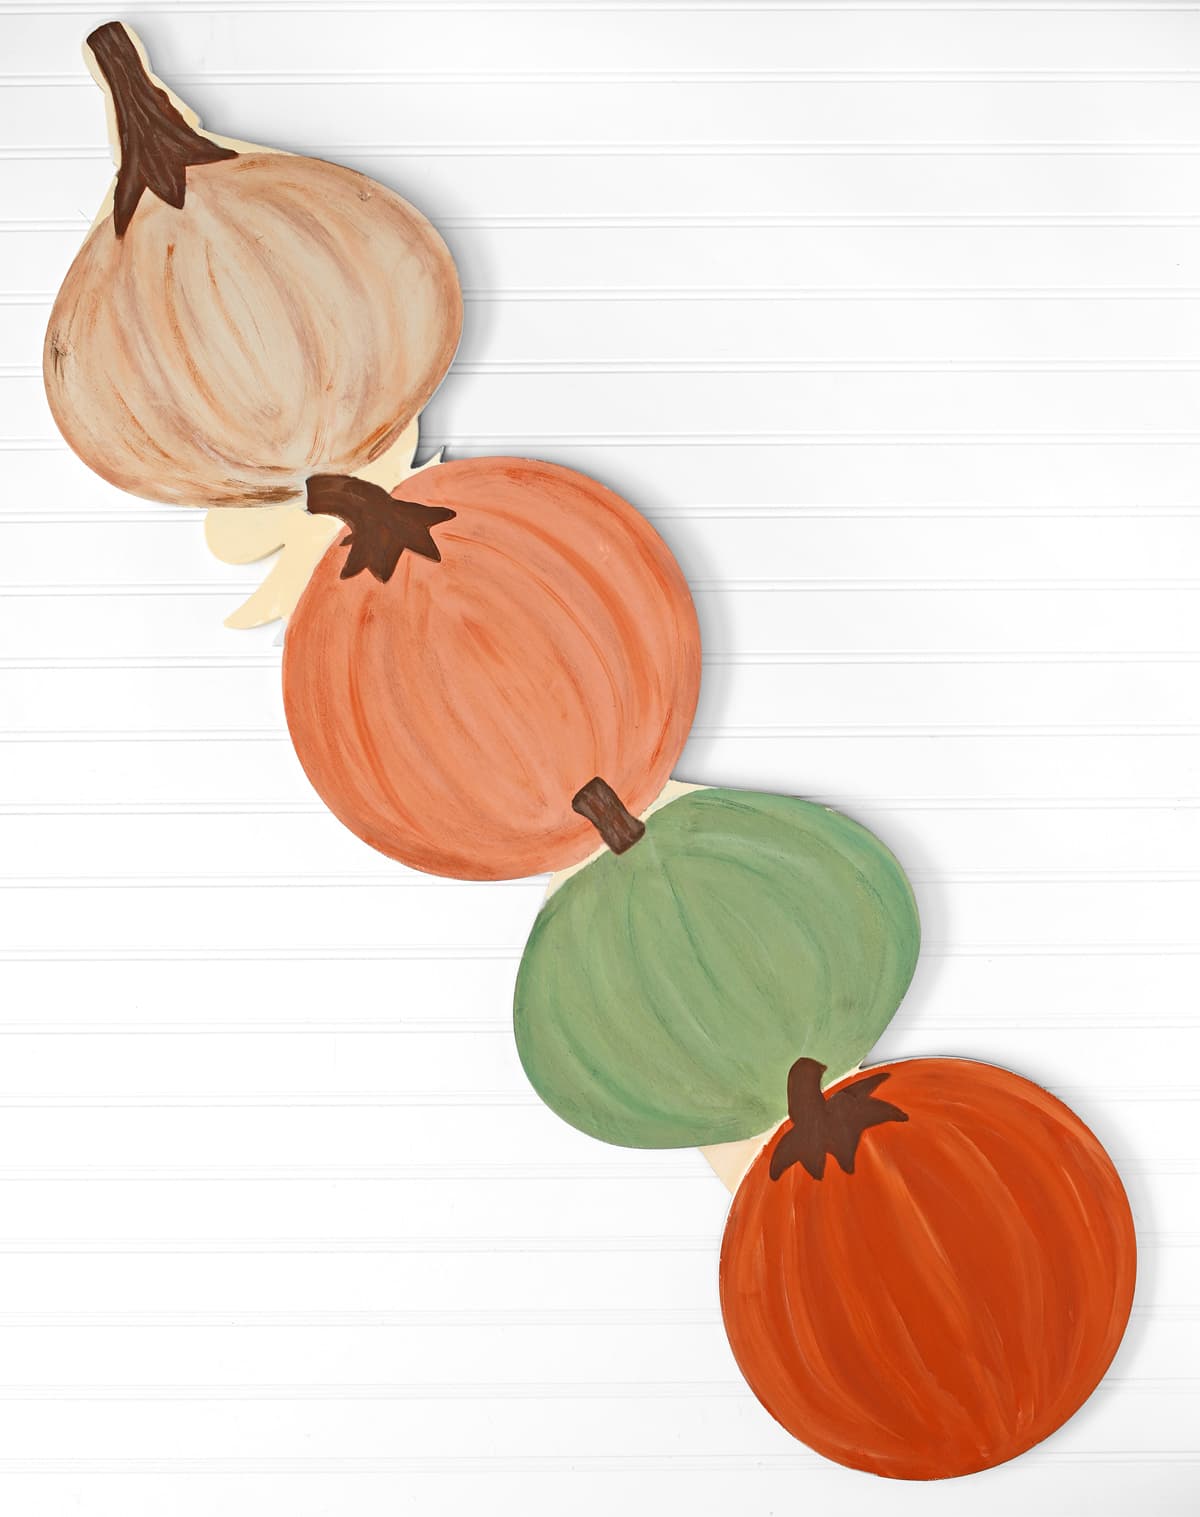
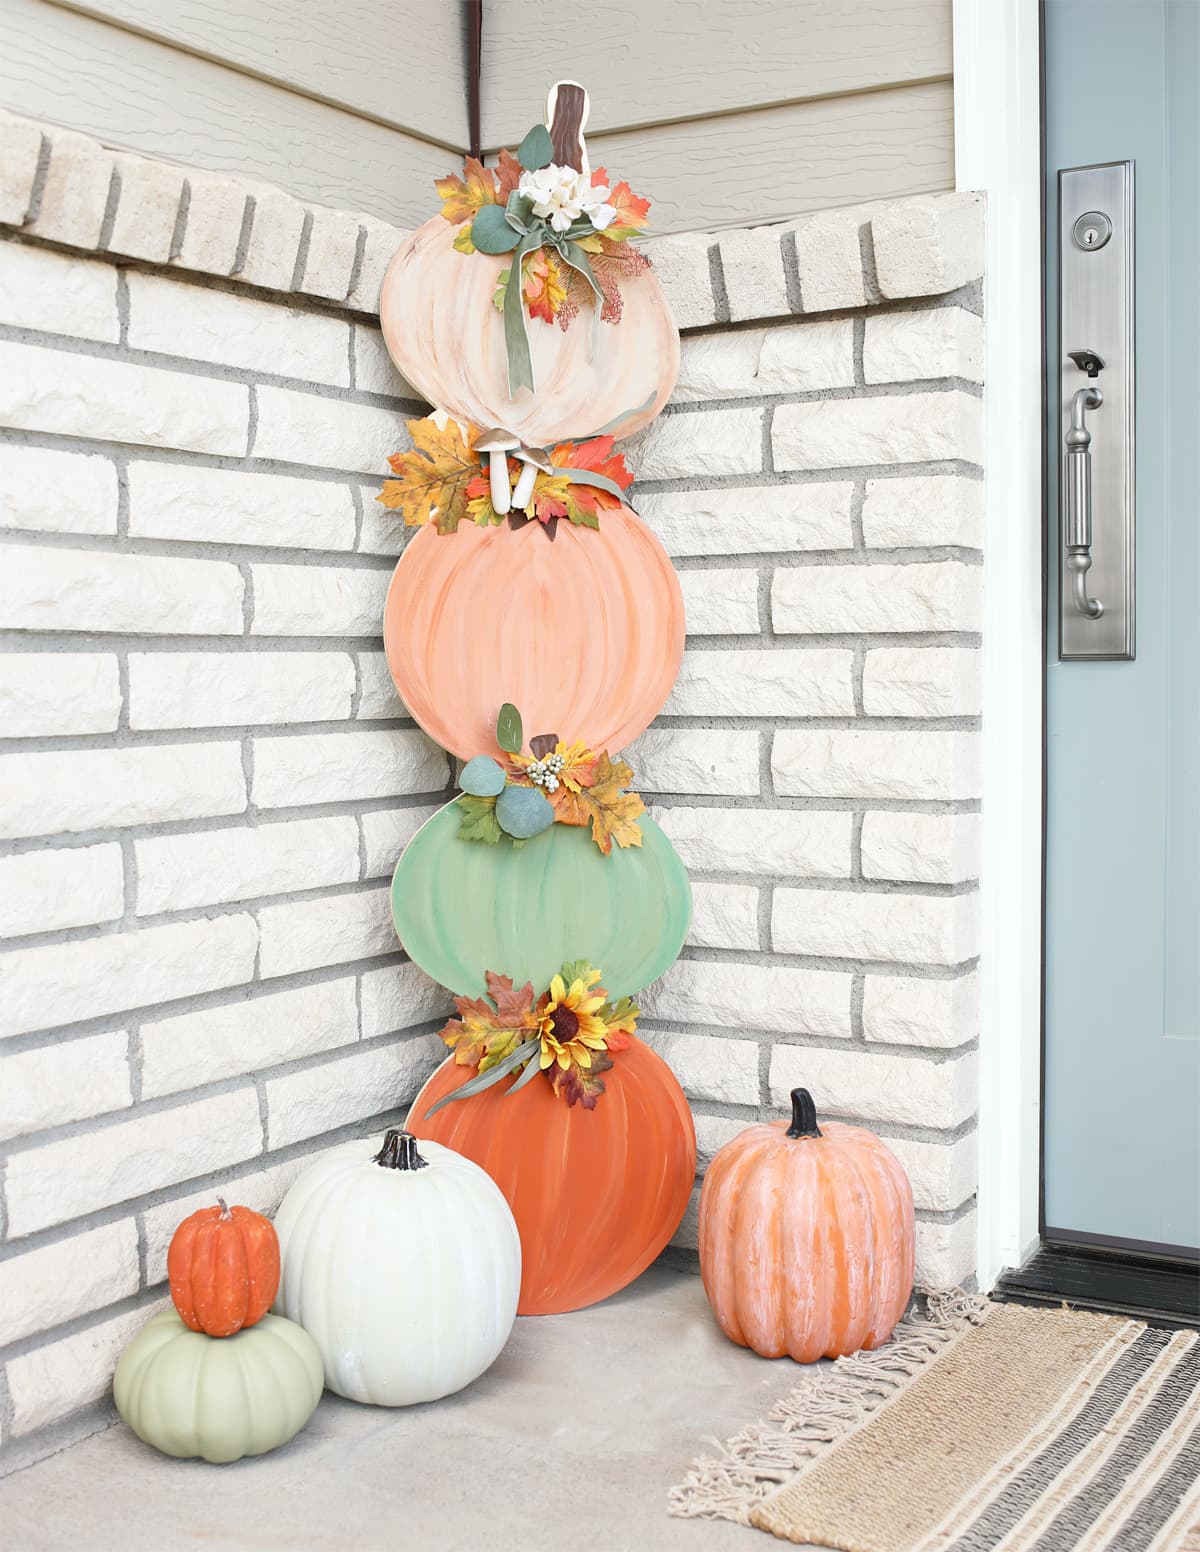
Step 3: Paint the pumpkins. Start with the base colors, but only add paint in a circular pumpkin shape. See how I left some areas of wood blank?
Then to get the pumpkin lines, use coordinating paint colors or add a bit of white or brown or black to the base color to get a coordinating shade. Lightly dry brush the lines on and smooth them out until they look blended. This step really made them look like pumpkins and gave them a ton of dimension.
Use a brown paint color to add stems.
At this point, I was starting to question if this project would turn out cute. I wasn’t very happy with how the stems turned out and that top pumpkin looks like an onion. But trust the process, it all works out in the end.
Step 4: I wanted little bunches of fall leaves in between each pumpkin, but I knew if I attached them directly to the wood, you’d be able to see them from the Christmas side and that wouldn’t be a good look.
So instead, I cut small pieces of craft foam, hot glued the florals to the craft foam, then attached the foam to the wood with Velcro dots. Now the floral bunches are removeable! Where there’s a will, there’s a way, baby.
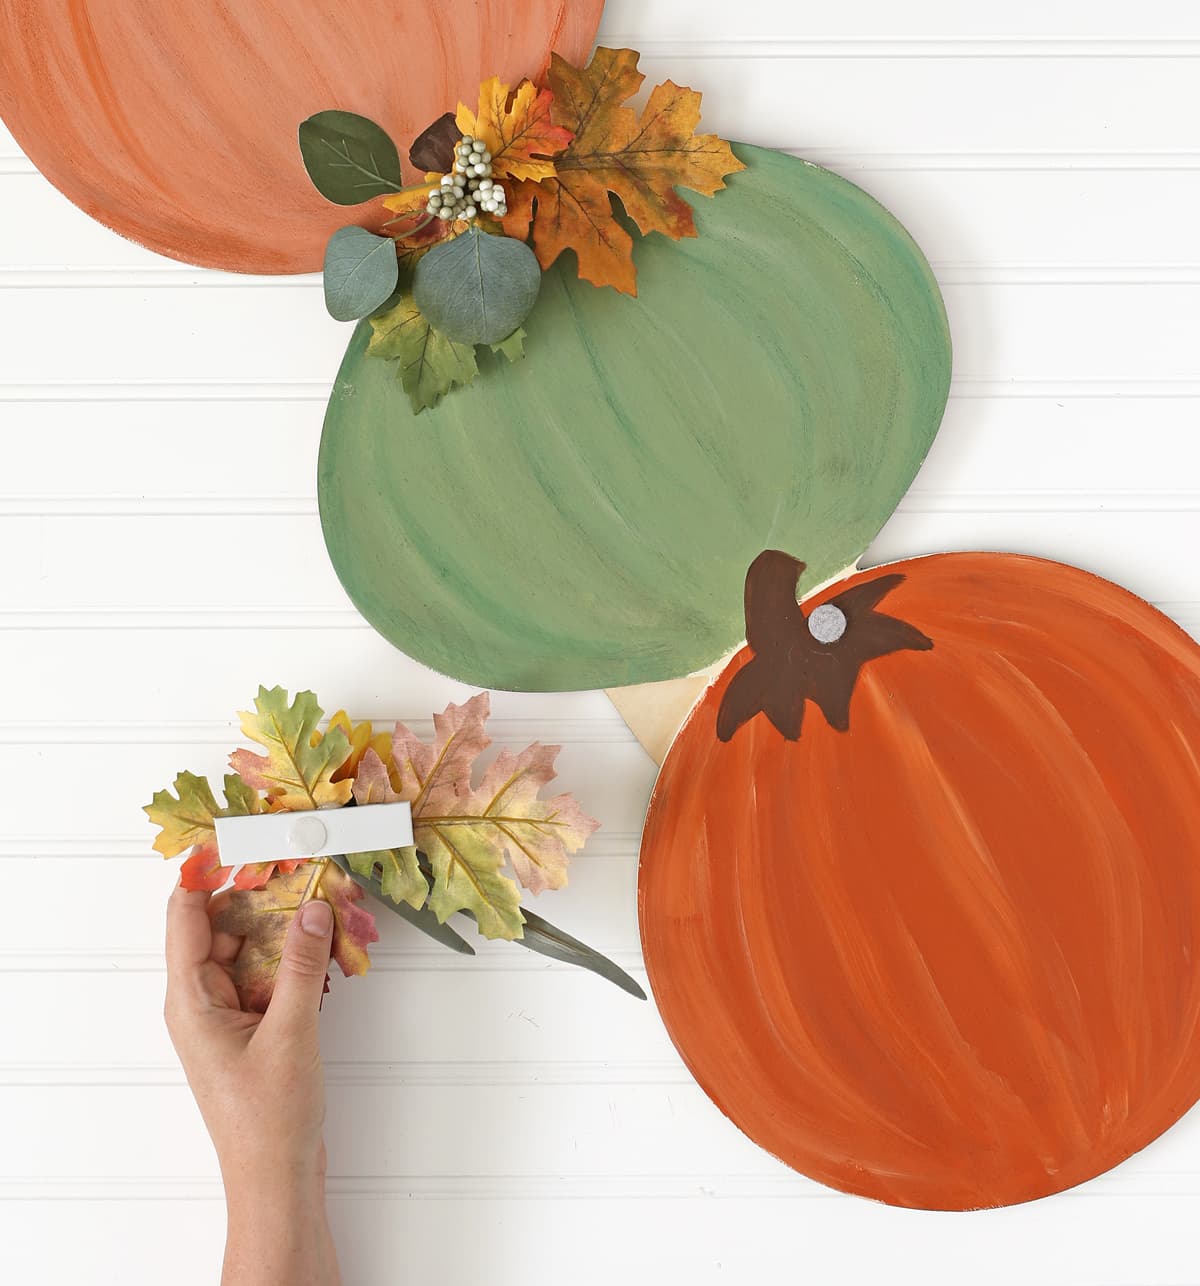
The fall florals make all the difference, don’t you think? Now I really love how the pumpkin side looks.
So there you have it! A two-for-one craft you can use from September through December. Woot woot! That’s pretty awesome.
Like this project? Pin it so you don’t forget it!

Comments & Reviews
Love it
Great and fun idea‼️
Where did you get the ornament/stacking pumpkins from?
I wrote it all out. Did you read through the supply list?
I love this adorable craft. How do I purchase this ?
You have to make one yourself.
I love this one. Did you buy that wood plank this year, 2023?
Yes, 2023!
Love this, I just bought this sign and super excited to use it this way. Thank you
So cute!! 🎄🍁🎄🍁
Is there a pattern or something to help cut out the wood?
I purchased the wood already cut out from Hobby Lobby.
Is there anyway if your hobby lobby still has some that I could buy it from you and pay shipping. Every hobby lobby I’ve tried is sold out unfortunately
I love this craft
Where can I purchase the pumpkin and Christmas wood plackd
Look in the section of this article under “Materials Needed.” I answer that question there.
What a cute idea, can’t wait to make it!
LOVE THIS!
Love the fall/Chritmas blank form.
I love the colors you used would there be any way to get a color list? I tried to zoom in and couldn’t see it. Thank you 🩷
Added to the post!
Can you please tell me the paint color’s you used?
Do you have a color list of the paints you used? It turned out wonderfully!
Love reversibles! This one is soooo cute.
Está genial está idea.
My first time on your site, it’s awesome, your very talented! I’m going to try the reverse pumpkin and decoration, wish me luck I’m fairly new at this.
Welcome, welcome! I’m so glad you found my site. I hope you’ll find a lot of joy following the tutorials here. Happy crafting!