Make a reversible wood slice porch decoration with pumpkins on one side and a snowman on the other. This cute holiday craft can be used for both the fall and winter seasons!

Decorations that are reversible for more than one season are my favorite. It’s just so fun that you get a two-for-one. This wood slice porch decoration features pretty fall pumpkins on one side and a cheerful snowman on the other side, which means you can leave it on your porch from September until January!
Follow along with this step-by-step tutorial as I show you how to make your very own wood slice reversible porch decoration.
To begin, you will need the following materials:
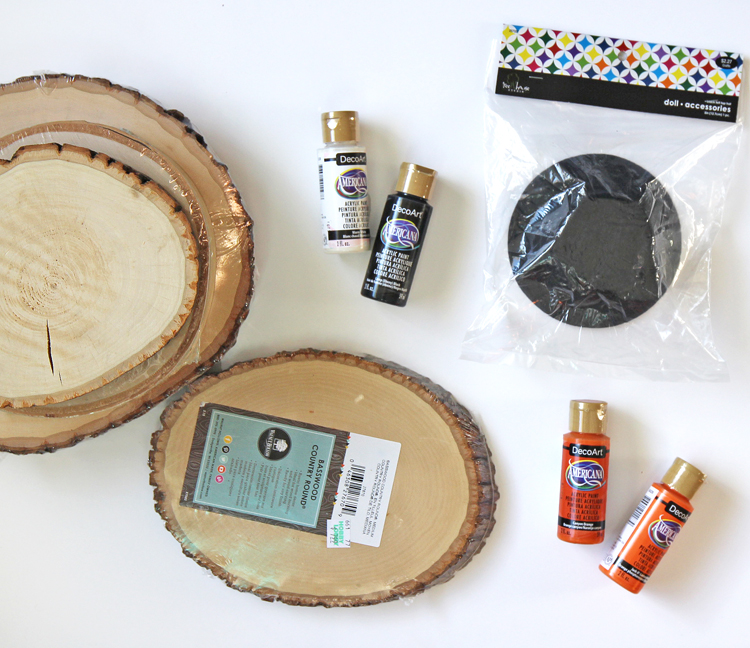
Materials Needed
- Wood Slices: One Small, One Medium, One Large and One Base
- Black, White, Orange and Dark Orange Craft Paint
- Paint Brush
- Felt Doll’s Hat (found in the doll clothing section next to the dollhouses)
- Plaid Ribbon
- Wooden Dowel
- Electric Drill
- 2 inch Screw
- Pumpkin Stem or Twig
- Wood Glue or Hot Glue
You can find the wood slices in the wood crafting aisle at Hobby Lobby. I laid mine out on the floor right there in the middle of Hobby Lobby to decide which sizes and shapes looked best together. Hey, sometimes you must suffer for your art. 😃 Be sure to buy the thicker birch wood slices for the body. The Basswood Country Rounds are too thin for the body and can only be used for the base. I recommend buying these in person to avoid being surprised by sizing or how they fit together.
Instructions
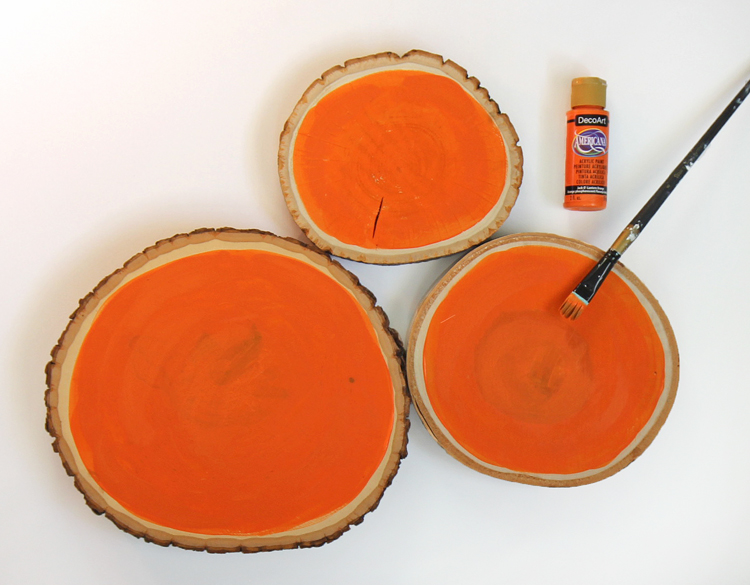
Step 1: Begin by painting the centers of the small, medium and large wood slices with orange paint on one side. When that dries, flip the wood slices over and paint the back centers white.
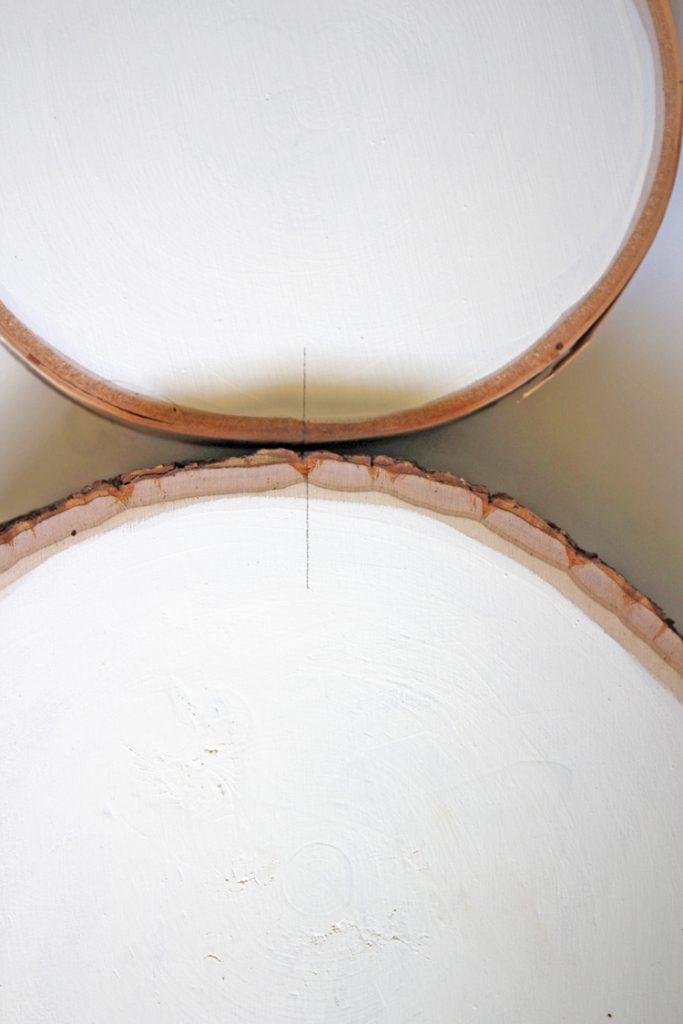
Step 2: When the paint is completely dry, line up the wood slices to form a snowman shape and mark the centers where the wood slices touch with pencil marks. I used a square arm ruler to make sure my lines were straight.
Step 3: Using a drill bit that is the same size as your dowel, carefully drill holes into the sides of each of the wood slices and slip one dowel piece into each set of holes so they fit together. This is what will secure the wood slices together and allow them to be stacked sturdily on top of one another. Use one or two long screws to anchor the largest round to the base piece. Just drill up from the bottom.
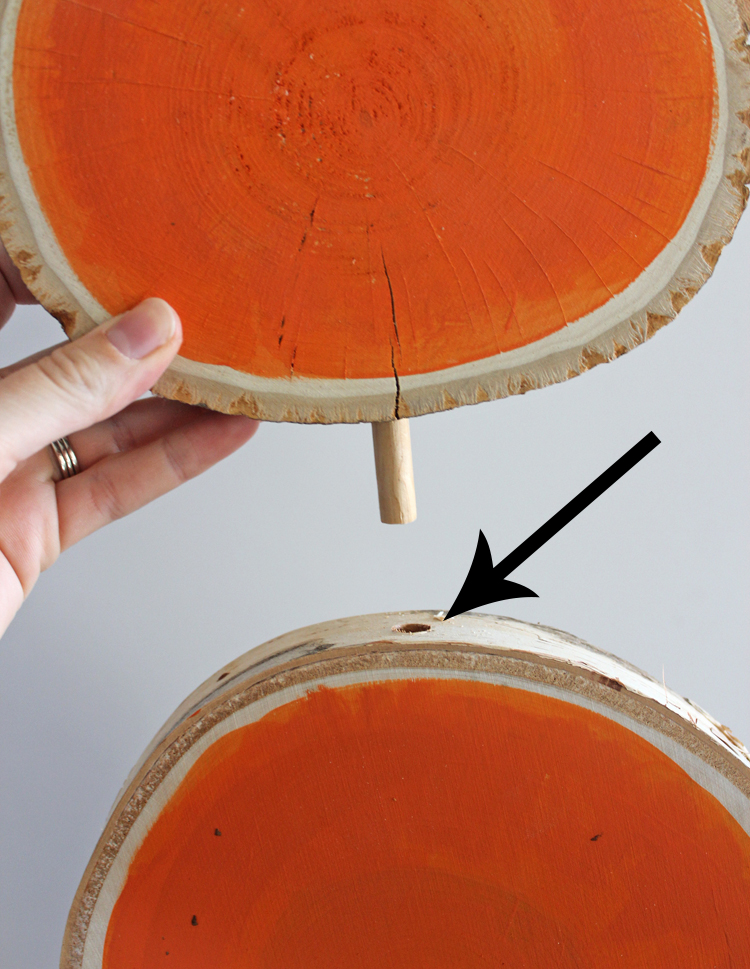
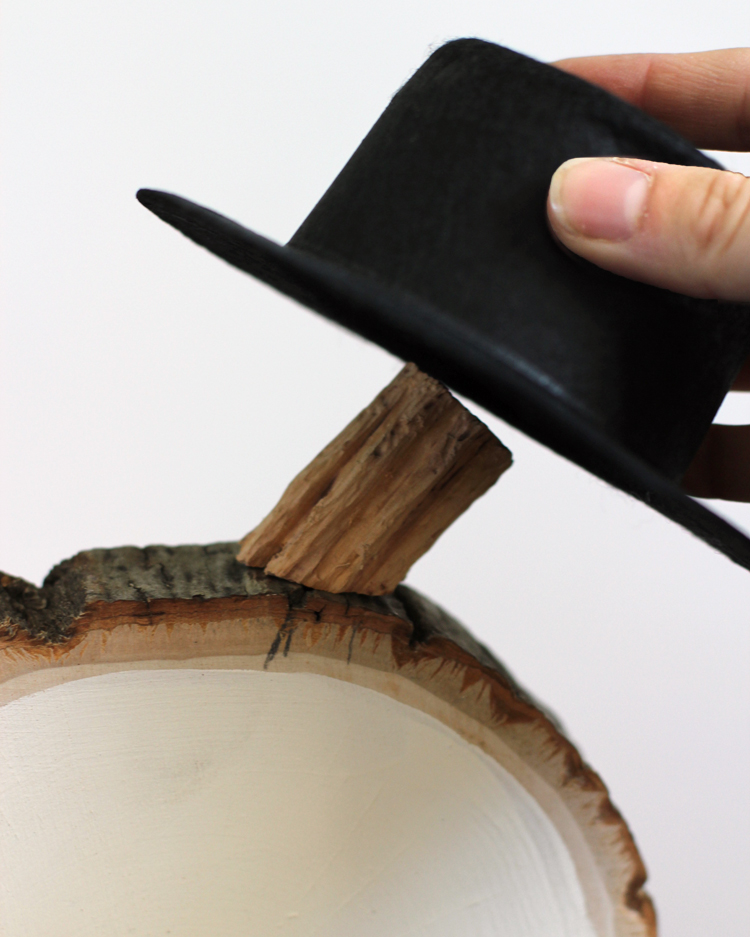
Step 4: Use wood glue or hot glue to attach a twig or pumpkin stem to the top edge of your smallest wood slice (the one on top). This will act as a pumpkin stem on the pumpkin side of the craft and will be covered by the felt hat on the snowman side of the craft.
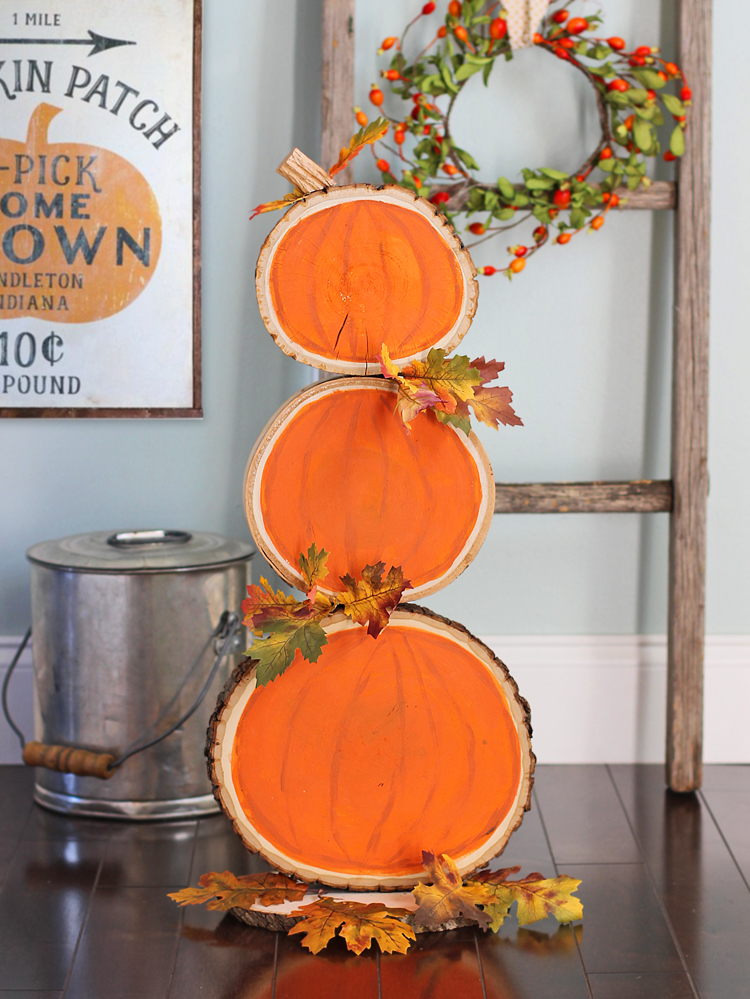
Step 5: Add the painted details! On the pumpkin side, I painted subtle veins in the pumpkins with the darker orange paint. Then I added a few faux fall leaves in just for a little extra cuteness.
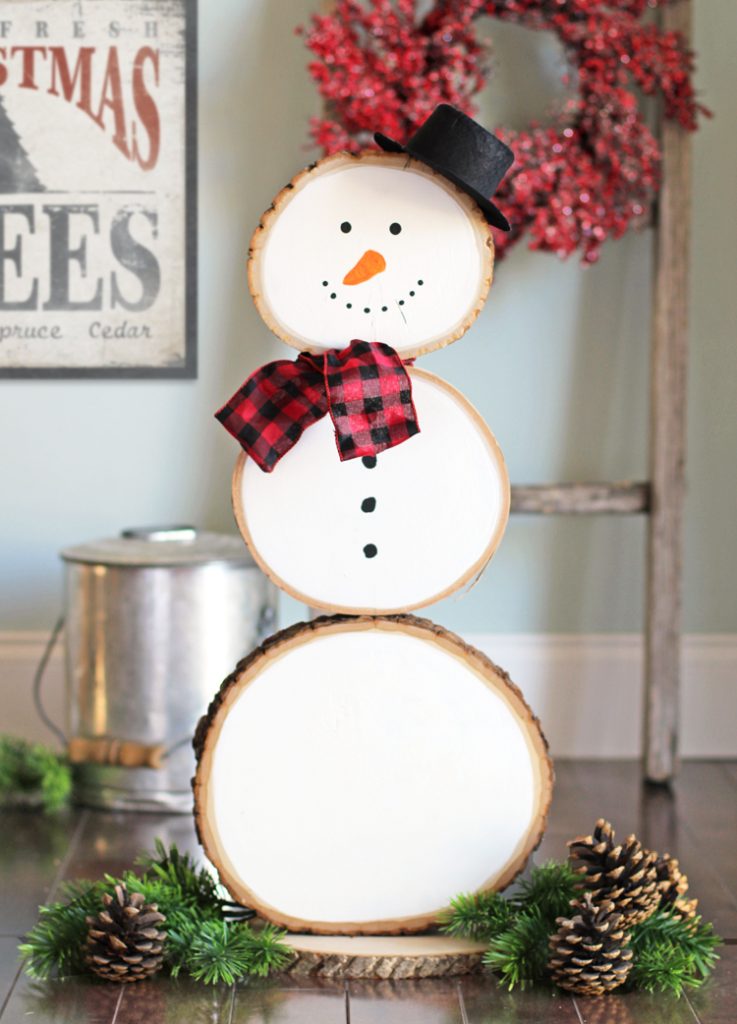
On the snowman side of the wood slices, I painted a snowman face and buttons and tied on a buffalo plaid ribbon scarf.
Want to see this craft in action? Watch this short video to see it flip from side to side.
Wood Slice Pumpkins and Snowman VIDEO
I’m absolutely in love with this fun, rustic craft. I love the texture of the wood slices and most of all I love the fact that I get a cute porch decoration that I can leave up all through fall and winter!
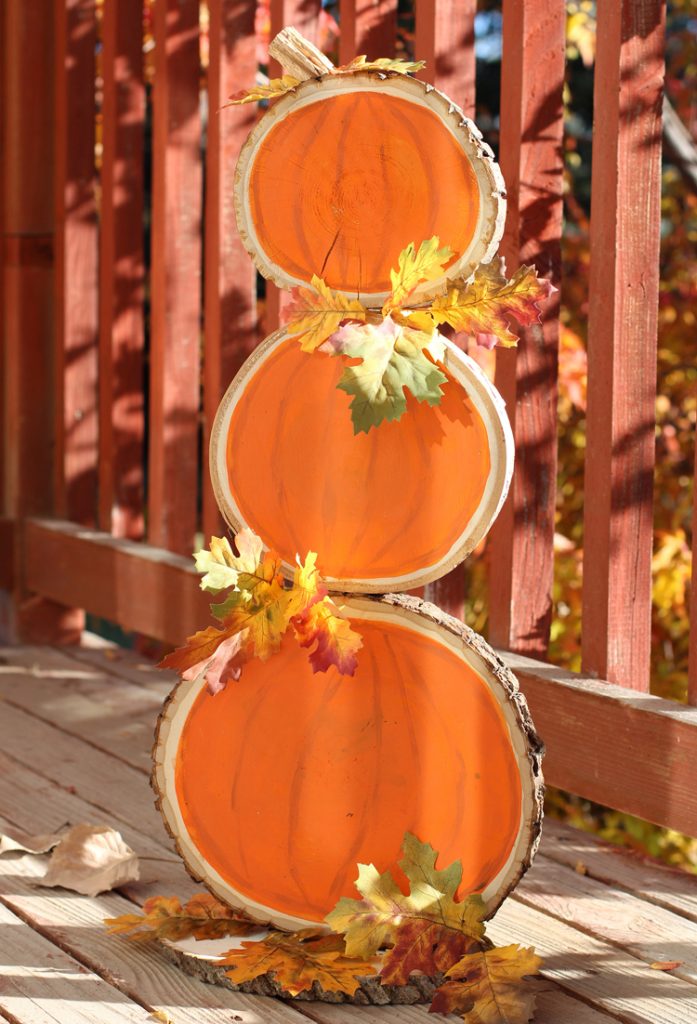
If you love this project, check out my other fall craft ideas! And here are a bunch of other darling wood slice craft ideas.
FREQUENTLY ASKED QUESTIONS
What sizes are the wood slices?
- The wood slices I used are about 7 inches, 9 inches and 11 inches across and the base piece is about 11 inches across, but it’s more of an oval shape. The slices are about 2 inches thick.
Where can I buy wood slices?
- Hobby Lobby has a great selection, but other craft stores carry them and you can even buy them on Amazon!
What did you use for the stem?
- I used a real stem from a pumpkin. You could also carve a stick to look like a stem or use a cute twig or cut the stem off of a fake decorative pumpkin.
Can I cut my own wood slices?
- You bet! If you’ve got a fallen tree in your yard, you could definitely use that wood and cut the slices yourself. But just FYI…sometimes freshly cut wood will split and crack as it dries. Older wood that’s really dried out won’t crack as much.
What size is the hat?
- Five inches

Comments & Reviews
Hi! This is adorable! My kids and I are going to make this. Can you please tell me how you attached it to the base? Thank you!
Oh, I'm so sorry I didn't add that into the instructions. We used a long screw and screwed it in to place from the bottom.
Such a great idea!
So wonderful! Thanks for sharing…only wish there was a way to print directions off.
So glad you like the project. If you are on a desktop computer, you could right click and highlight the words, then paste them into Word and print them. Hopefully that helps.
You can take a picture of the directions with your phone.
I was wondering if you had approximate sizes on the wood slabs. I don't live near any craft stores so I would have to order online with sizes. Thanks. I am super excited to make this!
The wood slices are approximately 7", 9" and 11" and the one on the bottom is more of an oval shape, about 11" as well. Hope that helps! I know Hobby Lobby does sell them online, so you could look there.
Actually, I looked today and they are not sold on line. What are they called? Maybe I used the wrong words. Is there anything else that can be used? It won’t be as pretty but the wood slices I’ve found are either too small or WAY too expensive. Any substitutes?
Hobby Lobby sells them in store and online. Here’s the medium one: https://www.hobbylobby.com/Crafts-Hobbies/Painting-Surfaces/Wood/Medium-Barkside-Round-Birch-Piece/p/144962 and the large one: https://www.hobbylobby.com/Crafts-Hobbies/Painting-Surfaces/Wood/Large-Barkside-Round-Birch-Piece/p/144963 then I would get this small one for the top piece: https://www.hobbylobby.com/Crafts-Hobbies/Painting-Surfaces/Wood/Wood-Rounds-with-Bark-Sides/p/80773875 But honestly, it would be better to shop in person so you can decide on proportions since each wood round is a little different in sizing.
Those are small
great ideas especially for a snowman collector and a. person who lived autumn. what about a bunny and santa? I'm sure you could come up with all kinds. of combinations. thanks ffor the ideas.
That IS perfect! I think the possibilities are endless.
Cute idea. But, I wanna' know where you got those framed botanical prints in background of the video. 🙂
Great question Stephanie. They are my favorite decoration EVER. I wrote a blog post about them here: https://www.thecraftpatchblog.com/2015/05/botanical-photo-grid.html The art itself is a free download and I included a link to it in the post. Thanks for stopping by!
Awsome simplease ideas. Thanks have to try these. Thanestled for sharing. CAROLYN swank.
Is the base wood slice the same size as the largest wood slice or the middle wood slice? I want to get the correct size to make sure this will be stable.
The base is the same size as the largest wood slice (about 11"), but it's a bit more of an oval and is thinner. Hope that helps!
I LOVE this!!! So cute!!
That Inspired Chick
How much would you say this cost to make?
Well, that depends. I broke my own rule and bought the wood slices when they weren't on sale. I think it was about $45. But if you wait until the wood is on sale, it would be half that.
You can always use a coupon at Joann Fabrics. Right now there is a 60% off one item until 10/21/17
Yes! I always try to use a coupon for at least one thing. All wood slices were 50% off last week at Hobby Lobby, so if I had waited until then, I would have saved a bunch.
We went to Hobby Lobby and bought exactly what is on the supply list. Total came to $101.54. Cute, but NOT a bargain. (9/15/18 shopping date)
Did you wait for the wood to go on sale? I bought mine when it was 50% off and that definitely helped the price a lot.
What did you use for the "stem"?
My husband carved it out of wood to look like a pumpkin stem because we didn't grow any pumpkins in our garden this year. But you could use a stick or a real pumpkin stem.
I’m making one right now and I’m gonna use one of my MANY wine corks for the stem!!🎃
This project is SO clever and cute! I don't often comment on people's blogs,
but I just wanted to let you know that I think your idea is really brilliant!
Congrats! 🙂 Starr D.
Thank you Starr! It means a lot to me that you would take the time to comment. I sure appreciate the kindness!
I wonder if you could use real wood? We are in the process of taking down a tree and boy could I use all that wood 🙂
You could definitely cut the wood yourself as long as you have the right tools.
I didnt use slab bought wood. We went out in my mom backyard and cut it out of wood she had ready for burning. We made a top hat also. Didnt cost me hardly anything to make. Just paint ribbon
That is so awesome Latara! Good job!
Have you had any issues with splitting or cracking of the wood? I was considering doing the same thing.
How thick is your dowel to put the wood pieces together? My husband thinks the wood will split. The one I just got for it is 1/4 inch thick. I can return it and get another if I need to, just wondering what you did!
I bought the super thick wood slices and used 3/4 inch dowels with a 3/4 inch drill bit. Make sure the bit is sharp (not super old and worn down) or it will split the wood, then just go really slowly and you should be okay. Good luck Amber and let me know how it turns out!
What a cute idea! And a space saver with two decorations in one!
I'm excited about that part. Less to store the rest of the year!
Where did you buy the dowels from ?
They have them at Hobby Lobby in the wood crafting aisle.
What size hat did you use? Hobby Lobby has 2", 3.25" & 5".
I used the 5 inch hat.
I am in the process of making this, I love the idea. I am using wood from our wood shed, my husband used his chainsaw to cut the slices 😉 Thank you so much for sharing your creativity!
Yay Tricia! I am so glad you're making it. Isn't it fun to create?
Oh, and if you send me a picture of your finished craft, I'll share it on my Facebook page! Thanks Tricia!
Love this idea! Thanks so much for sharing. Just have a question, I wanted to put this outside, but I'm having a hard time thinking about how to keep the hat from blowing off…any suggestions?
Hmm… maybe a dab of hot glue? Just enough to keep the hat on but easy to peel off later? Or the blue sticky tack poster stuff?
What about a small piece of velcro? you could put it inside or on the brim of the hat and the stem and then put a piece on the stem and a leaf to “hide” it during fall.
Love this!! Thanks so much for sharing. I have my little pumpkin man out all Fall and just finished the snowman side today. Merry Christmas! I pinned the hat on and learned today that hot glue comes off with Isopropyl Alcohol and a cotton swab.
How did you get the paint to be a perfect circle and leave some of the wood showing?
I just painted it on freehand. If you want perfect circles, try using a compass or trace around a plate or other round object with a pencil.
Hi
This is awesome. Is there a way to print this without all the ads on it?
You can try to copy and paste into Word.
I love this. BTW, I copied and pasted all the directions and one picture! It was easy, peasy.
I am totally clueless about painting. What size, type brush did you use for painting the slabs and little trims (eyes, nose, buttons, lines on pumpkins).
How do you paint those lines so they look so faint and natural? Also, how long of a wood screw did you use for attaching the base?
Thanks for your help. Marti Barnes
Hopefully I answered all of your questions in the other comment. Let me know if you still have questions!
does the dowel go all the way thru the wood to the bottom or are they cut into pieces?
No, there are two separate smaller dowels.
I love this. Few questions. How long a wood screw to attach base! Type, size paintbrush for painting surfaces and trim; ie snowman face, pumpkin lines, etc. Thanks. Marti Barnes
I believe the screw we used was 2 inches. Make sure you drill slowly to avoid splitting the wood! I used a large crafting paintbrush to paint the background colors, then smaller fine-tipped paint brushes for the detail work. To get the pumpkin lines, I dipped my paintbrush in the darker orange color, then wiped most of the paint off and did kind of a dry brush technique. I also rubbed those lines with a paper towel if they didn’t “blend” enough.
What is the name of the darker orange paint you used to do the lines in the pumpkins?
It was DecoArt “Spiced Pumpkin”
Love the video on how to make the pumpkin and snowman out of 3 different sizes of wood. And they are reversible!!! So cute.
Thank you so much Elaine!
I just bought everything for this project to make as a gift. The only thing I couldn’t find that I liked as good as yours was the top piece you used as the pumpkin stem. Where did you find it? I looked all over hobby lobby and didn’t see anything remotely similar And had to improvise but I would love to make it perfect since it is a gift. Thank you so much for such a genius idea!
I used a real pumpkin stem! You could carve a stick to look like a stem if you’re handy with whittling or just scavenge in the yard to find a stick that will work.
Thank you!
I am going to try to make this . It is sooooooooooooo cute. I had one question. How thick is the wood pieces? Thanks, Mary Ellen
Have a Great Day!!
Hi Mary Ellen! Your comments have to go through an approval process before you can see them (too many weirdos and spammers in this world). To answer your question, the wood is about 2″ inches thick.
Thanks Jennifer!! Sorry about asking two times!! I can’t wait to make this…. 🙂
I didn’t read all the comments, so this may have already been said. I would say that the snowman side, can stay here and other place till March. So we could actually leave it up September till April. That’s 7 months. I live in Boston Ma. I love it Btw, and plan on making it.
Yep, I live in Idaho where the winters are looooooooong, so I get what you’re saying! Glad you found it. Cheers!
Awesome
STORAGE: Drill holes on each side of lowest disc – top & middle discs sit side by side, fancy weeds tuck between.
Good idea!
Clothespin glue works for his hat sit on then I clipped leaves onto it. Also 2” x 1/4 double headed screws worked i didn’t have dowel.
Carol
Awesome adaptations, Carol! Double headed screws are a great idea.
Are there not printable instructions? Thanks
No, sorry! You’ll have to just refer back to this web page.
I live in the UK and just love this. I am in the process of having a go although mine, I fear, will be very rustic as it is being made out of wood slices cut by my Nephew. Thank you so much for sharing this.
I think rustic is perfect for this project!
I’ve looked at 2 Hobby Libby’s and Michels. They don’t have the sizes. Anyone know where else you can get these?
You can also try Amazon. Just double check on sizing. Here are a few that pulled up in search: https://amzn.to/2NqiI5H (affiliate link)
Wondering what would be best for weather proofing this to use outdoors?? Would acrylic sealant be enough or should this just stay indoors? TIA
I’d use a spray clear coat in a matte finish. That should be enough to protect it.
A massive old oak is coming down soon; what are the wood slice diameters, I see where they should be 2″ thick. How is base constructed? Thanks!
It says in the Frequently Asked Questions section that the slices are about 7, 9 and 11 inches in diameter and the base is an oval shaped slice that’s also about 11 inches across. Use a 2 inch screw to attach the bottom slice to the base piece.
Thank you for the great idea for wood slices. I made mine using slices of wood a family member made for my daughter’s wedding for table numbers. I giving this to her for her 5th anniversary.
First off, I consider myself an experienced crafter. My sister-in-law asked me to make a few of these for her. She bought the supplies and it’s basically been a disaster. Your photo of the wood slices looks like the Walnut Hollow Basswood Country Wood slices that are sold at Hobby Lobby as well as at Michael’s craft stores. Well, they are way, way too thin to make this project work and be stable. I was concerned that the wood would crack when drilling for the dowels which were 3/8″. When they started to crack, my husband and I thought, ok we need thinner dowels. So drilled smaller holes and got the 1/4″ dowels in, but it’s wobbly and leans forward (even tried 5/16″ dowels). In one of your comments, you provided a link to Hobby Lobby for the wood. However that is for the birch wood which is much thicker and not at all what you state and show a photo of in the supplies list. Very misleading – you should have provided more specific names and dimensions for the thickness of the wood. Now I need to figure out some way to add braces to make these sturdy and paint over the brace. So word of WARNING- don’t use the Basswood Country Wood Slices – they are too thin.
Hi Sandy,
I’m so sorry you had trouble making this craft! You are correct in recognizing your error… the Basswood country rounds ARE too thin to work. I only used that type of wood slice for the base. The other wood slices shown in the supply photo (in the top right hand corner stacked on top of each other) are about 2 inches thick and much more suitable for making the body. I’m sorry the directions weren’t more clear. I hope you can still make this craft work.
The issue is, the link provided to Hobby Lobby for the wood slices in your instructions, takes you to a page that has the Basswood rounds as well as the Birch rounds. By not specifying which wood should be purchased is what caused the confusion and issue. Your photo of the shrink wrapped wood looked just like the Basswood Country wood. I’m not referring to the base slice but the 3 that are stacked to the left side of the image. I have a solution to fix this disaster, but have put way too much time in to this project for my sister-in-law who thought it looked easy. Sorry to grumble so much to you, but I’m such a detail person, I expected more information on the instructions. I’m just trying to make sure others don’t make the same mistake.
What did you use for the nose
The nose is just painted on with craft paint!
what kind of paint is it if I want to use them outside and do you have to use a dowel rod or screw to put them together won’t wood glue just work just wondering
Wood glue won’t hold them together well because of the bumpy bark. For strength, I really recommend doing it with the dowels and screws. I used regular craft paint for mine, but if you want to spend a little extra, they sell paint made for outdoor projects. Just read the labels in the paint aisle at the craft store.
Hi Jennifer, this is such an adorable idea! I like to read ALL the comments prior to asking a question so I don’t waste space with a duplicate. That’s where I read about using thicker pieces for the body vs the base. It was mentioned a few times I believe. What I didn’t see and since I’m not an experienced crafter but do love adorable unique-only crafts, I wondered if this can be unassembled for storage purposes or do the dowels fit so tight that you wouldn’t want to hassle that? I just love compact storage also!😉
Hi Patty, YES! All of the rounds can be taken apart, except for the bottom one that is screwed into the base. I wouldn’t recommend unscrewing it for storage as that may weaken it over time.
I’m loving this cute project. Can’t wait to make it! Thank you for the great pictures and instructions and all of the answers to the many questions. I think I’m ready to give it a try!
Hurray! I’m so glad. Enjoy your crafting time!
oh my God! This project is so cute!!! Great Idea Dear! Kiss and a happy Fall to you!
What size/thickness of ribbon is used, and is there some specific reason you chose birchwood round for middle piece and basswood round for top and bottom piece, or was that just what was available to you?
The ribbon is 2.5 inch wired ribbon. I chose the wood rounds based on what was available at Hobby Lobby when I was there. I wanted the right sizing to make it look good. The bottom piece that’s used as the stand is thinner than the three pieces I used for the snowman body. It’s too thin to work for the top part, but I loved the shape for the base, so I went with it. Hope that helps!
We made this adorable craft this weekend, and it turned out great! Wish I could post/share a photo, to show it IS doable. The instructions & materials were easy to find & follow, though it does take a bit of intuitiveness to recognize what sizes/paints/, etc.
I used a larger oval base so it gave me space to decorate: I added some leaves, pinecone & little cute hedgie figure on the Autum side
I loved this adorable project so much, and my guy got involved with the easy drilling.
I’m thinking about making smaller versions (table top) for gifts, too
Thank you!!
I made this, so cute. Wish there was a place to post pictures.
Hi. Ok so I have bought the wood slices from the internet and unfortunately they are 1 inch thinks instead of 2. I didn’t catch that when I was reading…my fault…. Can I peel some of the bark pieces off the round to make it flat,so that maybe it will sit better and be sturdier?Any other suggestions ?
Thanks
Rhonda
Hmm, that’s going to be tricky, but maybe you can cut a teeny bit off of each slice where they would sit together to give them a flat surface. That’s the only thing I can think of. Good luck!
How tall is the whole decoration put together?
It’s roughly 28 inches tall.
Love this idea. So cute. What did you buy and do to make it swivel?
It doesn’t swivel. It’s just a wood slice on the bottom.
My friend and I made these this past weekend. We got a late start on Friday but we finished up on Saturday afternoon. What a fun project and they turned out great! We found everything we needed at Hobby Lobby. Thank you so much for sharing such a great idea!
Hi! This is a cute craft and I love that it’s reversible! You mention that it’s for outside on the porch but don’t say anything about using any type of lacquer to seal it. Do you just put it out without any?
You can definitely give it a coat of clear sealer. I would recommend something with a matte finish. I wouldn’t put it somewhere that’s going to get super wet though.
Very cute. Do you sell these?
Nope, sorry!
Quick question about the hat. Is it 5 inches tall or wide? I am having a terrible time finding something to use.
It’s five inches in diameter. Did you click on it in the materials list? I have it linked to one you can buy at Hobby Lobby.
amazing idea, gotta get this old man to cut me a few slices……
My sister-in-law bought these from amazon and the thickness they sent are a half inch thick. no way to drill a dowel in them. Have you used Amazon before?
There are definitely different thicknesses. That’s why I recommend buying them at Hobby Lobby so you can see them in person.
Love the pumpkin and flipside snowman!