Learn how to use the Print and Cut feature in Silhouette Studio to make custom, professional-looking gift tags.
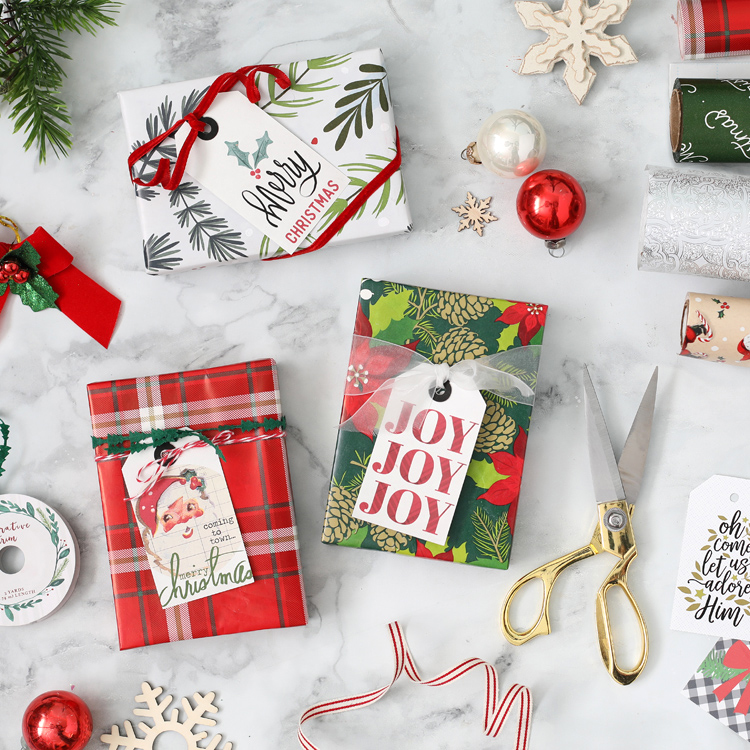
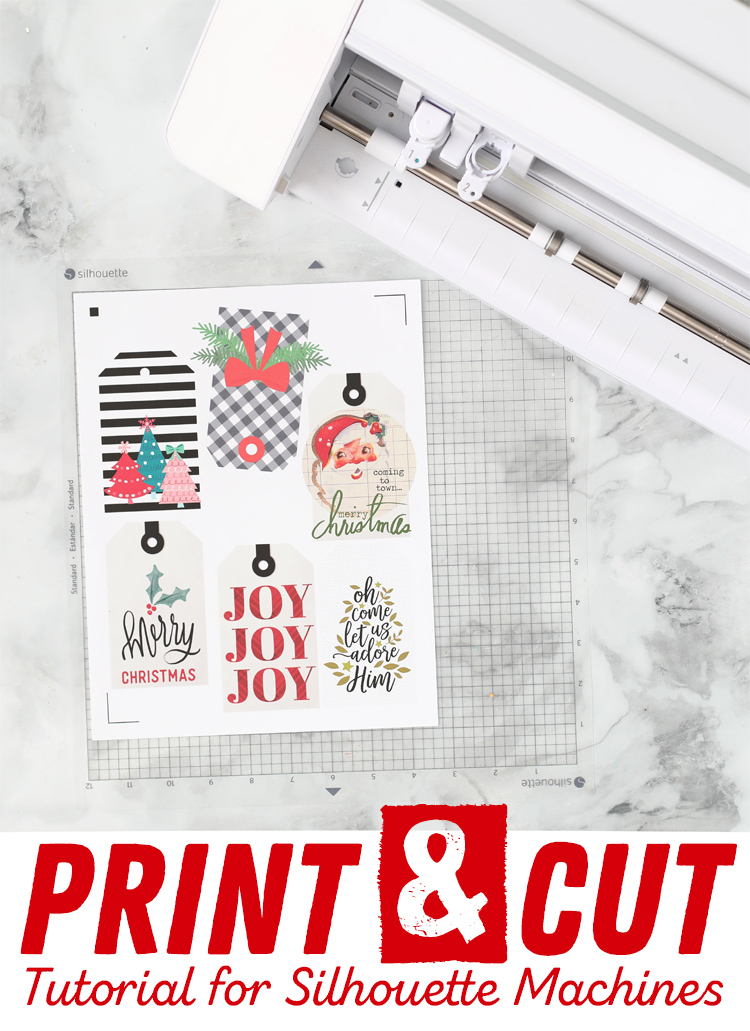
Today I’m going to show you how you can make gorgeous holiday gift tags using the Print and Cut feature on your Silhouette Cameo or Silhouette Portrait machine.
This post is brought to you in partnership with Silhouette America. Affiliate links may be used.
I love giving thoughtful Christmas gifts and I really, really love wrapping them beautifully too. It’s the cherry on top of a good gift, in my opinion.
What is Print and Cut?
Print & Cut is a type of file that uses your personal printer to print designs that can then be cut out using your electronic cutting machine. Silhouette has made it super easy to do and I think once you try it, you’ll be hooked. You can get SUCH professional results!
Where Can I Get Print and Cut Files?
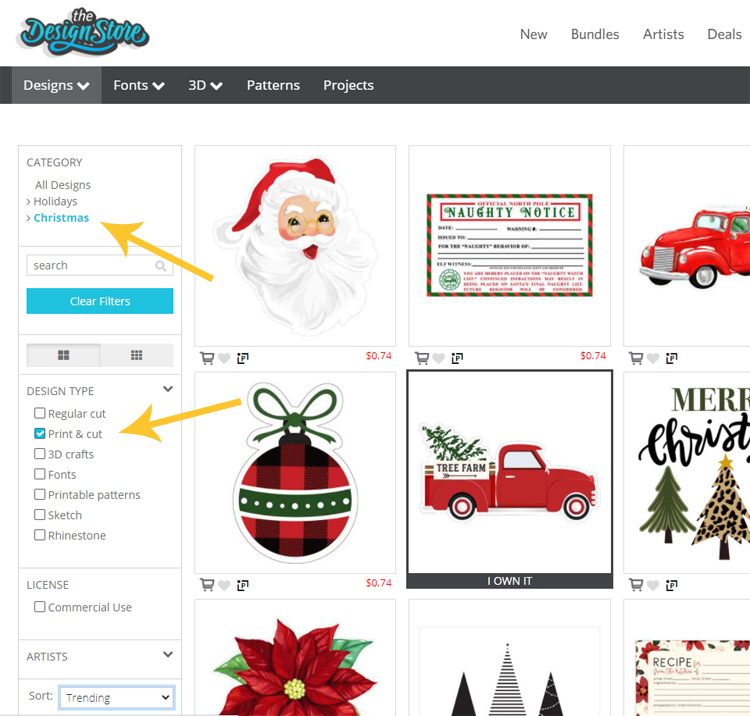
There are a ton of really cute Print and Cut files available in the Silhouette Design Store and a lot of them are under $1. If you are specifically looking for Christmas Print and Cut files, go to https://www.silhouettedesignstore.com, then click on the tab that says Designs > Holidays > Christmas. Then click the Print & Cut Design Type filter. Here’s a screenshot to help you:
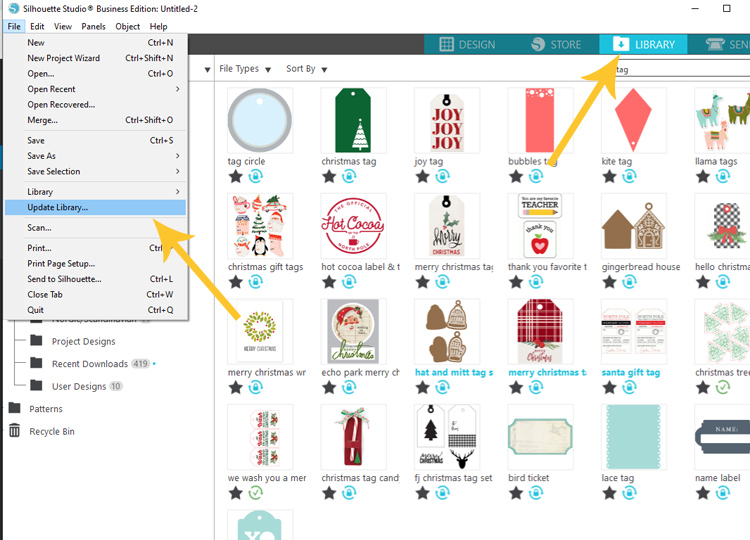
Then you can purchase some cute, cute goodies and upload them into your file library in Silhouette Studio. If you have synced your software to your account in Silhouette Studio, the files will automatically appear in your Library. Sometimes you need to click FILE > UPDATE LIBRARY to get the new files to show up.
Double click on the file you’d like and it will open in the work area.
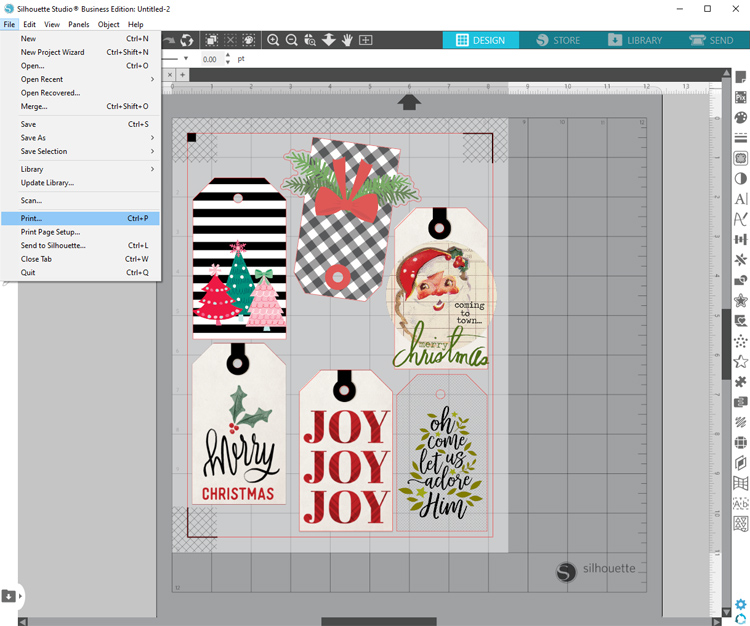
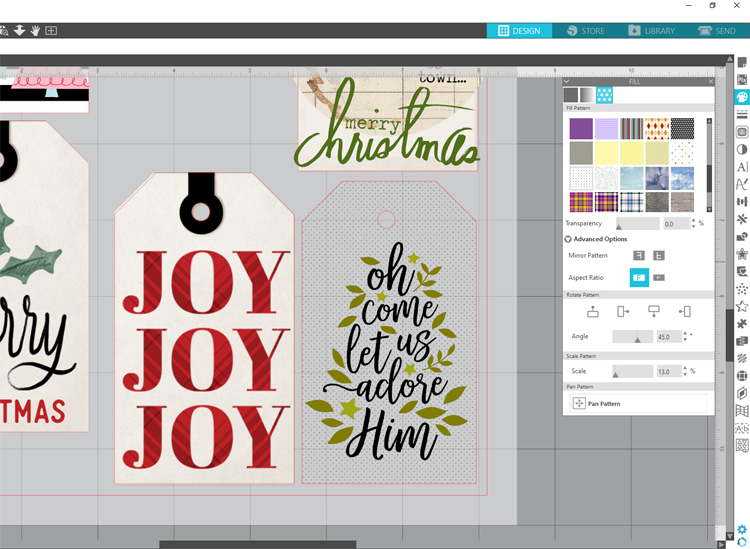
I chose several different types of art. Some tags I left as-is. For a few of the other tags, I removed the cutting lines from the artwork and framed them with a tag cutting shape. Another cool feature I recently discovered is the FILL PATTERN TOOL. If you click on the paint palette tool on the right hand side, then click on the third square, it’ll open a panel where you can add a background pattern for the shape you have selected. That’s how I added the polka dot background to the Oh Come Let Us Adore Him tag in the screenshot below.
I also added the black and white stripes to the tag with the pink Christmas trees the same way.
Silhouette Print & Cut Instructions
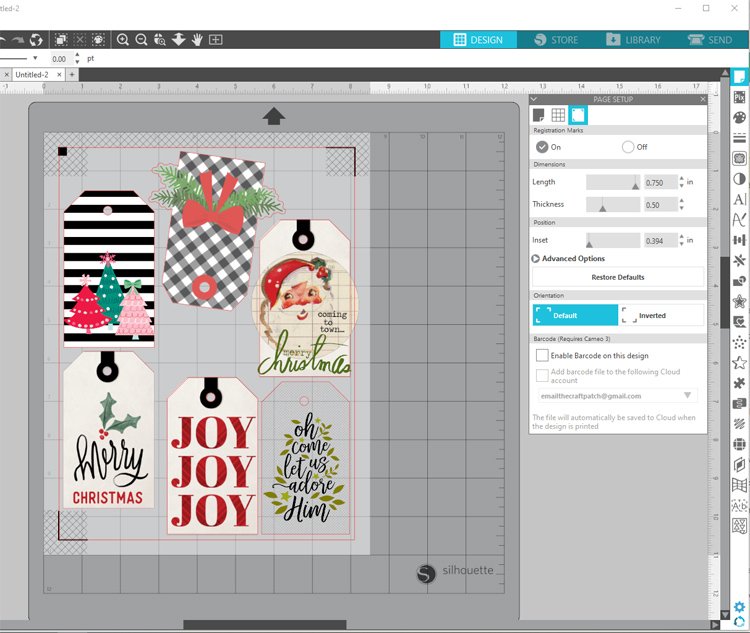
Step 1: Click on the Page Setup icon at the top of the tools column on the right hand side of the page, then click on the third button within that window. Click REGISTRATION MARKS ON. Here’s a screenshot to show you where those commands are located:
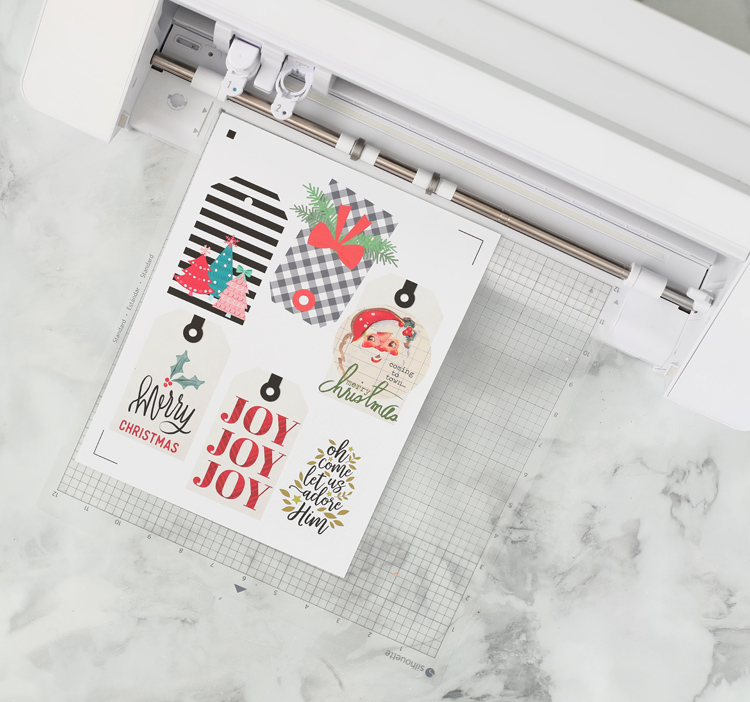
Step 2: Prepare your designs and place them within the cutting area. Since I cut my tags out of cardstock, I adjusted the mat to show an 8.5″ x 11″ work area. You can add multiple files to one printing page. I try to fill the whole page so I don’t waste material. One thing to keep in mind: the printer won’t print the red cutting lines. Only your Silhouette machine can see them!
Step 3: Load your printer with whatever material you would like to use. Cardstock, kraft paper, sticker paper and gold foil sticker sheets make awesome gift tags! Then click FILE > PRINT.
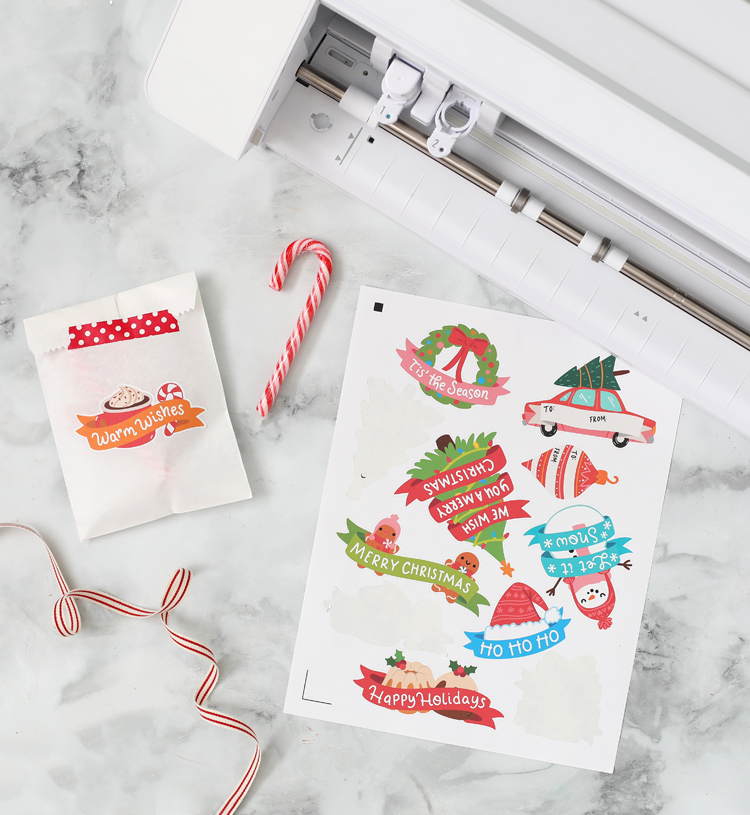
The Print & Cut feature is also perfect for making custom stickers. All of these designs are available in the Design Store and it makes packaging up Christmas goodies SO EASY if you can just slap a sticker onto something.
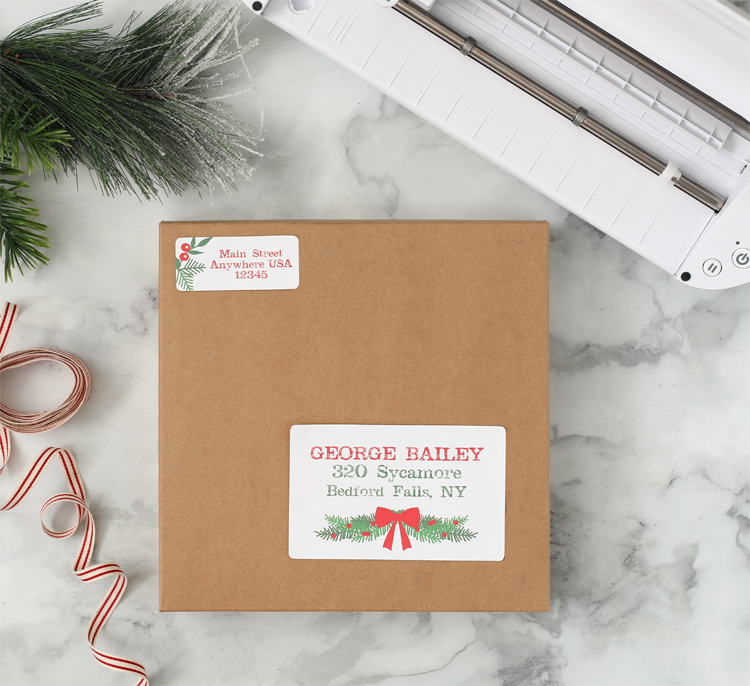
Another way to use the Print & Cut feature is to make cute address labels for mailing presents. Wouldn’t you just be even more excited to open this box when you see the cute labels?! I designed all of it right inside Silhouette Studio in minutes. The trick is to remove the cut lines from anything you want printed and only leave the cut lines around the outside of the label.
If you haven’t tried the Print & Cut feature, DO IT! It’s so much fun. Even my husband was impressed with some of the tags I made. LOL. And if you have any fun ways that you’ve used Print & Cut, I’d love to see. Send me a message on Facebook or Instagram to show off your project!
Like this project? Pin it so you don’t forget it!
This post was compensated by Silhouette America but all ideas, opinions and words are my own.

Comments & Reviews
I have a cricut and often purchase designs from Silhouette design store. Do you know if this will work with the cricut?
Cricut has their own way of doing print and cut, so you CAN do all of these things, I just don’t know how. LOL. Try googling it maybe?
Designs purchased from the Silhouette Design store do not import into Design Space correctly. It’ll be like lines instead. I have both programs and use both machines.
I think you have to use SVG files and have the Business edition of the software.
Thanks for your blog! You are a GREAT teacher and writer. I am subscribed to a lot of “creative blogs” but yours has more helpful information than any of the others! Keep up the good work and have a Merry Christmas.
Thank you!! I sure appreciate your great instructions with visuals!!!!