Homemade Christmas Ornaments are the best! Make this adorable sled out of popsicle sticks and customize it with a photo.
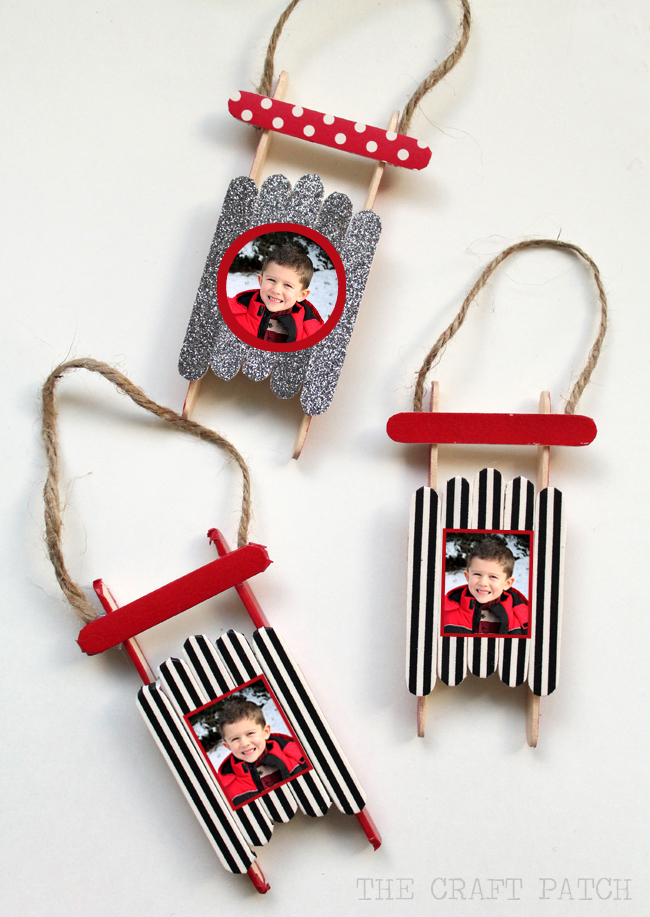
As promised I’ve got another DIY Christmas ornament for you today. In case you missed it, I shared the tutorial for mason jar ring chalkboard ornaments earlier this week.
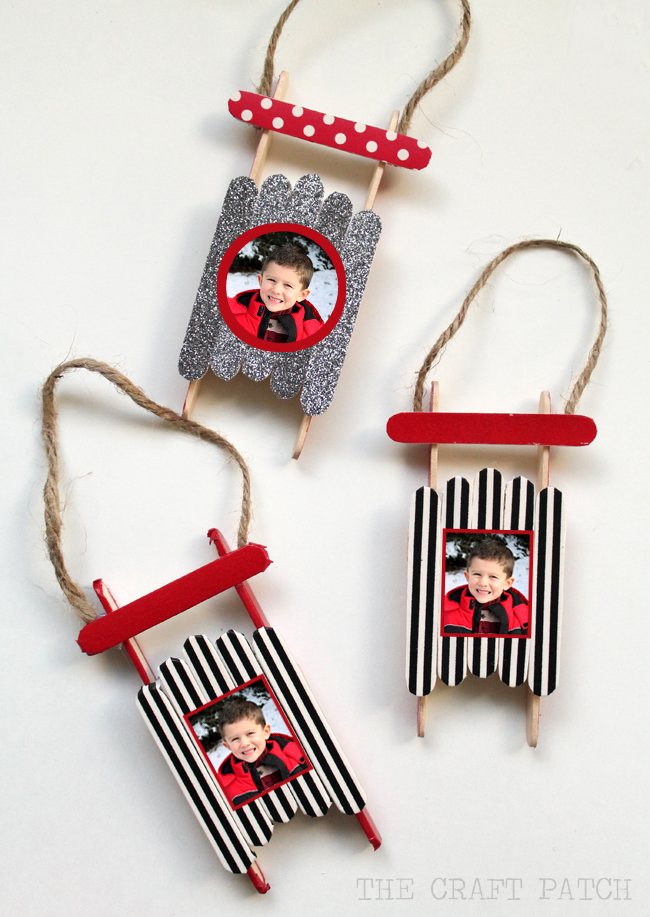
I’m in love with these little washi tape popsicle stick sled ornaments.
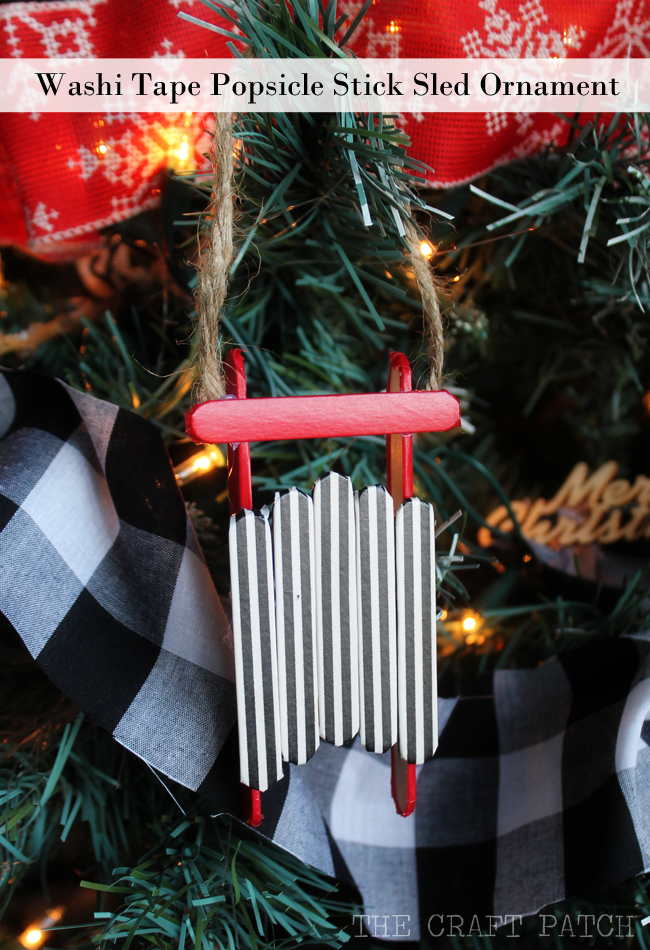
They’re a little bit rustic, a little bit modern and a lot of fun. They make me want to go sledding and drink hot cocoa! Yay!
To make your very own sled ornament, you’ll need the following supplies:
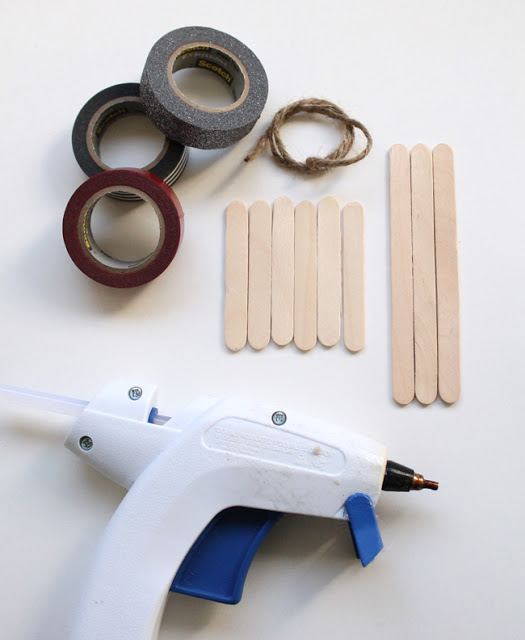
Materials
- Washi Tape (I used Scotch brand)
- Utility Knife (also Scotch brand)
- Regular sized craft sticks (3 for each sled)
- Mini sized craft sticks (6 for each sled)
- Hot glue gun
- Twine or ribbon
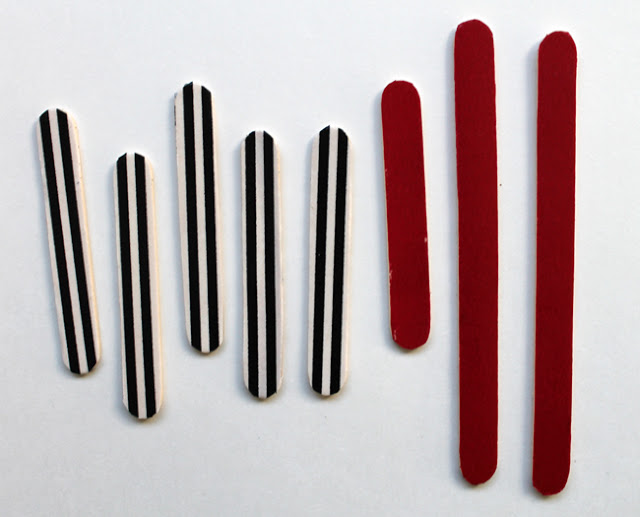
For the sled, you’ll need five short sticks covered in the striped washi tape, two long sticks and one short stick covered in red washi tape and one extra stick that you’ll cut into smaller pieces.
If you’d rather watch a video tutorial, scroll straight to the end of this post.
Instructions
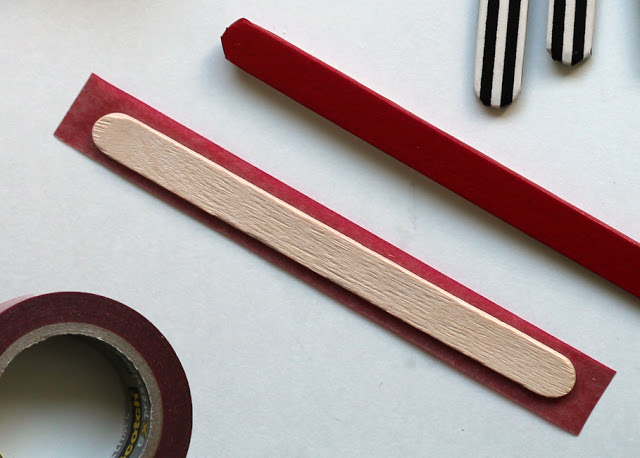
Put a piece of tape on the stick, then flip it over and cut away the excess tape using the utility knife. Make sure you have something underneath so you don’t cut marks into your table. I used posterboard.

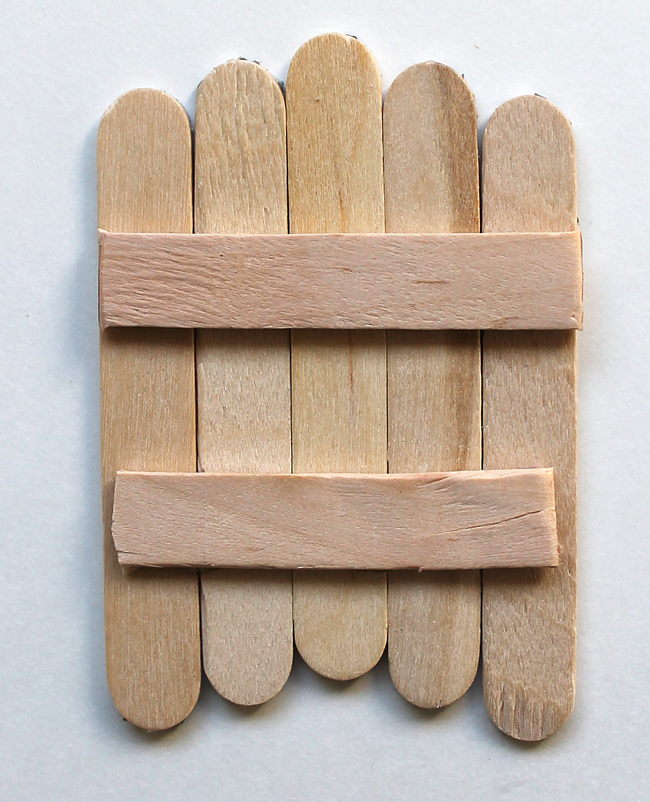
To build the “seat” of the sled, lay the short sticks in the shape you want them, cut small sections of the plain stick small enough to fit, then use hot glue to attach them together, like this:
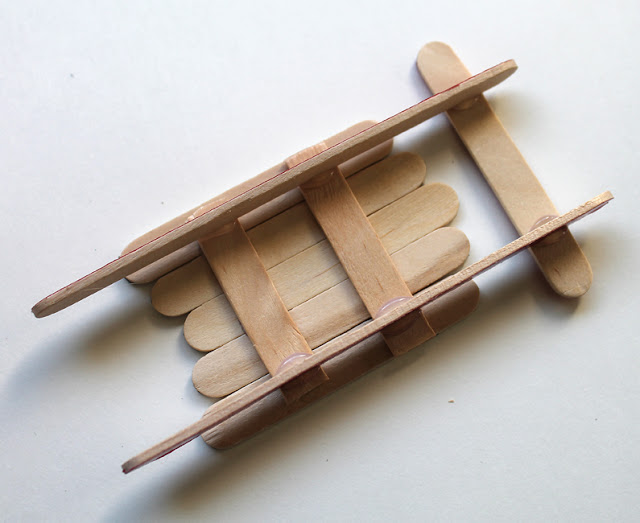
The two long red sticks are the runners. Dab hot glue on the smaller cross pieces, then place the sticks on their edges and hold until the glue sets. Then add the top cross piece (the handlebars). When you’re done, the underside of your sled will look like this:
All that’s left to do is add a twine or ribbon loop for hanging. I used hot glue on the back side of the handlebars, but tying the twine around the handlebars would be cute too.
I tried two different methods for adding the tape to the sticks. First I tried just wrapping the tape around the sides, but it made the curved ends look pretty messy underneath:
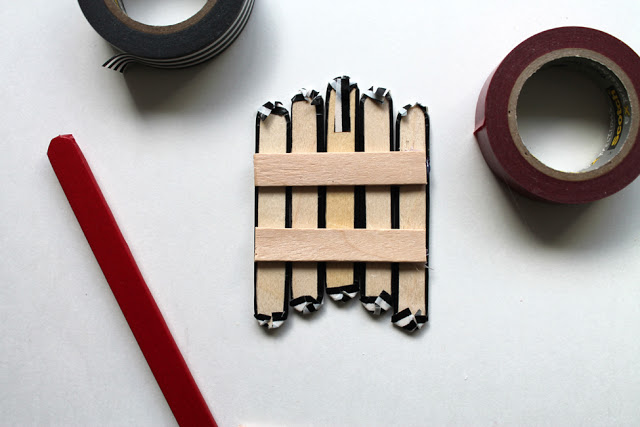
Then I tried the method I described above, using the utility knife to cut the extra tape away. You definitely get a cleaner look, but the edges are bare wood. I actually like the bare wood, so I left it, but you could do a combination of the two methods and apply washi tape to both sides of the popsicle sticks if you want the whole thing covered.
The glitter tape is so pretty, but the black and white stripes have my heart.

My aunt, a kindergarten teacher, asked me if these would be cute with her students’ photos on them, so I made this to show her how perfect they’d be for her students:
Popsicle Stick Sled Ornament Video Tutorial
Click here for the full Christmas tree reveal!!

Comments & Reviews
Love these ornaments. Very creative and the pictures from the store were helpful.
Merry Christmas!
What a clever idea! Will pass on to teacher co-workers. It will be easier for students to paint the sticks and less stressful for the teachers, too!
These are just the Cutest sleds ever…
Thanks for sharing !!
What a fun idea. These are so sweet. Thanks.
How did you put the pictures on? These are so cute and perfect for the family as Christmas presents with my sons picture on them!
Print out small photos, add a card stock mat if desired, then glue to the finished sled. I would use a glue stick.
We're making these during my daughter's class Christmas party. Thanks for the idea. Question – what sizes are the mini and regular popsicle sticks?
The mini popsicle sticks are 2 1/2 inches and the regular popsicle sticks are 4 1/2 inches. Have fun and thanks for stopping by, Mary Jane!
Thanks so much!
Just love these will have my Sunday School class try these. This year.
Thank you so much. Love them. we are going to do this with my nephews on Thanksgiving after dinner.
That sounds like the perfect activity for Thanksgiving afternoon!
Absolutely love this idea! I am going to make these for the children's parents in my classroom as a holiday gift! Thank you so much 🙂
I'm making these as Christmas presents for daycare kids! Are the pictures wallet size or smaller? I'm concerned about getting it to fit on the sled. Thanks in advance! 🙂
The pictures measure about 1.25" by 1.5"
I would love to do these with my 2nd graders, but I'm wondering if there is a way to make it more "their" creation than mine? How would these look painted? What trim did you use for the picture frames? Is that also Washi tape? These are so cute!
The pictures are just mounted on cardstock and the sled would still be really cute painted… a little more child friendly that way.
Hi! I saw you mentioned the size of the photos you used, but where did you get one printed that small? We are making these for my sons kindergarten and I can't find anywhere that prints pictures that small.
Thanks! 🙂
I printed mine at home. But here's another idea that might work for you and it would be really inexpensive. If you have a photo editing program like Photoshop, put a bunch of smaller pictures together to make a 4×6 print, then cut them after you have them printed.
I just made two of these for my mother-in-law for Christmas who loves homemade ornaments. I painted the sticks before putting them together. If you're making them with kids, I would recommend putting the sleds together ahead of time and having them paint them after they are assembled. Painting the sticks takes some patience and the drying time might be too much for little fingers. I laid my wet sticks on a couple extra of the bigger sticks to dry, so the paint didn't stick to the paper I had on my crafting surface.
Awesome tips! Thank you for taking the time to share.
I love the markers idea! That will be perfect for my grandsons, aged 3, 4, 4 and 5!
What size washi tape did you use? Great idea btw! Thank you.
I used the standard size that most washi tape comes in.
Where did you get the mini popsicle sticks? I tried amazon and they only have the 4.5 inch …
Hobby Lobby, JOANN or Michael’s have them.
you can also order on walmart.com for $3-4.
I just made my pictures at the cvs kiosk. They have mini sizes that are 1.3×2. They are so cute and only .35 for 9! Did you glue the picture to the sled?
That’s a great tip. Thanks for sharing! I glued the picture to a piece of colored cardstock, then glued that to the sled.
Hi, I cannot find the video tutorial. I scrolled to the bottom like it said but I don’t see it. Can you please send me it or point me in the right direction? I want to make these with my students 🙂
So sorry about that! I switched hosts a few years ago and lost all of my videos. I’m still finding posts with missing videos. Re-adding it now!
These Popsicle Stick Sled Ornament With Washi Tape crafts are so amazing , will love make these , my son gonna love these . Thanks for sharing this one with us.
I love this Idea, Ordering today from Walmart , thank you for this idea
Hi! How big are the photo cut outs?
about 1 inch
I love the country ornaments, and the cost of the ornaments! I am using them for gift cards. I am hoping that both grandparents and parents will enjoy them!
Love this idea!