These nutcrackers are made from popsicle sticks and they’re the cutest handmade Christmas ornaments!
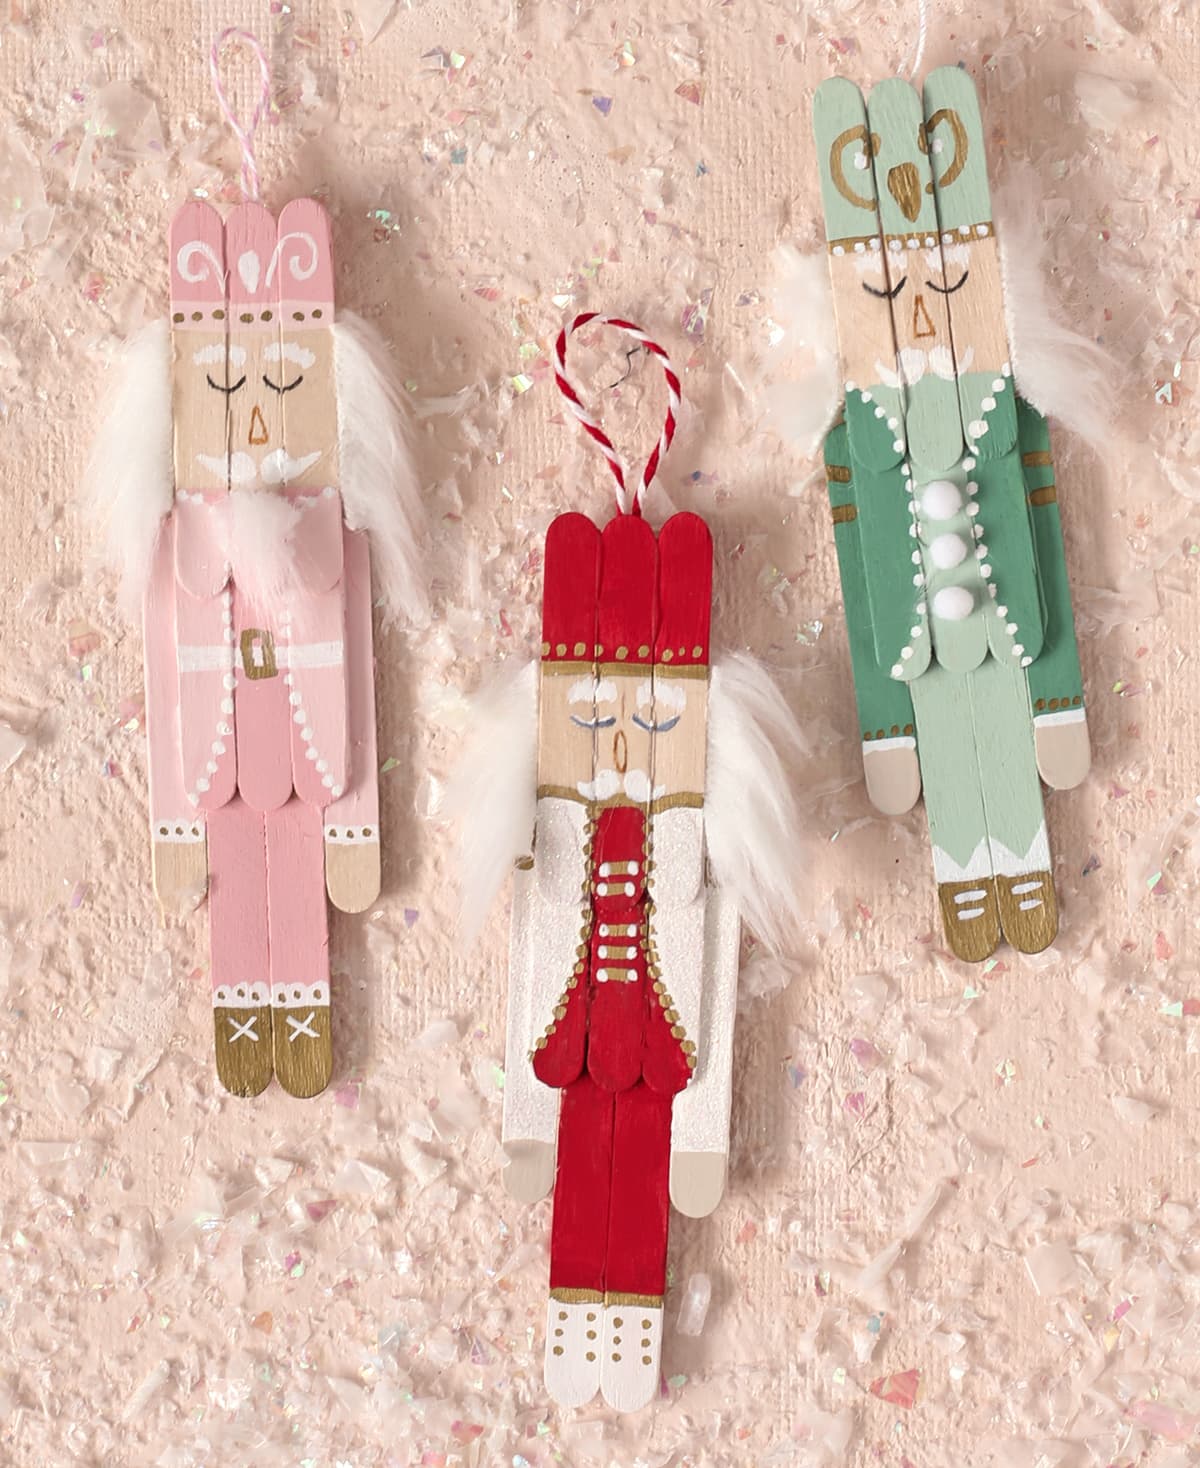
I have the cutest Christmas craft idea for you today. I’m going to show you how to make these absolutely darling miniature nutcracker ornaments out of popsicle sticks. They were super fun to make and I loved adding all the decorative details like buttons and boot laces and little embellishments. They can be customized to any color scheme or style and even though I intended for this to be a craft for kids, it was so much fun for me, I now think it’s an adult Christmas craft. 🙂
To make your own nutcracker ornaments, you will need:
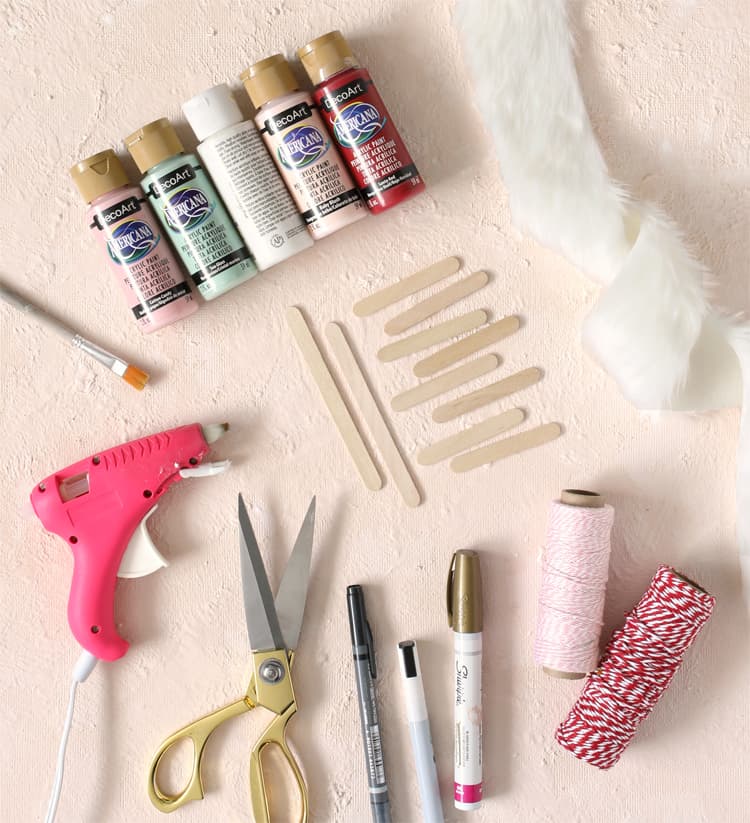
Materials Needed
- 8 Small Craft Sticks (2.5 inches long)
- Two Regular Craft Sticks (4.5 inches long)
- Hot Glue Gun + Glue Sticks
- Craft Paint
- Small Paint Brushes
- Paint Pens (I used white, gold and black)
- White Faux Fur
- Twine, Ribbon or String for Hanging
Paint Colors Used – DecoArt Cotton Candy | Decoart Sea Glass | White | Decoart Baby Blush | DecoArt Santa Red | DecoArt Eucalyptus Leaf
Instructions
Step 1: Begin by gluing the popsicle sticks together as shown in the diagram below.
- Place the two longest sticks side by side.
- Add hot glue to one small craft stick, then place it on top of the two long sticks, centered and with the top edges lined up.
- Add hot glue on either side of the small stick and press two more small sticks down, lining up the ends.
- Glue two small sticks underneath, so they’re even with the long sticks, but attached to the three small sticks in front.
- Place glue along the top edge, then attach three more sticks, lining the bottom edges up so they’re about 1/3 overlapping the other sticks.
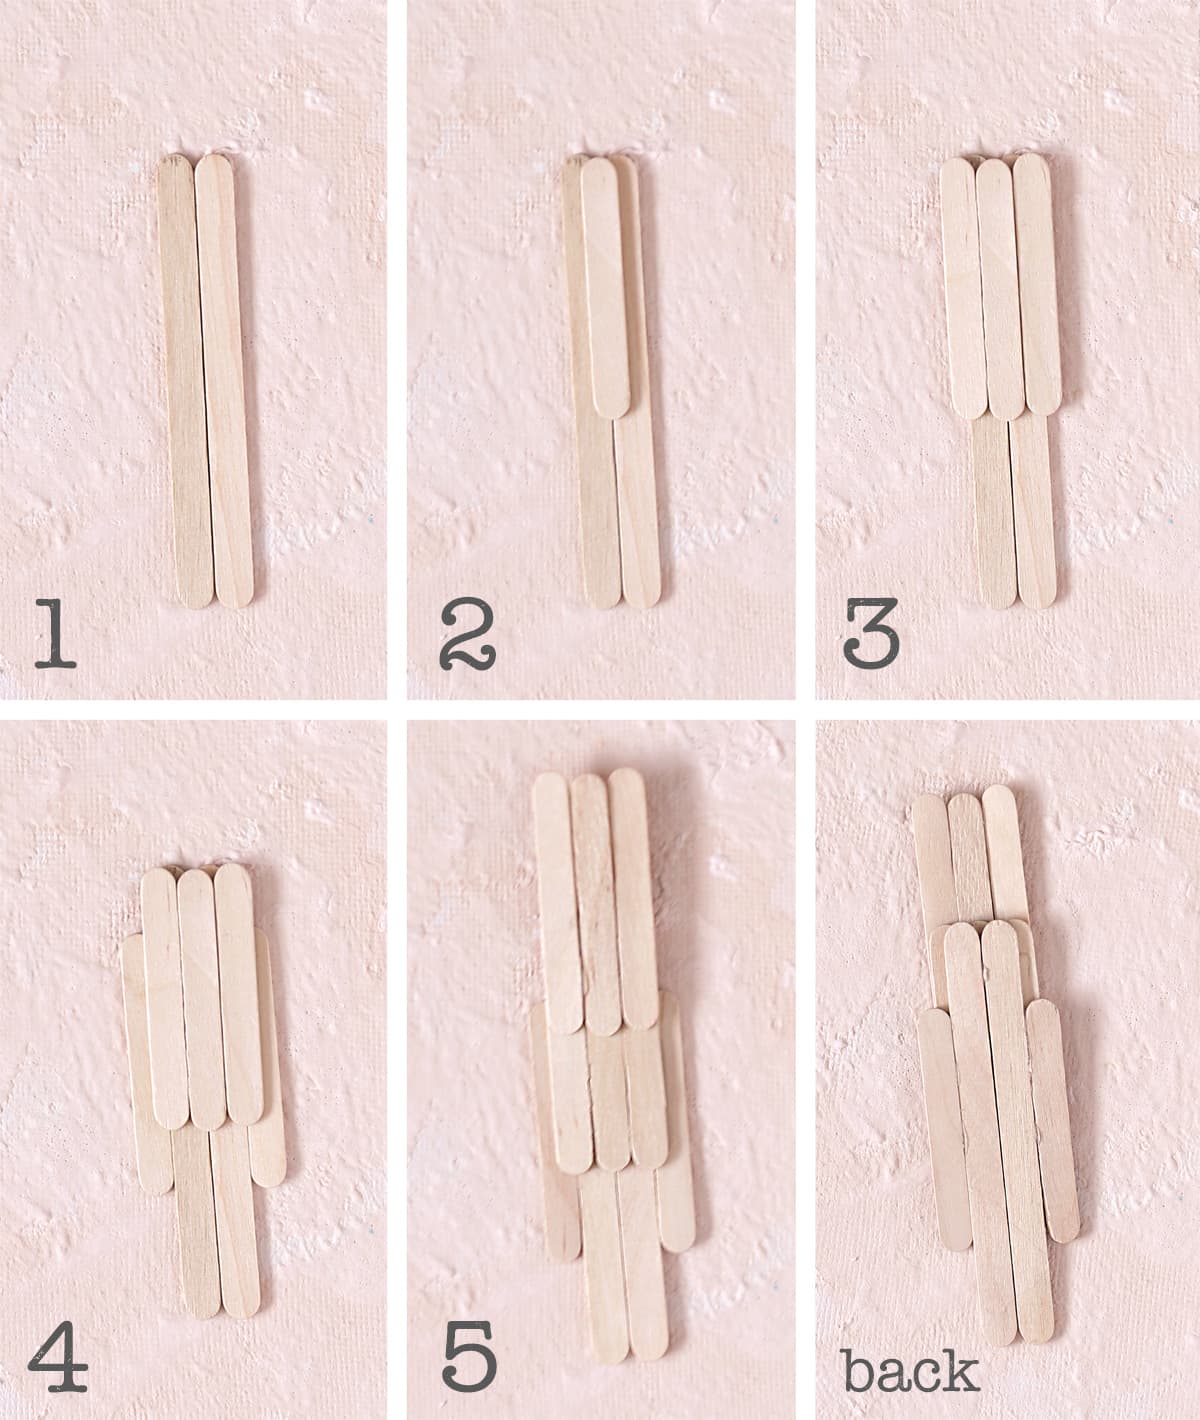
I’ve included a photo of the back of the nutcracker too, so you can see how they’re all placed. The instructions may seem confusing, but if you just lay out your sticks and look at the picture, it’s really not too hard.
Step 2: Once all of the sticks are glued together, it’s time to add some color and personality. Paint the top of the nutcracker to look like his hat, then leave his face area raw wood. Paint the rest of the nutcracker light green, then when that is dry, add dark green sleeves and a curved area to look like a jacket. I meant to leave the tips of the arms raw wood to look like hands, but I forgot, so I used a beige color to paint the hands on.
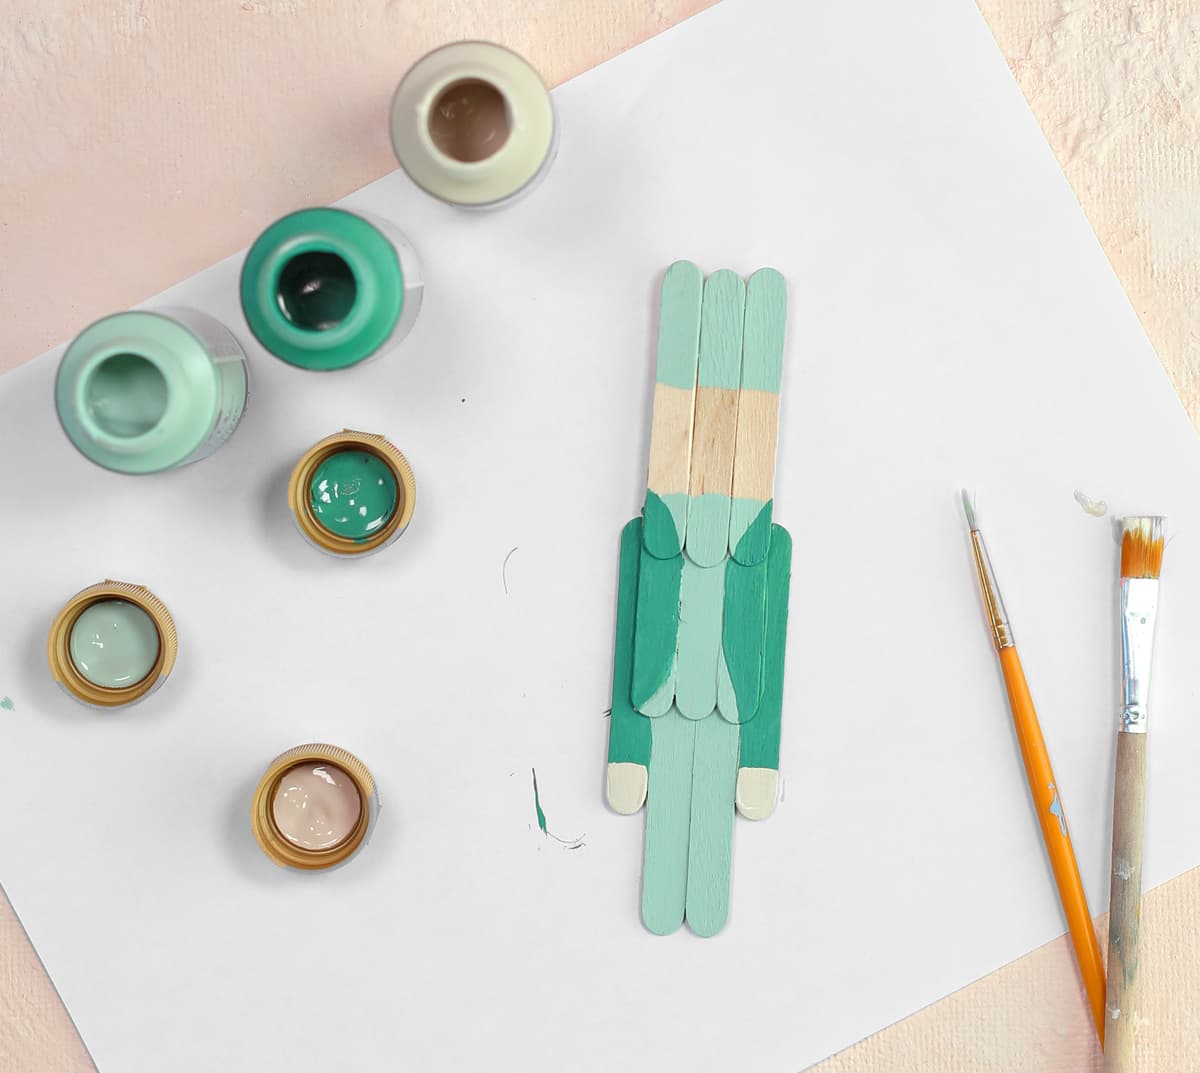
It doesn’t look like much yet, but just wait. We’re about to get to the good part!
Step 3: Using paint pens, add in all the cute details. Add eyes, a nose and a bushy mustache. Then fill in details like sleeve cuffs, hat bands, shoelaces, etc. Have fun with it!
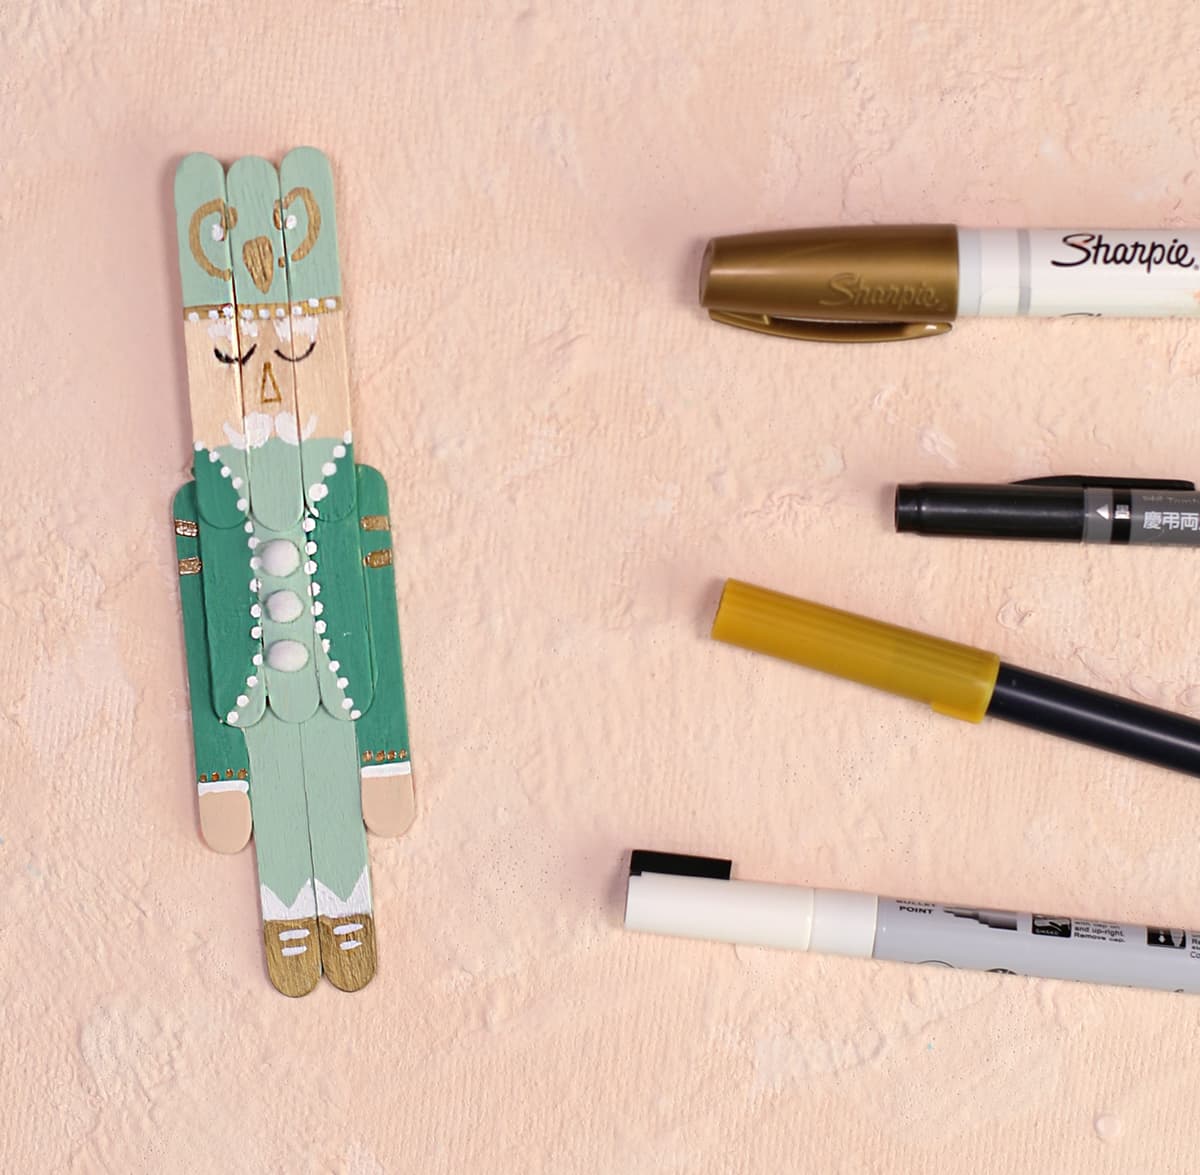
Step 4: Cut tiny little strips of faux fur and hot glue them to the sides of the face area to give the nutcracker some hair.
HELPFUL TIP – If you’ve never crafted with faux fur before, try cutting it from the back side. Slide the tip of your scissors just under the backing fabric so you aren’t actually cutting the fur, just the backing.
Step 5: Use hot glue to attach a twine loop onto the back of nutcracker if you plan to use it as an ornament. If not, you can skip this step.
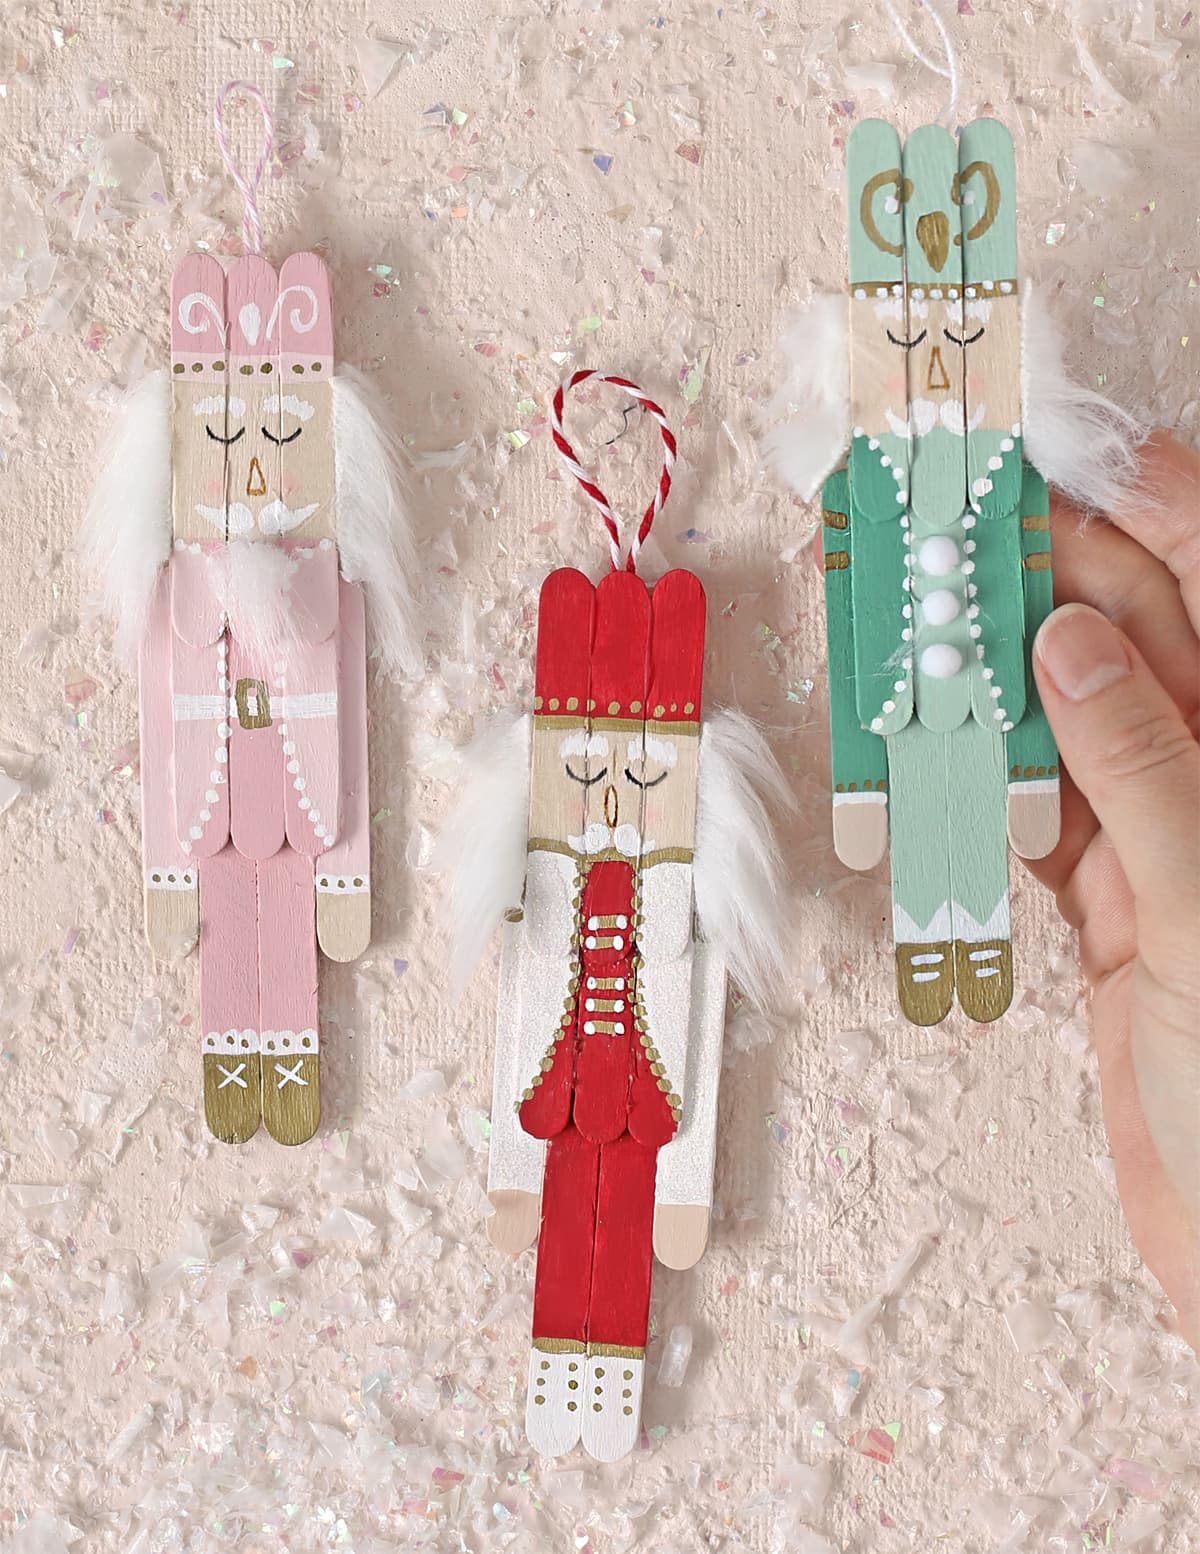
Oh my goodness, I just love these little men. This was seriously so fun to do! It’s all about the details. Just look at them and soak it all in.
Want more fun ideas? Get more popsicle stick Christmas crafts here.

Let’s Get Social
I’m sharing tons of fun ideas on my social channels and I’d love for you to join me there.