This is an update post for the Jeffrey Court Renovation Challenge– where I am attempting to completely remodel our bathroom in just six short weeks. You can catch up with our plans and progress up to this point by reading the posts here:
SEE THE FULL BATHROOM REVEAL HERE!
And don’t forget to vote for my bathroom! It’s super simple… just click on the link below, scroll down until you see my picture, then click vote. It takes ten seconds, but your support means the world! You can vote once per day per device until the competition ends.
It’s been an intense week. We have had SO many long days and late nights working in the bathroom and we are getting T-I-R-E-D! The big deadline is looming and of course nothing is going smoothly. Ha!
The first thing I accomplished this week was painting all of the newly installed wainscoting. And guess what? After all that talk last week about picking paint colors, I made a huuuuuuuge blunder in my choice and for a day the bathroom looked like an Irish pub.
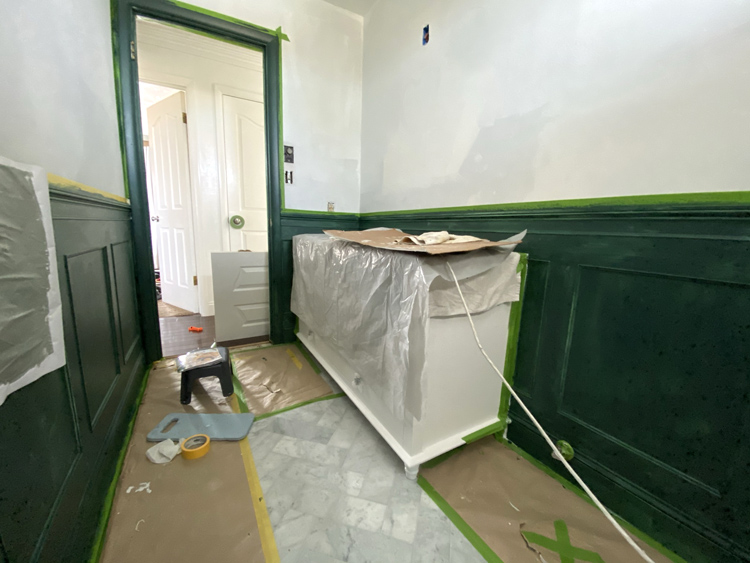
Doh! It was even worse in person!
Here’s what I think happened. I psyched myself out! My original plan was to choose a dusty mid-tone greenish color, but after staring at samples for much too long, I started hating all those muted colors and chose a green that was NOT what I actually had in mind. I strayed from my original vision. Dumb mistake.
Luckily, I went back to one of the very first colors I was drawn to and it ended up being perfect. Meet Sherwin-Williams Acacia Haze:
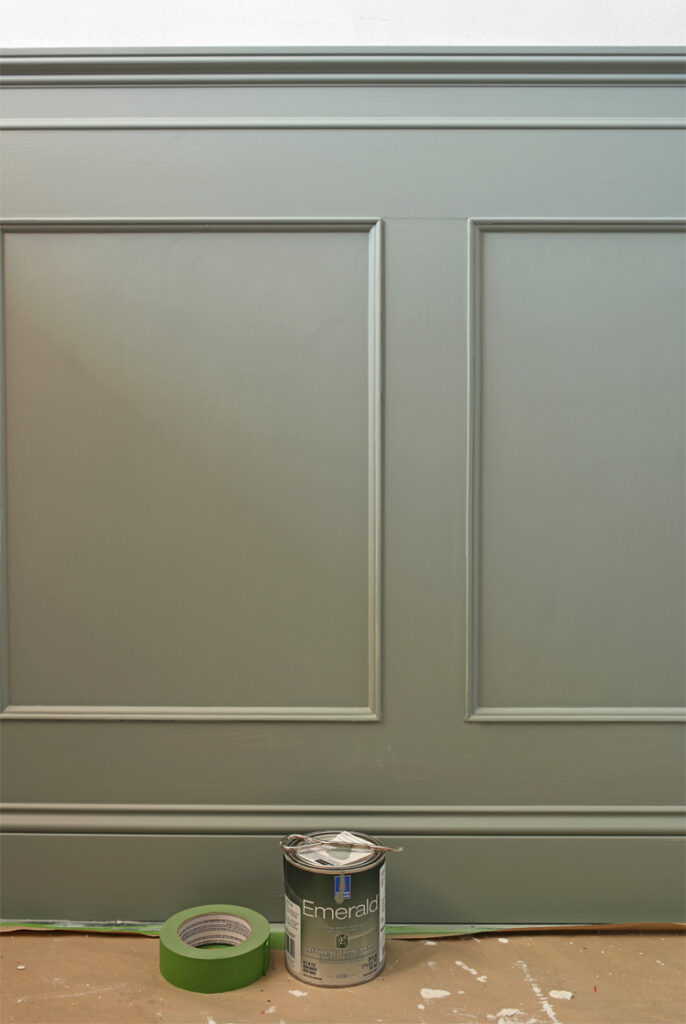
I love it! It is exactly the color I had envisioned from the beginning and it is stunning in person. It feels historic and time-worn but new and fresh at the same time. I guess sometimes you have to choose the wrong thing to recognize when the right thing comes along and I absolutely adore this color.
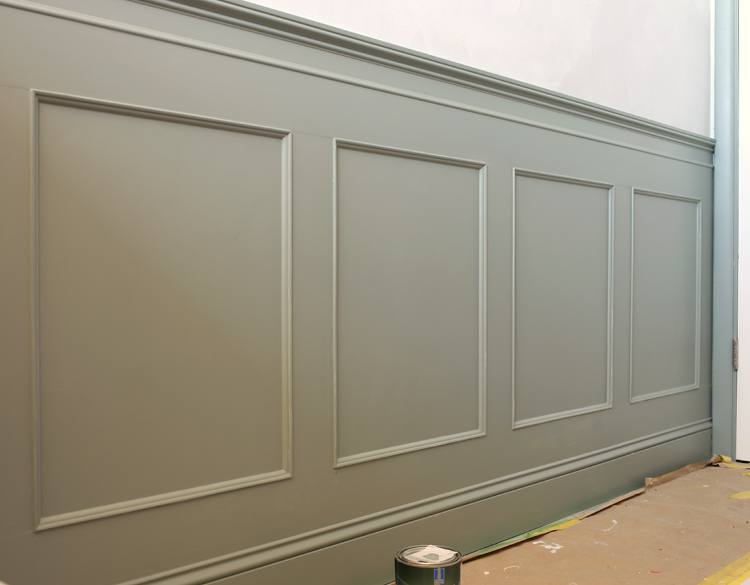
And once again I have to make a plug for Sherwin-Williams Urethane Trim Enamel. I purchased this paint with my own money, by the way… both times since I messed up the color choice! Haha. If you are painting cabinetry, moulding or furniture, just spring for the good paint. I brushed this paint on but because of its miraculous self-leveling properties, there are no brushstrokes to be seen. The finish is flawless. Clip coupons and shop at thrift stores and buy the store brand on everything else but don’t skimp on quality paint. Luckily, it only took 1 quart to paint all of the trim.
The second major accomplishment this week was a last minute addition to our plans and it was super hard to do. We cut a giant hole in our house!
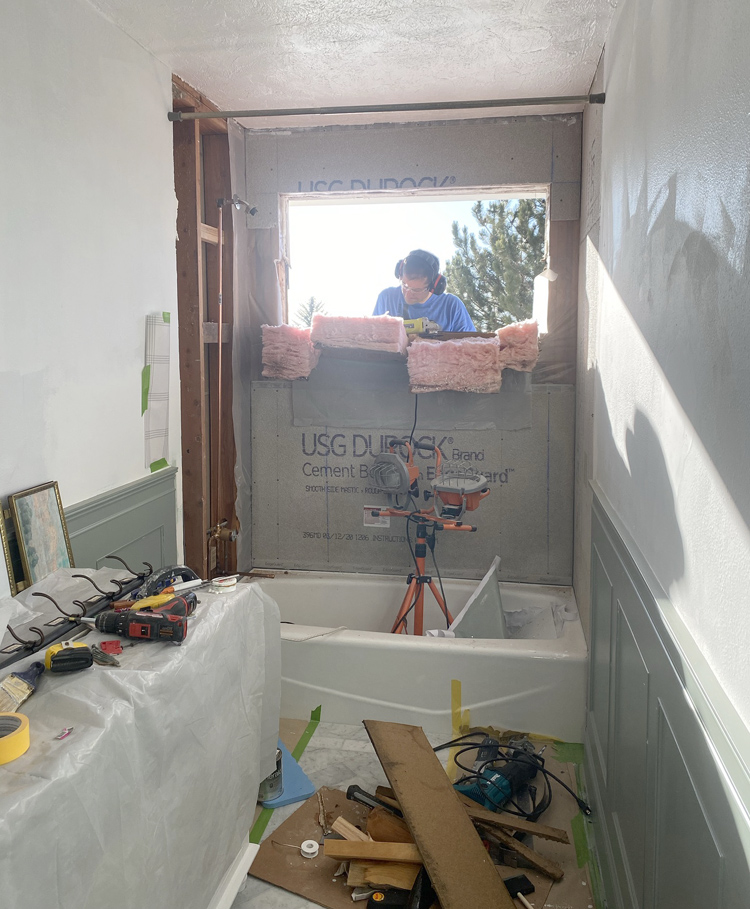
We swapped out our teeny tiny old window for a new, bigger one (the biggest size we could manage that would still keep us from flashing the neighbors while nekked). And it was the best decision EVER.
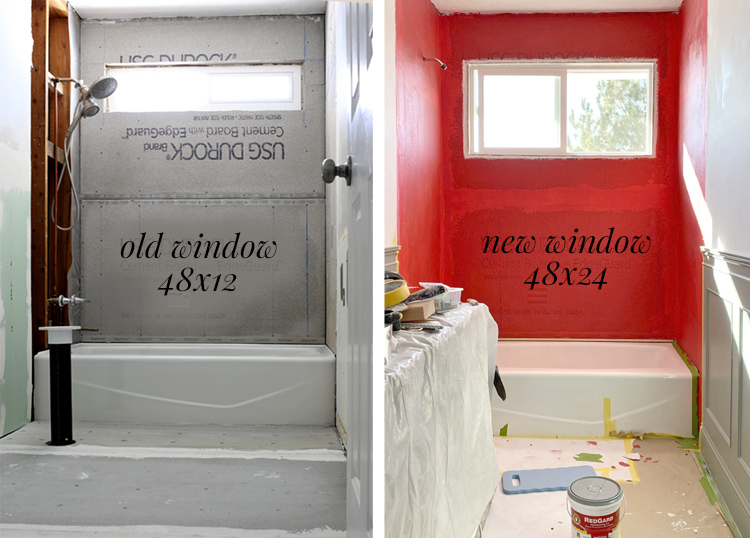
After spending so much time in this room with no lights on thanks to all the remodeling, I quickly realized that the number one flaw in this room was the lack of natural light. On Saturday we were supposed to start tiling the shower surround, so I knew it was my last chance to make the change. I begged and pleaded and watched a bazillion YouTube videos and finally convinced my husband that we could do it. And instead of spending Saturday tiling the shower surround, we installed a new window and I regret nothing. Well, not yet at least. Ask me how I feel the day before the deadline.
I wish I could capture the feeling of all that natural light pouring in. The change is incredible. More than anything else we’ve done, this one change has made the biggest impact hands down. I’m so glad we went for it… and I think after my husband forgets what a horrible job it was, he’ll be glad we did too.
So there’s all the good news.
The bad news is we now have exactly one week to finish our bathroom and it currently looks like this:
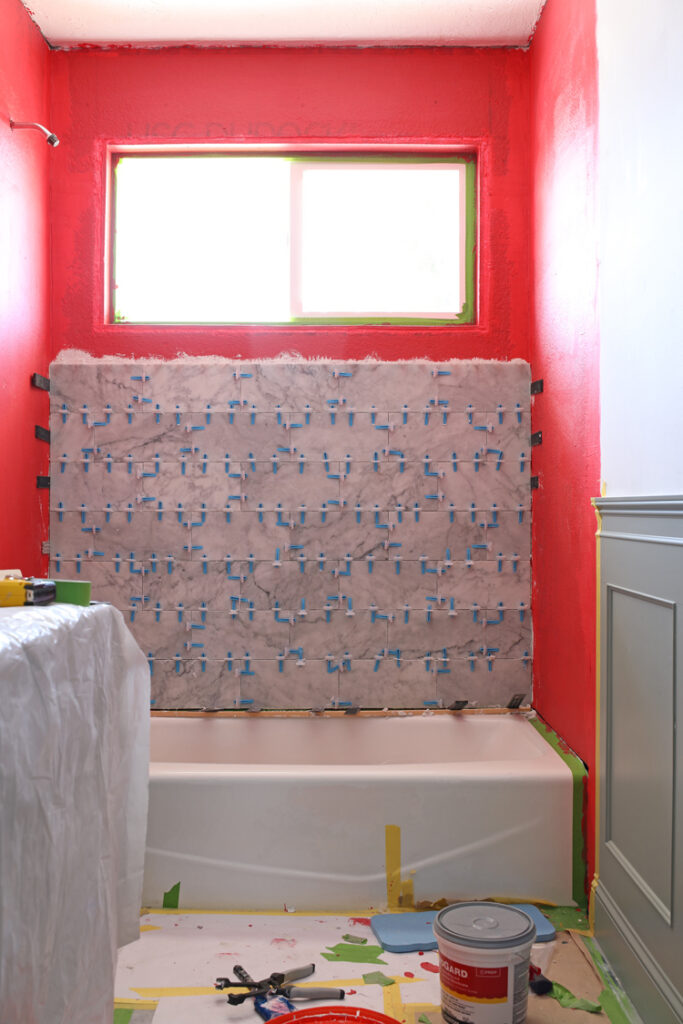
Don’t worry… that garish pinky red color is just the RedGard waterproofing membrane that goes under the tile. I promise I have not lost my mind. But wow does it cast weird colors all over the room! I’ll be really glad when it’s all covered with gorgeous marble tile.
TO-DO LIST:
Remove old tile around tub and showerRemove old tile floorClear out debrisRemove old vanityAdd outlet behind vanityMove light box downRepair drywallRemove toiletClean floor and prepLay down cement boardTape and cement seamsTile floorSeal floorGrout floorNew plumbing valves in showerInstall cement board in shower surroundTape + MudRedgard- Tile shower surround
- Seal shower surround
- Grout shower surround
Install vanityWainscoting wall moldingSand, caulk, prime and paint molding- Wallpaper above wainscoting
- Install new toilet
- Install new vanity faucets and tub/shower faucets
- Install light, mirrors, towel bars, decor, etc.
Come back next week and maybe you’ll see a beautiful finished bathroom. Or maybe you’ll see me weeping myself a lake full of tears as I stress eat curled up in the fetal position. Which do YOU think it will be?

Let’s Get Social
I’m sharing tons of fun ideas on my social channels and I’d love for you to join me there.