It’s Week 2 of the Jeffrey Court Renovation Challenge, a competition where I have to completely renovate a space in my home in just six short weeks. You can catch up on Week 1 here.
Voting is now open! You can vote once per day for the rest of the competition. Scroll down until you see my photo, then click on the button that says “VOTE.” It is that quick! Thank you so, so much for your support!
CLICK HERE TO VOTE.
Let’s do this thing!
If I could sum up this week in one phrase it would be, “Everything takes longer than I expected.” LOL.
I was hoping to start tiling by now, but the prep work is taking foreeeeeeeeeever. Let’s walk through what we’ve accomplished, what we’ve had to change in our plan and why prep work is the key to success for any DIY project (even if it feels like the worst thing ever when you’re doing it).
What We Accomplished:
- Removed old tile from walls and floor
- Cleared out debris
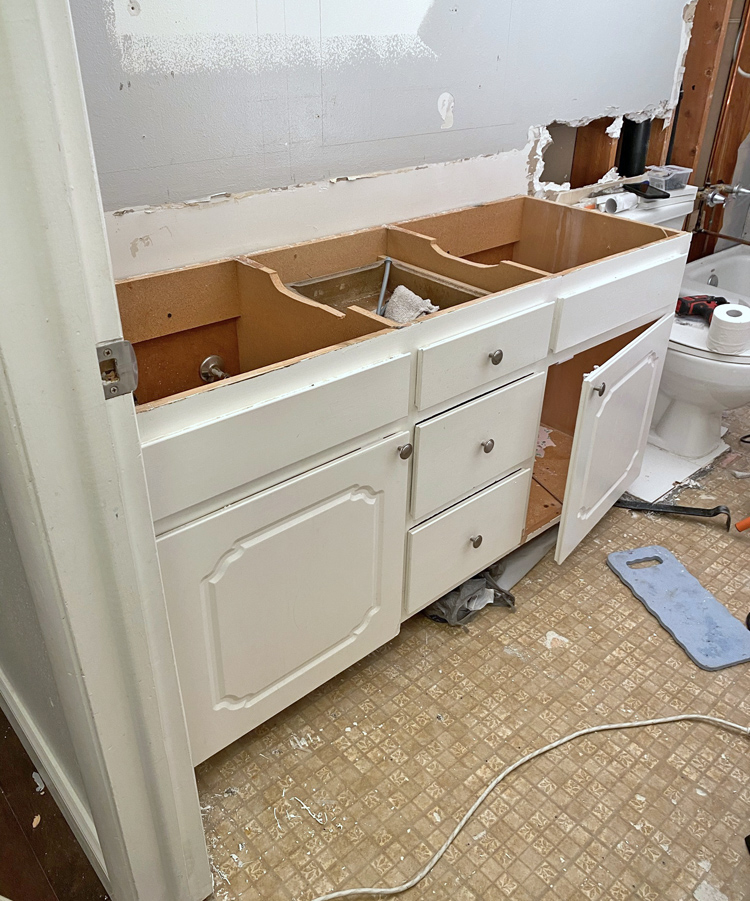
- Removed old vanity
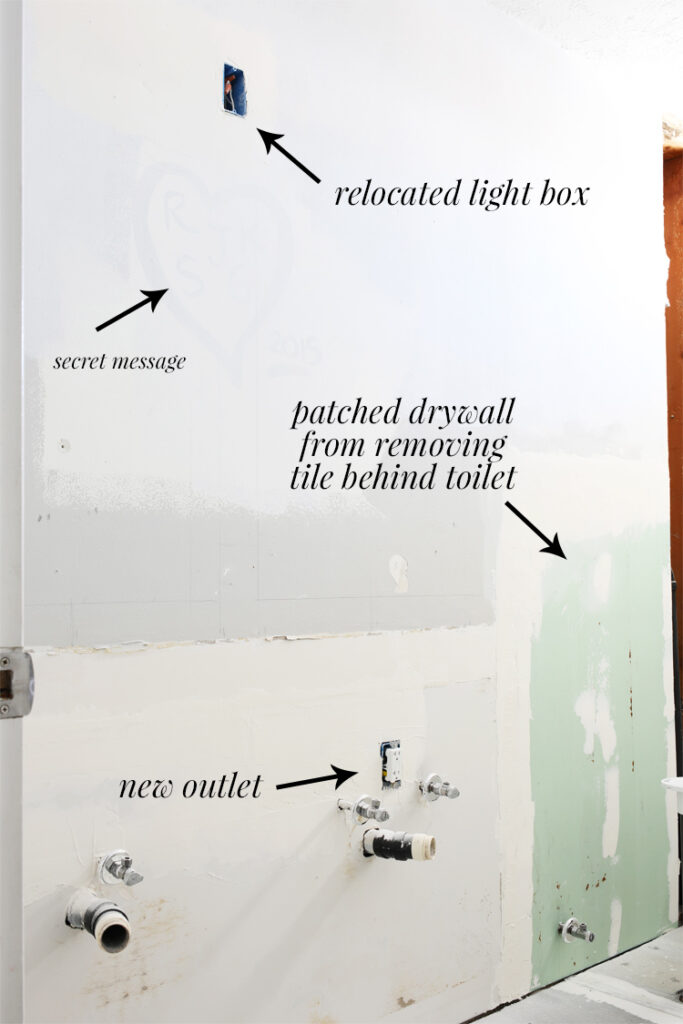
- Added outlet behind vanity
- Moved light box to be centered on new vanity
- Patched drywall + tape + mud
- Removed toilet and replaced old flange
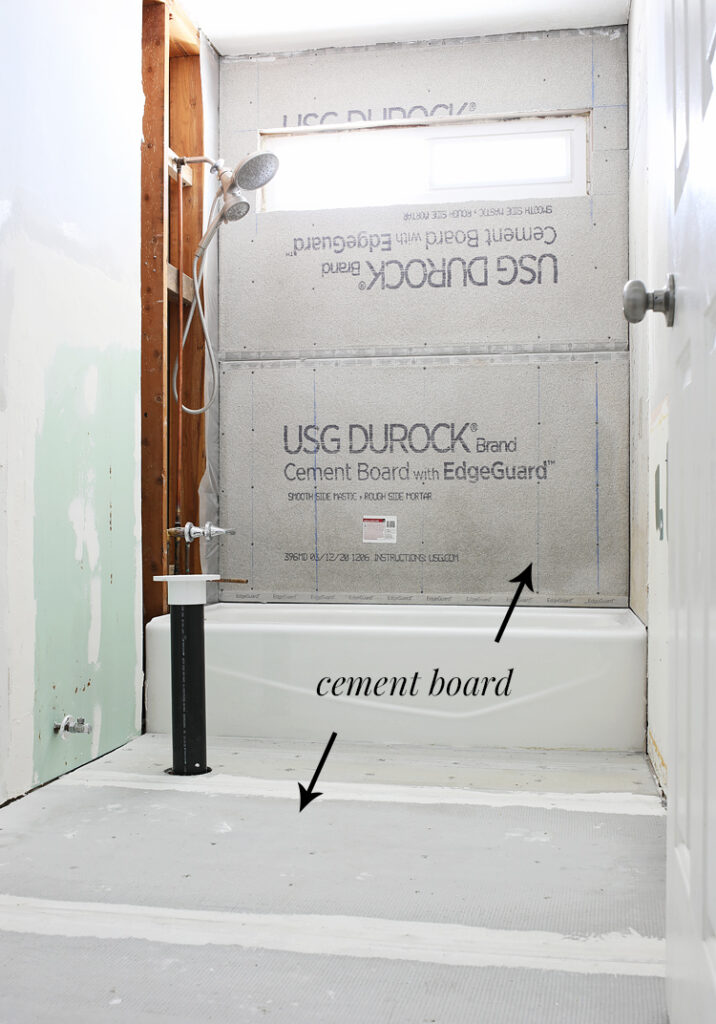
- Prepped floors for tile (cement board + tape + mud)
Demo
Removing the old tile from the shower surround and floor was relatively easy using a pry bar and a hammer. Don’t get me wrong… it took some muscle and it was really messy, but I was able to do most of it myself and only had to call in the big guns (my husband) for a few stubborn floor tiles that just wouldn’t budge.
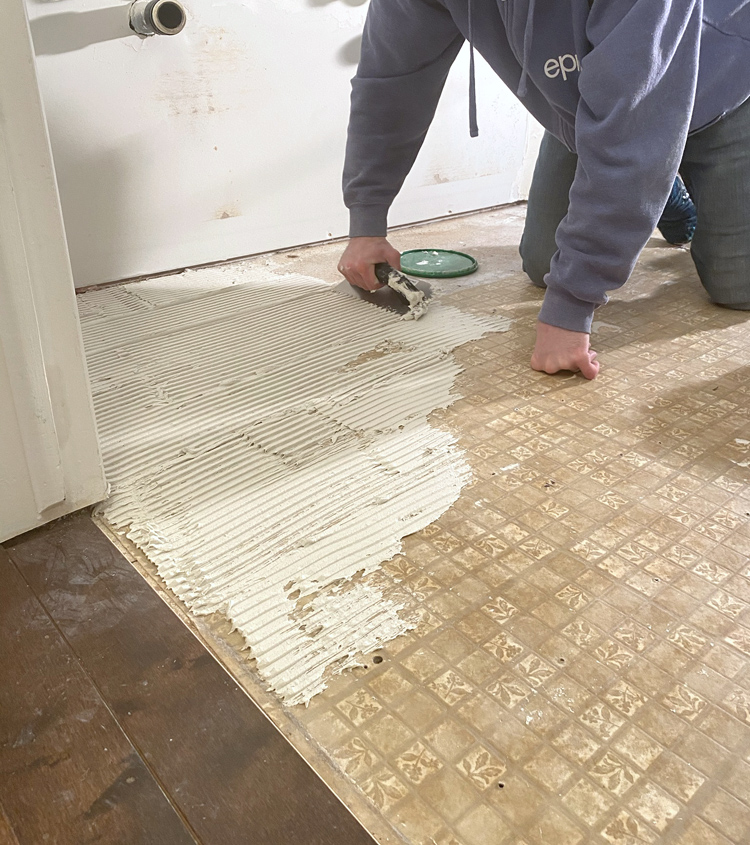
It was pretty fun to find an old linoleum floor under the tile. Brown flowers… so very 80’s.
Removing the old vanity was a two person job for sure. The thing was built out of MDF and weighed a ton, plus it was really securely set into place. We scored around all of the caulk that we could find and removed the countertop, then kept scoring and wiggling and prying until the old gal finally came loose. The old vanity is currently sitting on our back deck because we’re classy like that. I’m hoping to give it away to someone who could use it.

Electrical and Wall Prep
My design plan included two vanity lights– one above each mirror centered on the two sinks of the new vanity. Well, that plan was quickly nixed. With the way our studs lined up, we would have had to tear out the entire wall and re-structure the framework inside the walls to mount new electrical boxes in the right places. NO THANKS. I had already ordered the two sconces, so I sold them on Facebook and ordered a new one that we will center between the two mirrors. This only required a teeny bit of cutting into the drywall to move the light down and over a bit and the style of the new light is similar, so I can live with the change.
This is one of those instances where it would be easy to achieve a certain look in new construction but it’s just not worth it sometimes in a remodel. It happens.
The new vanity we bought has a built in outlet in a drawer so I’ll be able to leave my hair dryer plugged in. Cool, huh? In order for that to work, we had to install an outlet in the wall behind the vanity. So more drywall cutting, mudding and sanding. I’m waiting for mud to dry so I can do one final sanding, but otherwise the walls are prepped!

Floor + Wall Prep for Tile
Confession: The only tiling I’ve ever done was the backsplash in our kitchen. So this week I have spent a ton of time researching how to install tile floors and shower surrounds. Not going to lie… I’m nervous and don’t want to mess it up! Here are the resources I found most helpful:
- How To Tile A Shower Wall | The Home Depot
- Tile Floor Installation: How to Prepare and Lay Tile | The Home Depot
- How to Tile A Shower Video |
- How to Tile Floors for Beginners Video
- Schluter DITRA Uncoupling Membrane Underlayment Video
- How to Trowel Thinset Correctly Video | Watch this one! It will teach you the correct way to use a trowel and why it needs to be done that way.
- Thinset, Mortar and Grout Shopping List | Enter your project specifics and the program will tell you which products you should use. Super helpful because there are dozens of different types of mortar.
One of the main points I gleaned from my hours of YouTube research is that the success or failure of your tile job comes down to the prep work and using the proper products.
Get the underlayment right and you’re most of the way there.
So we have been meticulous in our prep work.
We chose to use cement board on our floors vs. the Schluter Ditra because we felt our subfloors needed the extra rigidity. After researching the Schluter product, though, I think the stuff is genius and will definitely keep it in mind if we ever do tile again.

The previous tile job was also installed using cement board and held up really well, so we installed the cement board over the old linoleum again. We cleaned everything thoroughly, troweled on a layer of thinset according to the instructions on the bag, then set the cement board in place, screwed it down and let it dry. Yesterday we came back and taped + mudded the seams and made sure everything was just as secure and level as could be.

We are still waiting for our plumbing parts to come in the mail, so we haven’t been able to finish up the shower surround prep. Once the plumbing is installed, we’ll add the cement board to the final wall, tape + mud the joints, then paint on RedGard, a waterproofing membrane that also helps prevent cracks.
I will be starting on the floor tile as soon as the mud is dry and I can’t wait to finally get to some of the pretty parts of the job. Come back next week to check in! Exciting things are happening!

Let’s Get Social
I’m sharing tons of fun ideas on my social channels and I’d love for you to join me there.