Learn how to make screen print stencils at home using the IKONART screen printing stencil kit.
If you’re a crafter, you’ve probably used your share of stencils. But today I’m going to show you the coolest new crafting technology that will change the way you stencil forever. Say goodbye to plastic and vinyl stencils, because the IKONART screen print stencils are AMAZING!
This post is sponsored by IKONART Stencils. All opinions and ideas are my own. Affiliate links may be used.
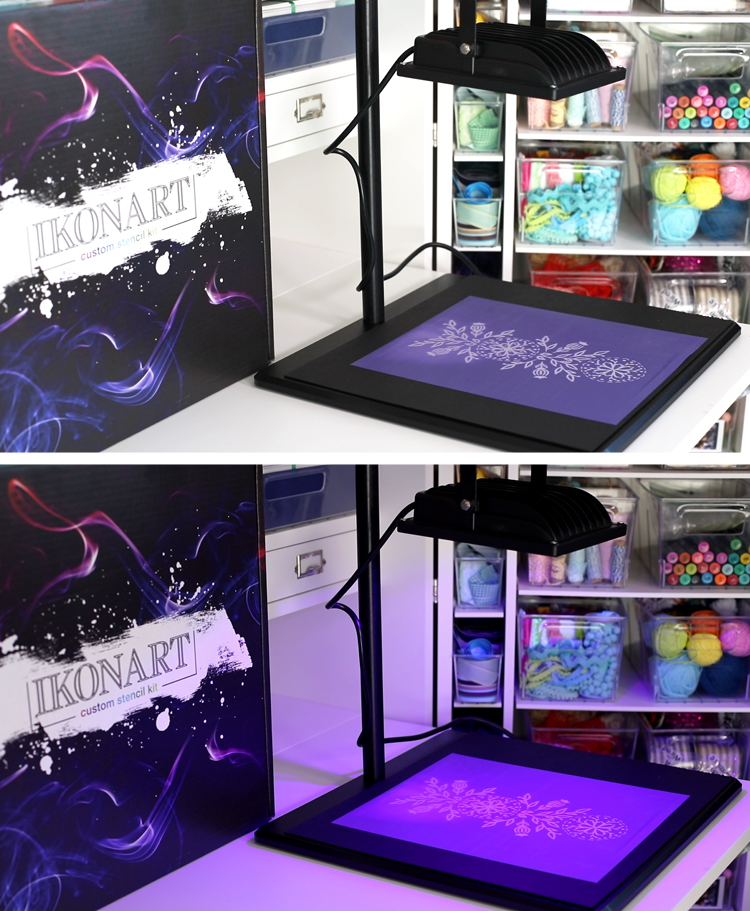
IKONART stencils use special light-sensitive materials that change when exposed to a UV light. The part of the design you print in black ink washes out to reveal a fine mesh for screen printing, while the surrounding part of the stencil becomes a sturdy plastic.
The benefits of IKONART Stencils:
- Completely customizable (If you can print it, you can turn it into a stencil!!)
- Reusable
- No weeding
- No transfer tape
- No “bridges” needed
- Can print “islands”
- Works on fabric, metal, wood, glass and many other surfaces
- Can be used with any type of water-based paint
- Repositionable
- Detailed designs
Isn’t that just amazing!?! I’m telling you, I’ll probably never use a traditional stencil again! Yes, it’s a little pricey, but if you are a small shop owner or a hard core crafter, it’s worth it for the reusability and design perks. Those details though. *heart eyes*
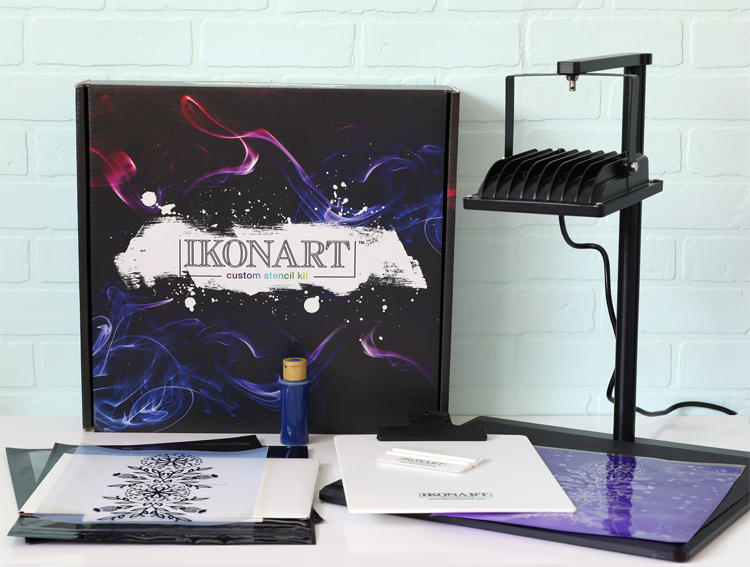
The IKONART Custom Stencil Kit comes with everything you need to start making projects.
Here’s what’s included in the box:
- Exposure Stand
- UV LED Light
- IKONART Stencil Film (10″ x 12″ 5-Sheet Pack)
- Inkjet Printer Film (8.5″ x 11″ 5-Sheet Pack)
- Laser Printer Film (8.5″ x 11″ 5-Sheet Pack)
- IKONART Clipboard
- IKONART Plastic Squeegee
- Exposure Stand Setup Guide
- User Guide
I was also able to score us a discount code. Woohoo! Head to ikonartstencil.com and type in THECRAFTPATCH at checkout to receive 15% off your entire order.
Let’s walk through a project together so you can see the whole process from start to finish.
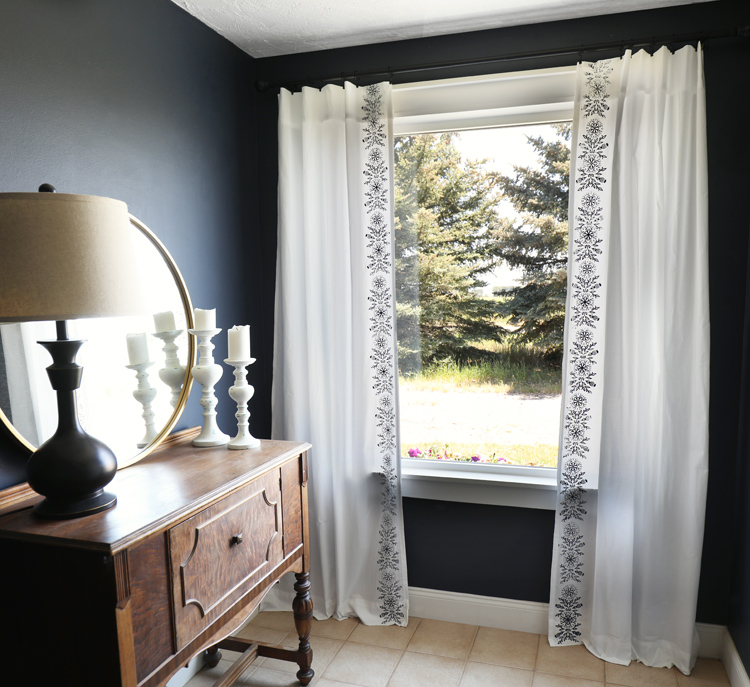
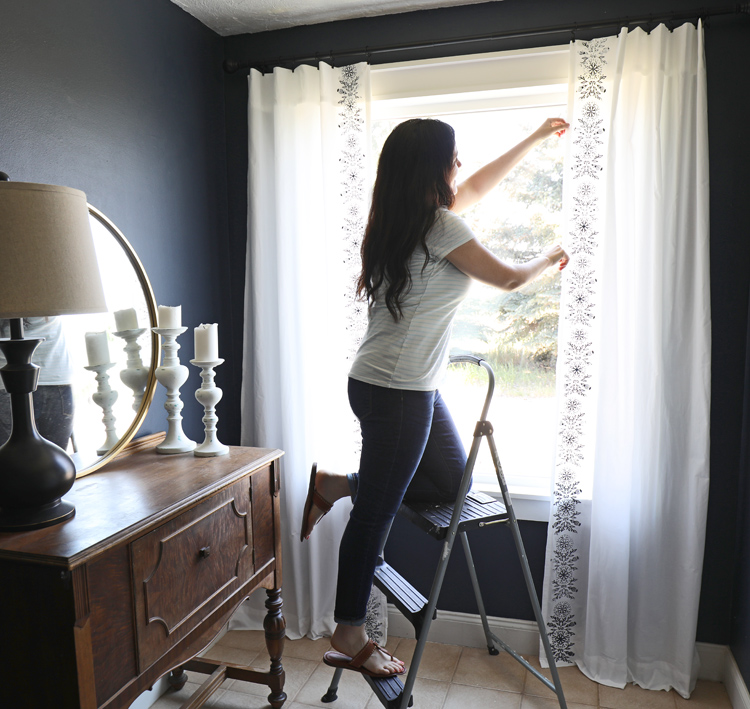
I’m going to be stenciling some curtains today. I fell in love with a pair from Anthropologie that were $150 per panel (ouch!), and then to add insult to injury, they sold out. I kept searching for other curtains I loved, but I couldn’t get those dang Anthro curtains out of my mind. So I decided to make my own DIY version.
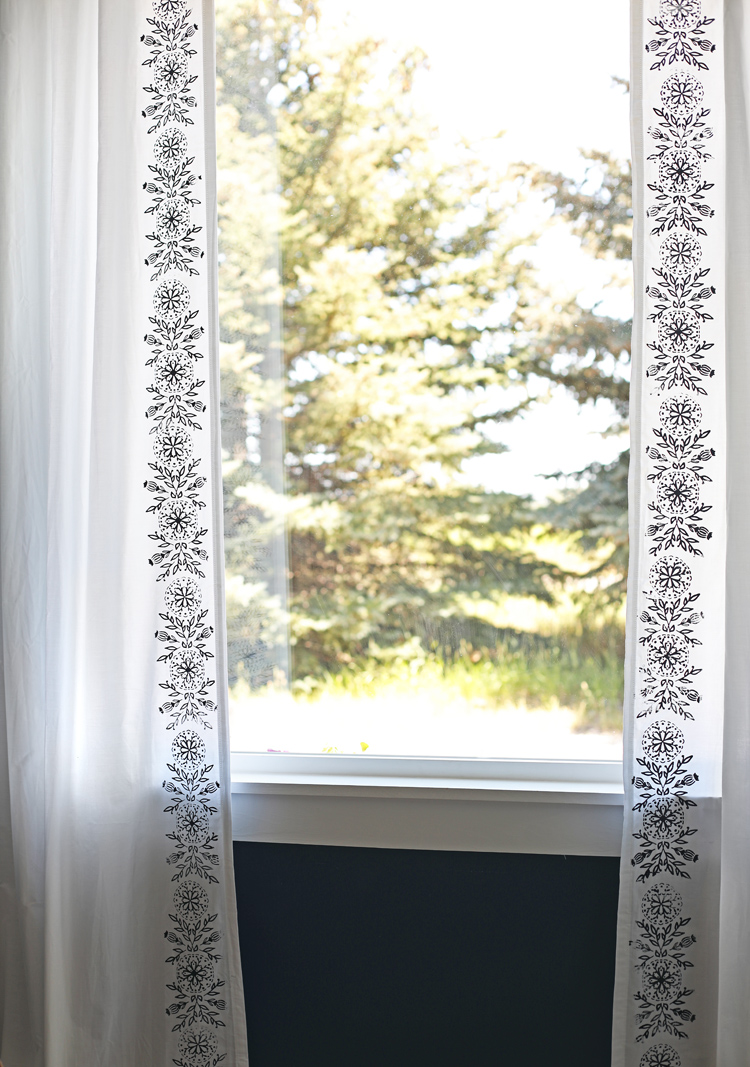
First, I created a Scandinavian inspired floral design to use. If you’re interested, you can download the design file here. If you are on a work or school district computer, you probably won’t be able to open the file. Try again at home.
I’ve broken down each step, but you can also just skip to the video below.
Instructions
Step 1: Print your design onto the PRINTER FILM that’s included in the kit. Films designed for both laser and inkjet printers are both included in the kit and once you use those, you can order whichever type works with your printer.
Step 2: Set up the UV light on a sturdy table, then add the black cardstock to the base area. Place the stencil film shiny side down onto the cardstock. Place your artwork on top of that, making sure you can read it if it’s a one-way design.Top everything with the clear exposure sheet included in the film pack. Turn on the UV light and leave it on for 35 seconds for inkjet printed designs and 30 seconds for laser printed designs.
Step 3: After exposure, you won’t be able to see your printed design right away. Attach the stencil film to the included clipboard and wash the stencil with a spray nozzle in warm or hot water. Keep washing until the design magically appears and is completely clear and crisp.
Step 4: Gently blot the stencil with a paper towel, then hang it to dry for about 45 minutes. When the IKONART stencil film is completely dry, place it back under the light for 60 seconds to cure. This increases the durability of the stencil.
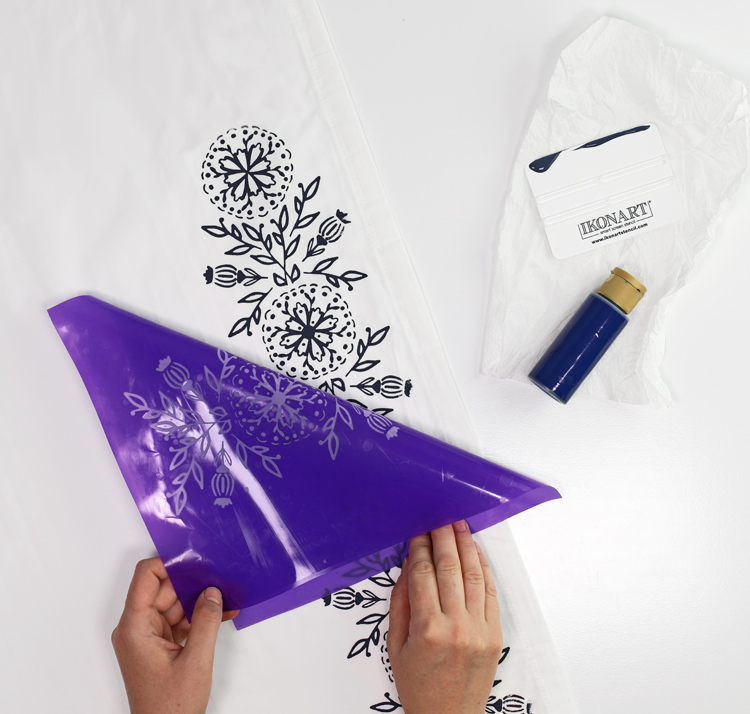
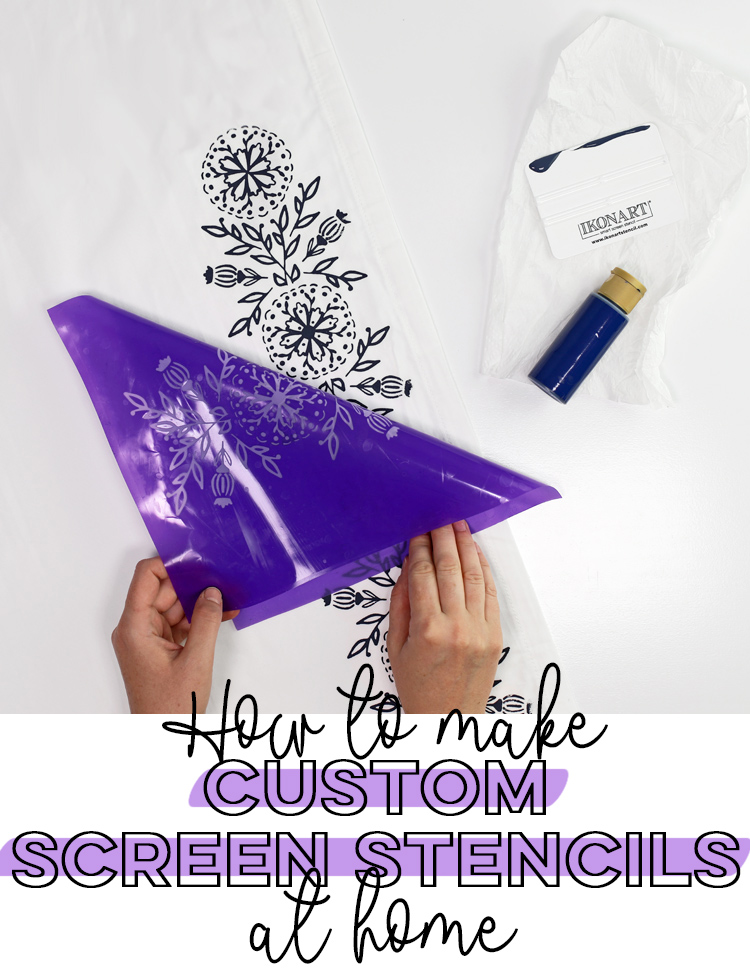
Step 5: Now comes the fun part. Let’s start stenciling!! Remove the clear, shiny carrier sheet from the back of the stencil and save it for later. Place the stencil onto your project sticky side down. Dab a thin line of paint (I just used regular acrylic craft paint) along one edge of the design, then use the squeegee to scrape the paint across the design. Make sure all of it gets covered in paint. I had a few spots on my curtains where I didn’t scrape the paint through the mesh well enough and the design looked a little faded, but oh well!
For this particular project, I wanted a repeating design all along the border of these curtains, so I carefully peeled up the stencil, repositioned it and repeated the process again and again. And the stencil worked great, even though I didn’t press it down as much as I did the first time.
Watch this technology in action in this 3 minute video. It’s so cool!
IKONART Screen Stencil Video Tutorial
I could hardly wait for the paint to dry so I could hang up my brand new curtains.
They totally captured the same vibe as the inspiration curtains and I loooooooove them so much! I made my curtains from a $10 flat sheet cut in half down the middle. I already had the paint, so I saved $290 on this one project… so the stencil has already paid for itself. Or at least that’s what I told my husband. LOL.
After your project is completed, you can wash the stencil, reattach it to the clear carrier sheet and reuse it again another day.
How to Clean the Stencil for Reuse
- Attach the stencil to the clipboard and rinse the paint off the surface. I just rubbed it gently with my fingers until it looked clean.
- Place the stencil sticky-side-up on a flat surface and re-apply the carrier sheet that you set aside from earlier.
- Use the squeegee to remove excess water and air bubbles. Allow to dry completely.
I have to say, I am so impressed with the IKONART stencil kit. It made it so easy and the finished product is so detailed and pretty. There’s no way I could have done a design like this with a vinyl or plastic stencil.
Don’t forget the code THECRAFTPATCH at checkout to get 15% off your order. Visit ikonartstencil.com.
Like this project? Save it for later by pinning the image below!

Comments & Reviews
1) Do you have to heat set the ink after it dries? I use chalk paste and chalk ink right now. just received my kit
2) hearing different things about the designs. do the designs have to be a .svg file or can they be .png?
3) I have a laser printer….also hearing different things about settings….be sure on glossy or high gloss. is there a best practice for this?
4) I do own an old brother inkjet I will get out just to use the inkjet film that came with the kit…same question on settings and file.
Thank you for any additional advice.
1) If it is an item that will go in the wash, I recommend heat setting. It only takes a few minutes but really helps the paint last long-term.
2) It doesn’t matter what type of file the design is as long as you can print it from your home computer.
3) 4) Follow the instructions on the Ikonart website exactly. They have written it all out so clearly.