Make these oversized Christmas presents to decorate outside this Christmas season. They’re waterproof and they light up!
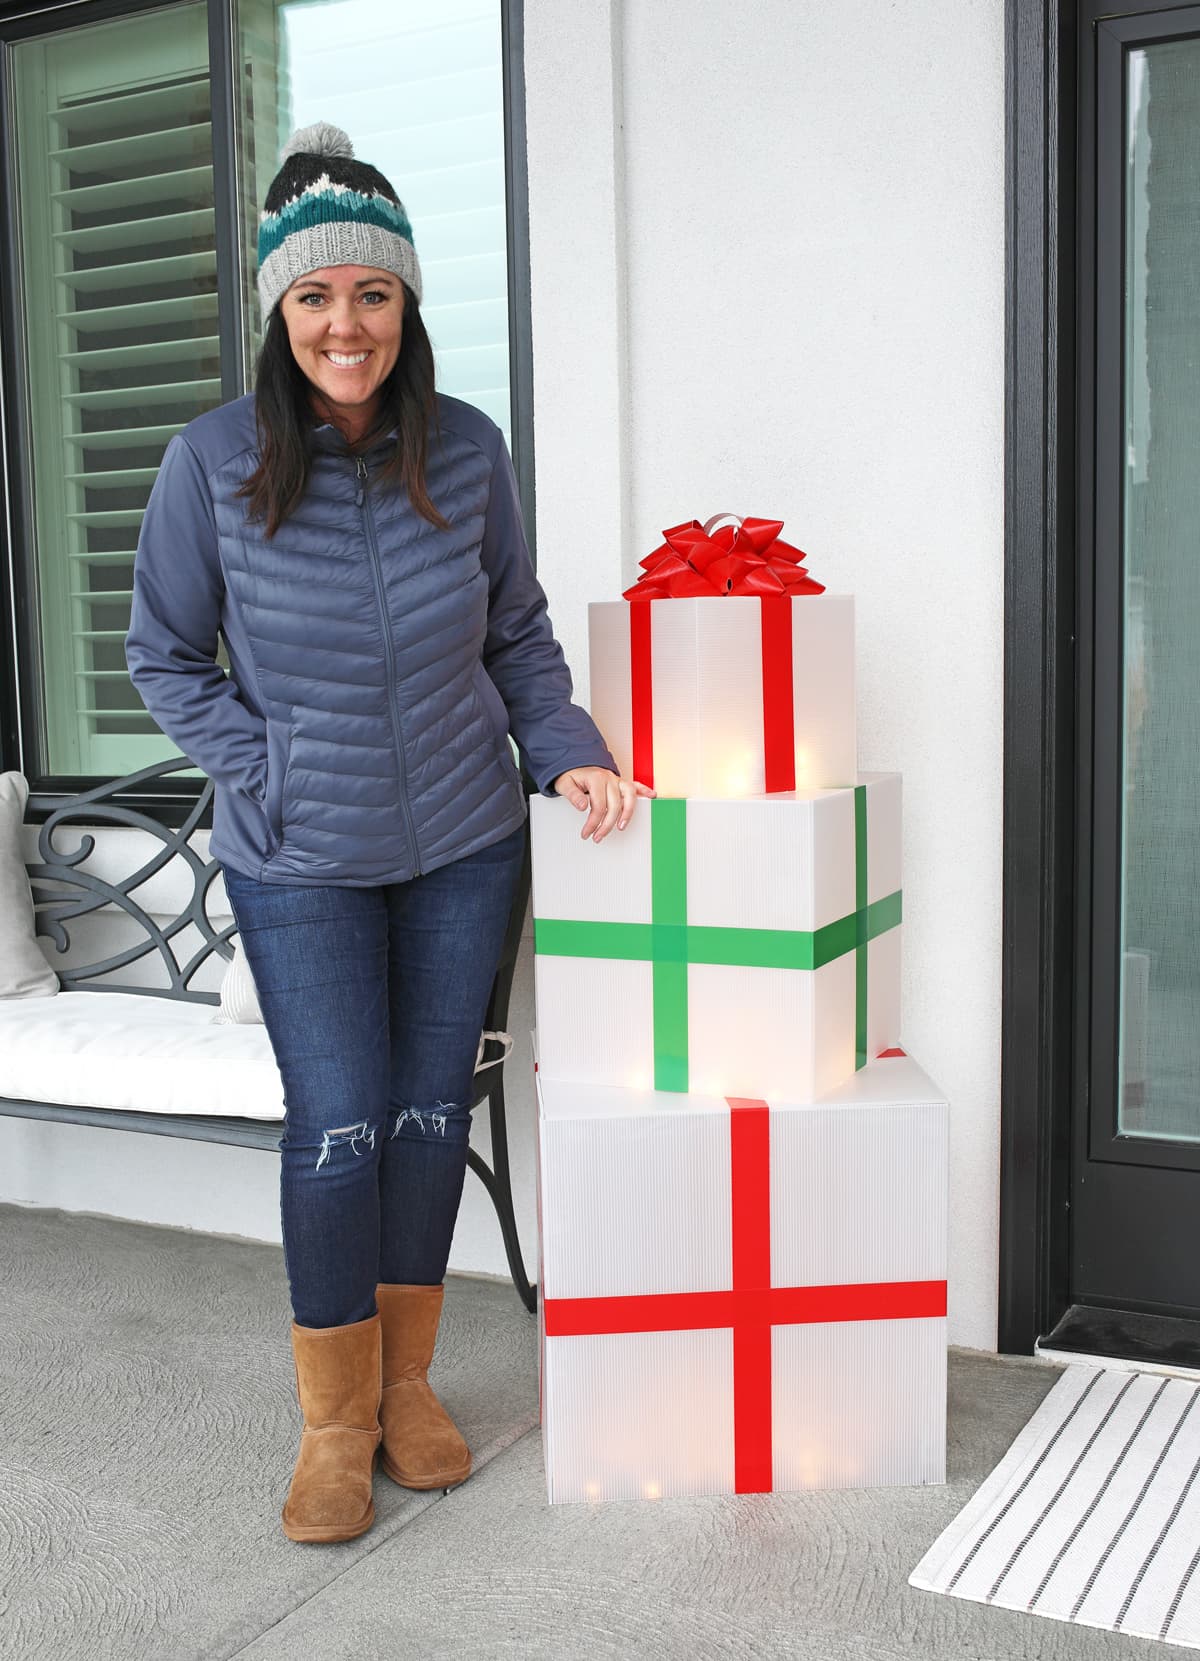
It’s super fun to decorate outside for Christmas. I really wanted to make a big stack of Christmas presents to use as a holiday decoration, but I wanted something waterproof that would hold up to lots of rain and snow. Well, I figured out a way!
This post is sponsored by Duck Brand. All ideas and opinions are my own.
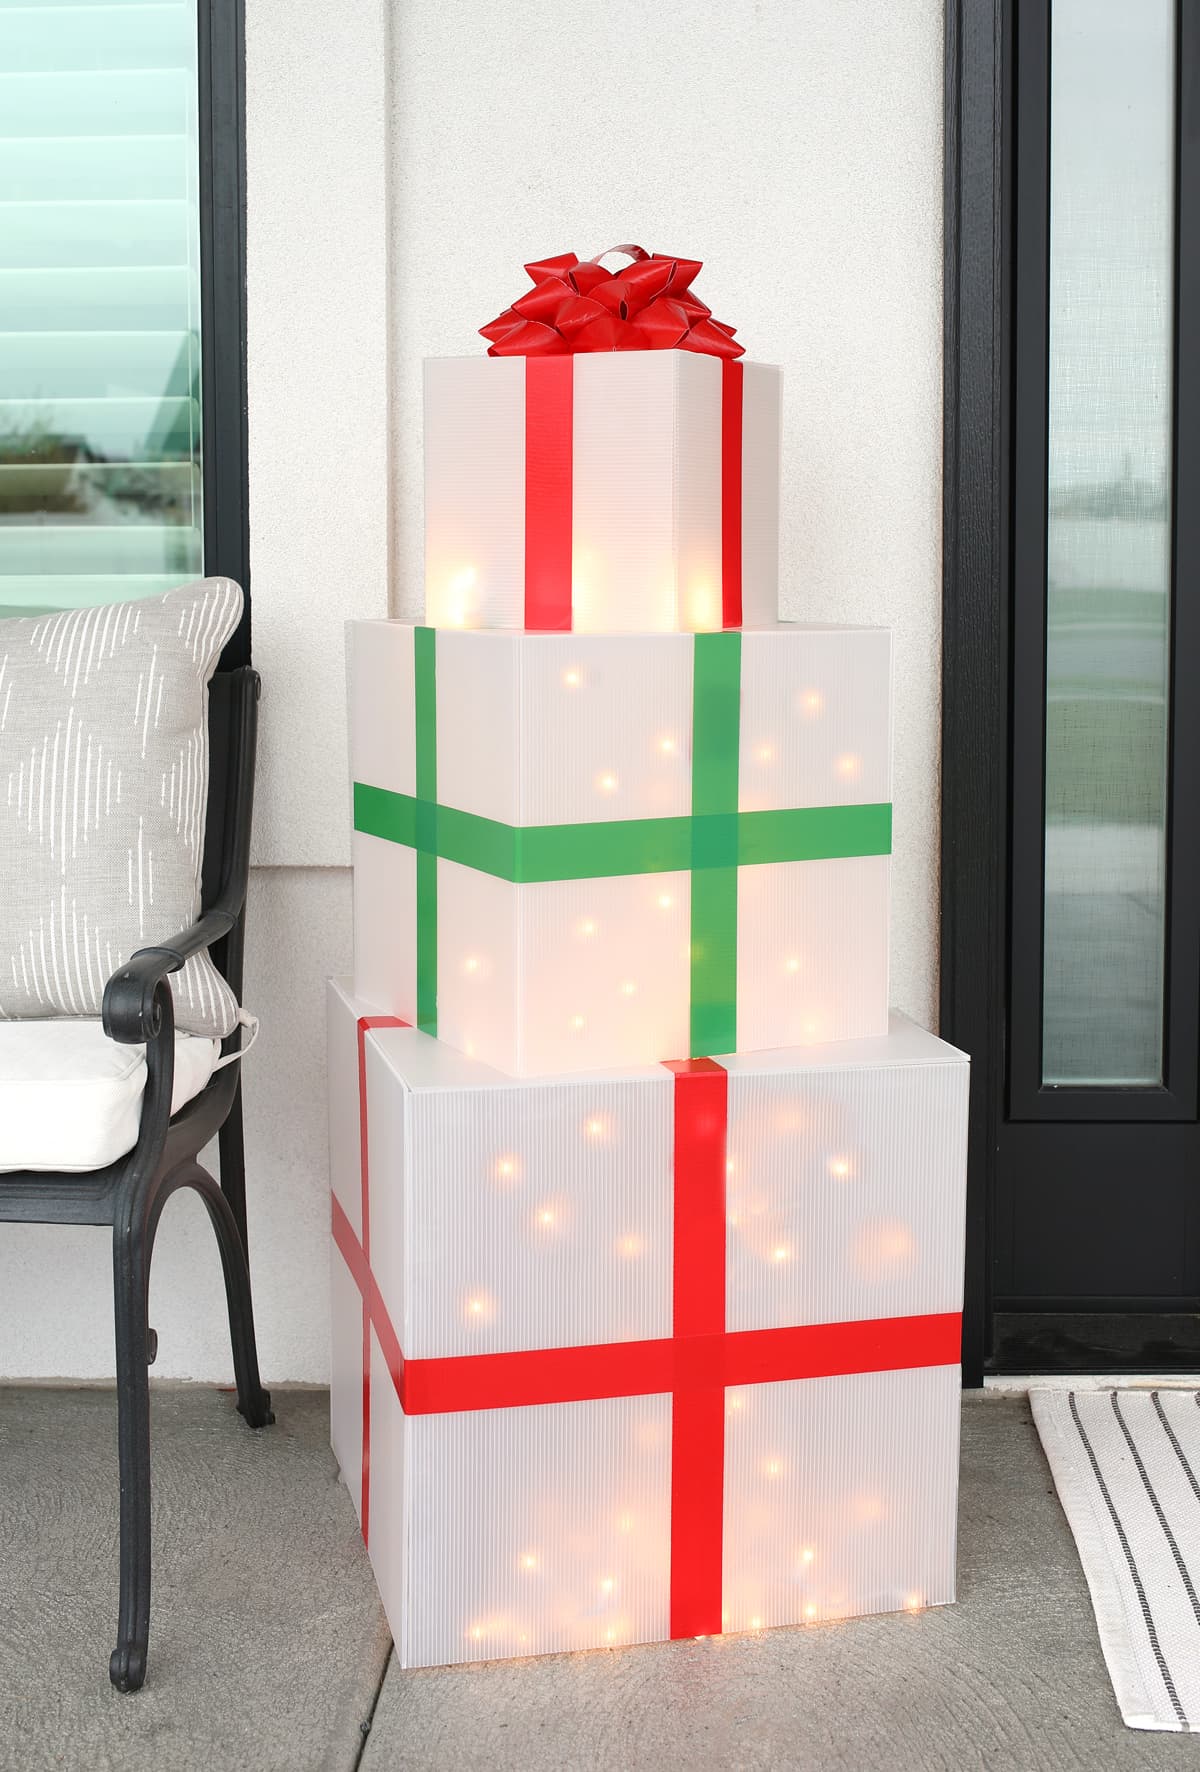
Today I’m going to show you how to make these awesome outdoor Christmas decorations. Stacked together, they are about 4 feet tall and there are lights inside, so at night they glow. They turned out so cute!
To make them, you will need:
Materials Needed
- Color Duck Tape® (Red, Green, Silver, and/or Gold)
- Transparent Corrugated Plastic Board (8 pieces total)
- Duck Max Strength® Packing Tape – Clear
- White LED Christmas Lights x 3 Strands *
- Utility Knife
- Ruler
- Stapler
I found the corrugated plastic board at Michaels a few years back and have been looking for an excuse to make something out of it ever since. This stuff is so cool! It’s thick and corrugated like cardboard, but made out of plastic so it’s weatherproof. It comes in white, black and transparent. I waited to buy it until it went on sale.
* Please be sure to use LED lights, not incandescent lights. This will prevent potential overheating.
Instructions
Step 1: Cut the plastic boards to size. You need 5 equal squares for each present box. The board is 20″x30″ so I made the biggest box 20″, the middle box 15″ and the smallest box 10 inches. If you save the excess from cutting the largest squares, you can use those pieces to make the smaller squares, which will reduce the number of boards you have to purchase.
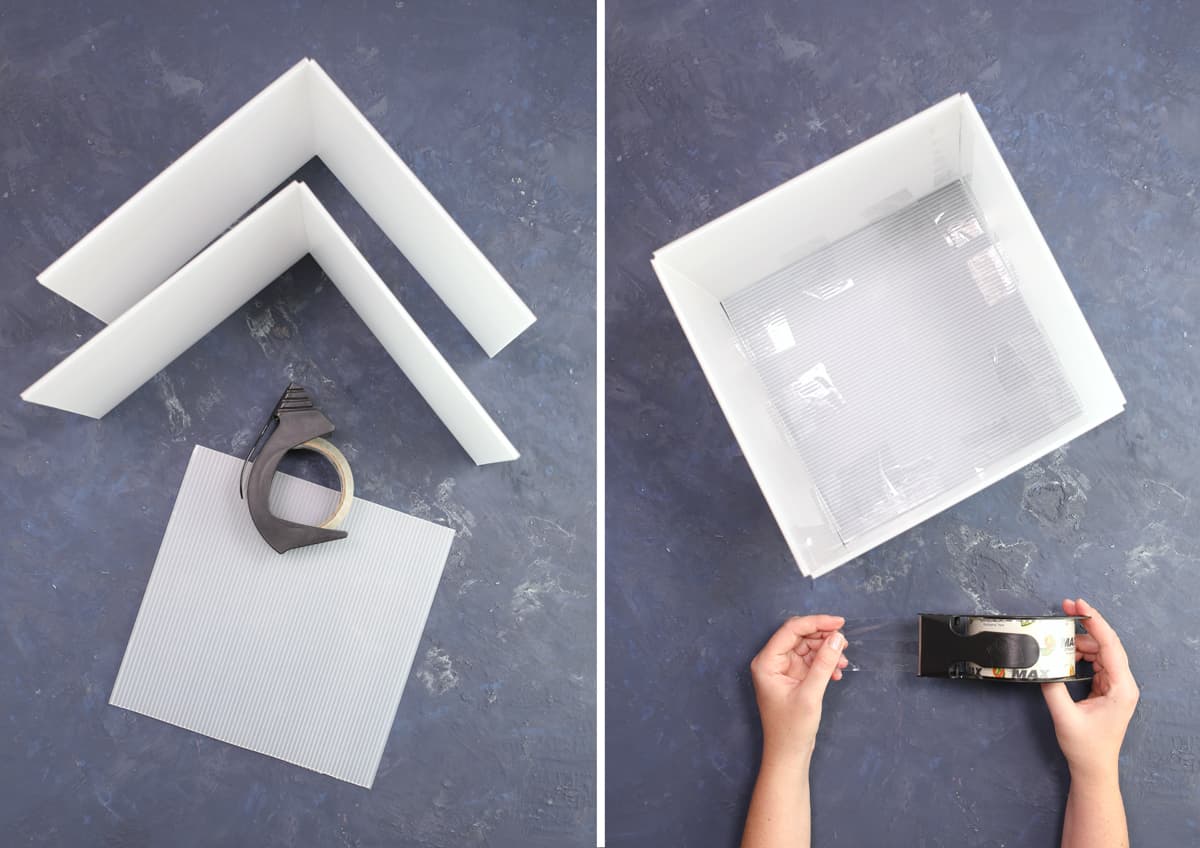
Step 2: Use packing tape to attach the 5 squares together to form a cube with one open side. I loved using the Max Strength tape. That stuff is strong! Repeat for all three cubes.
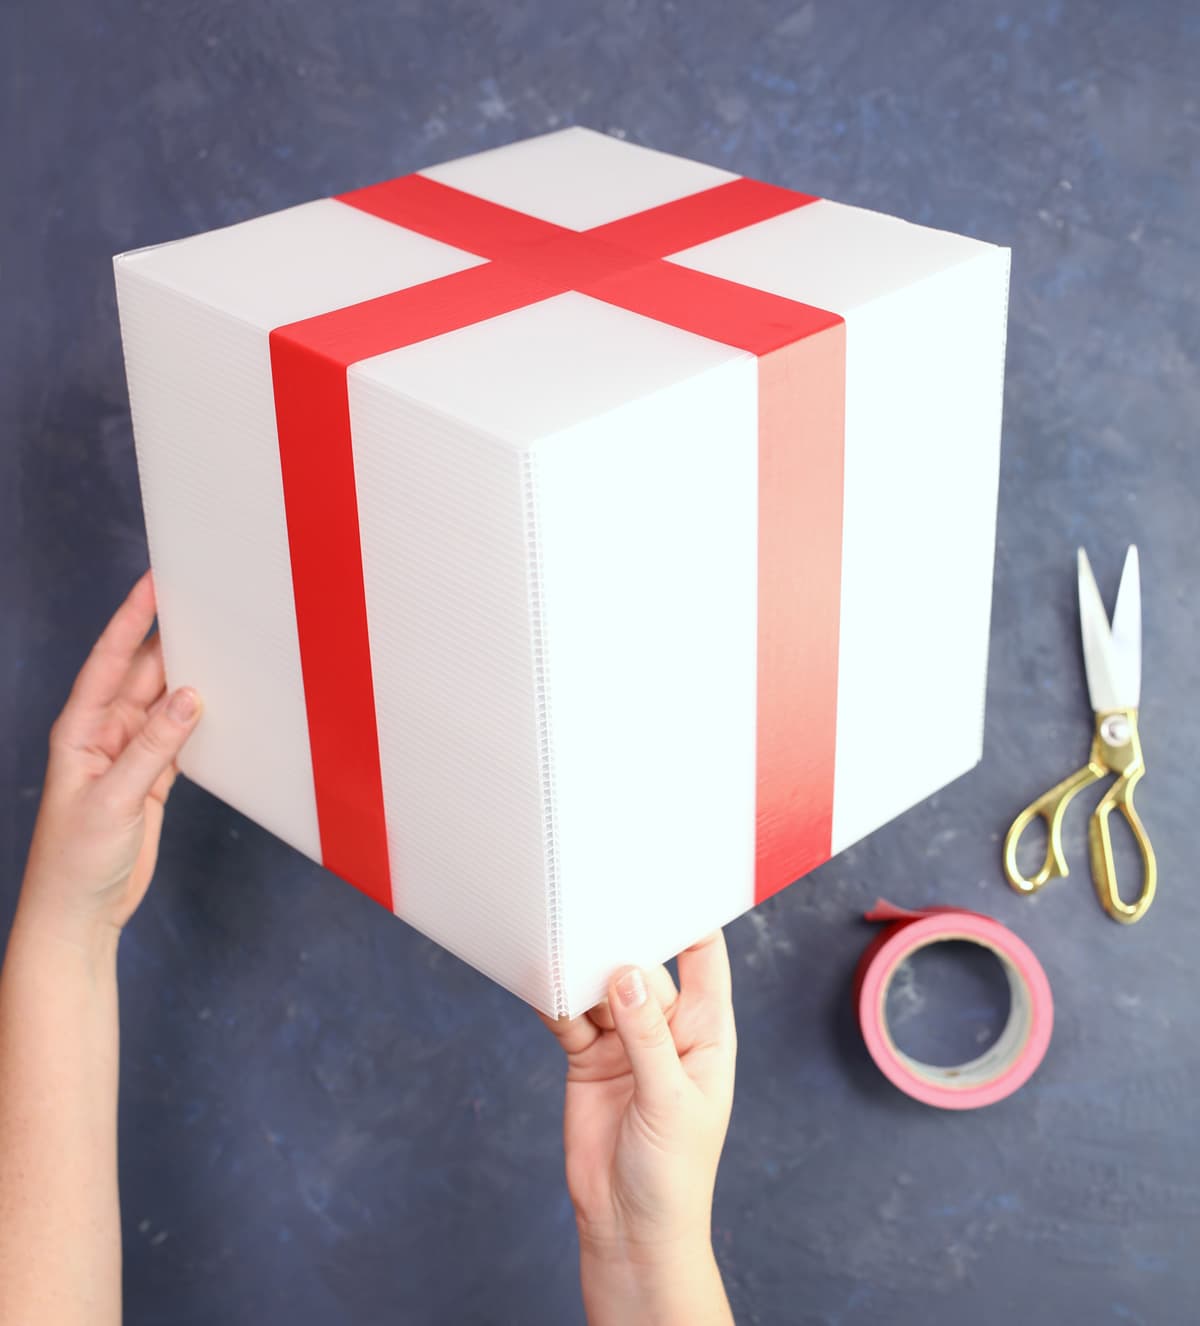
Step 3: To make the cubes look more like gifts, wrap color Duck Tape around each side so it looks like ribbon. I tucked the loose ends into the inside of the cube.
Step 4: Now comes the most fun part. We’re going to make a giant bow to go on top! You’ll start by cutting strips of Duck Tape and sandwiching them sticky sides together so you have double sided strips. You will need to make the following sizes and quantities:
- 23 inches long (quantity 3)
- 21 inches long (quantity 3)
- 19 inches long (quantity 3)
- 17 inches long (quantity 3)
- 20 inches (quantity 1)
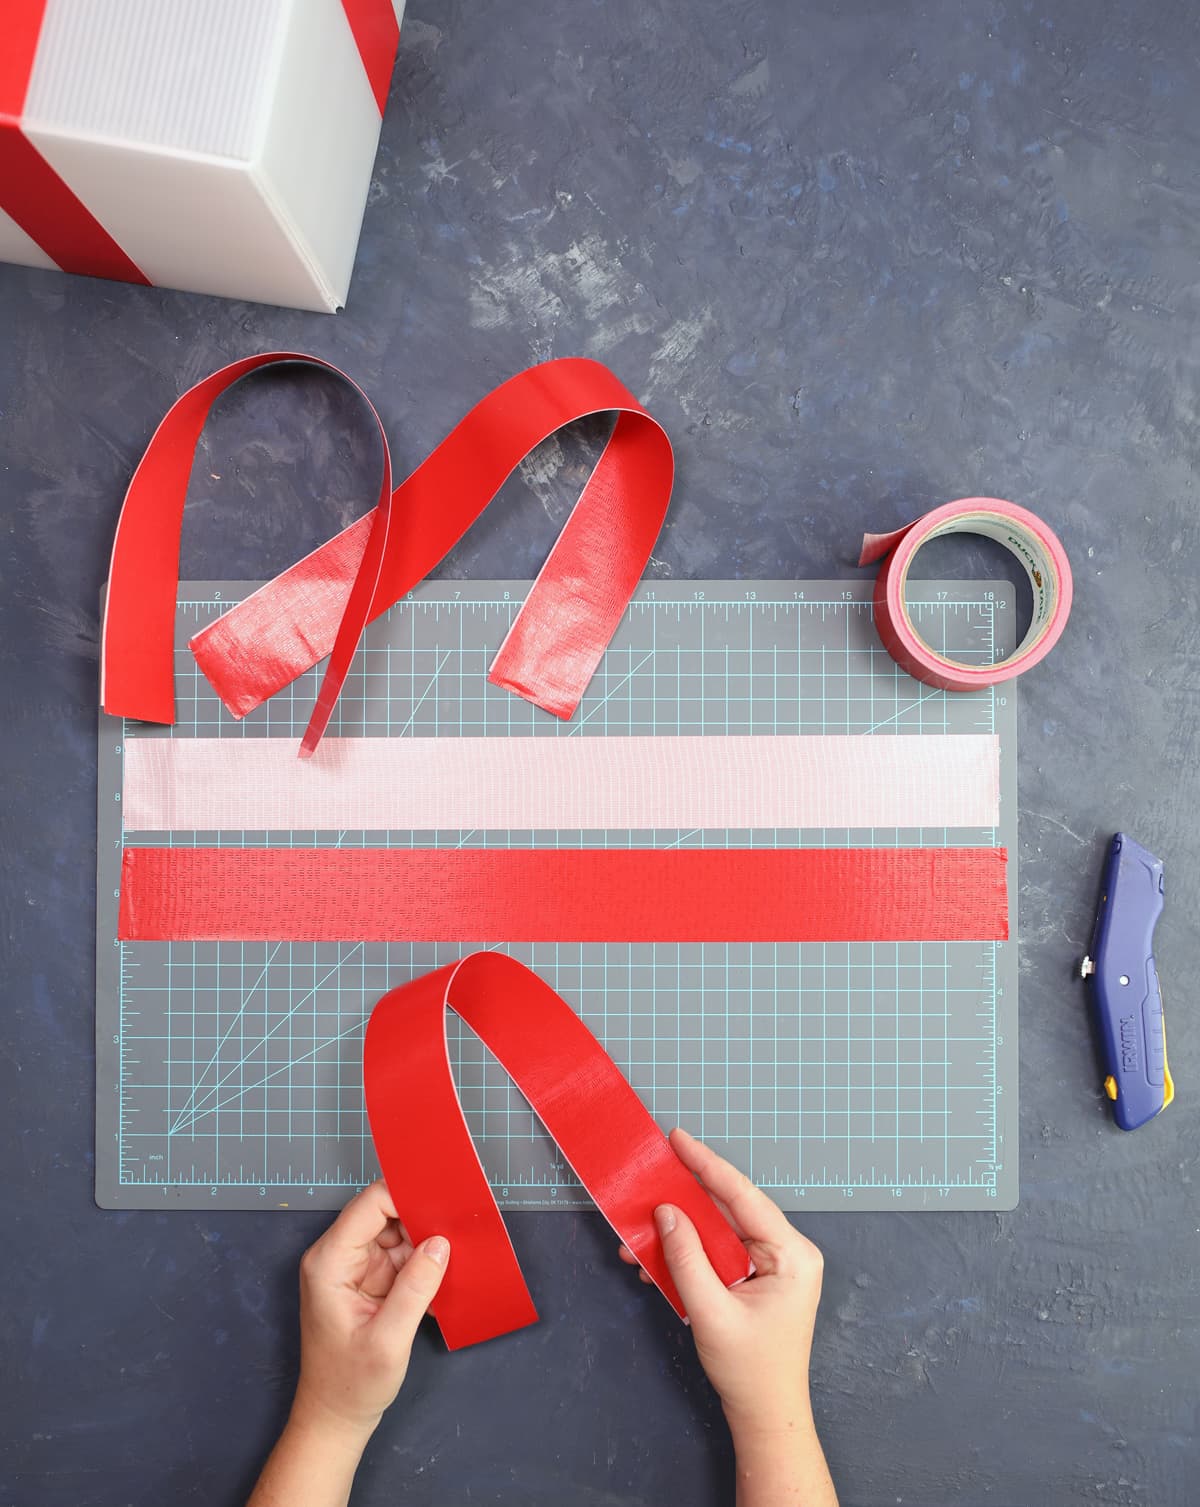
Step 5: Take one double sided strip cut to length and fold it in half to make a crease line. Then twist both ends to form loopy points. Overlap the two ends of the ribbon by 1/2 inch, then tape them together. Center the ends over the crease line you made earlier, rotate the ribbon so the tips get pointy with no large holes, then staple through the center to hold it in place. Repeat with all strips except the 20 inch strip.
Step 6: Starting with the largest size, layer the looped pieces of the same size together to form a six point star. Use loops of tape under each individual piece to stick everything together. Add the next size down in the same way and repeat until all four layers are attached.
Step 7: Form the 20 inch strip into a big loop and attach it into the center of the bow and now you have a giant waterproof gift bow for your stack of giant presents!
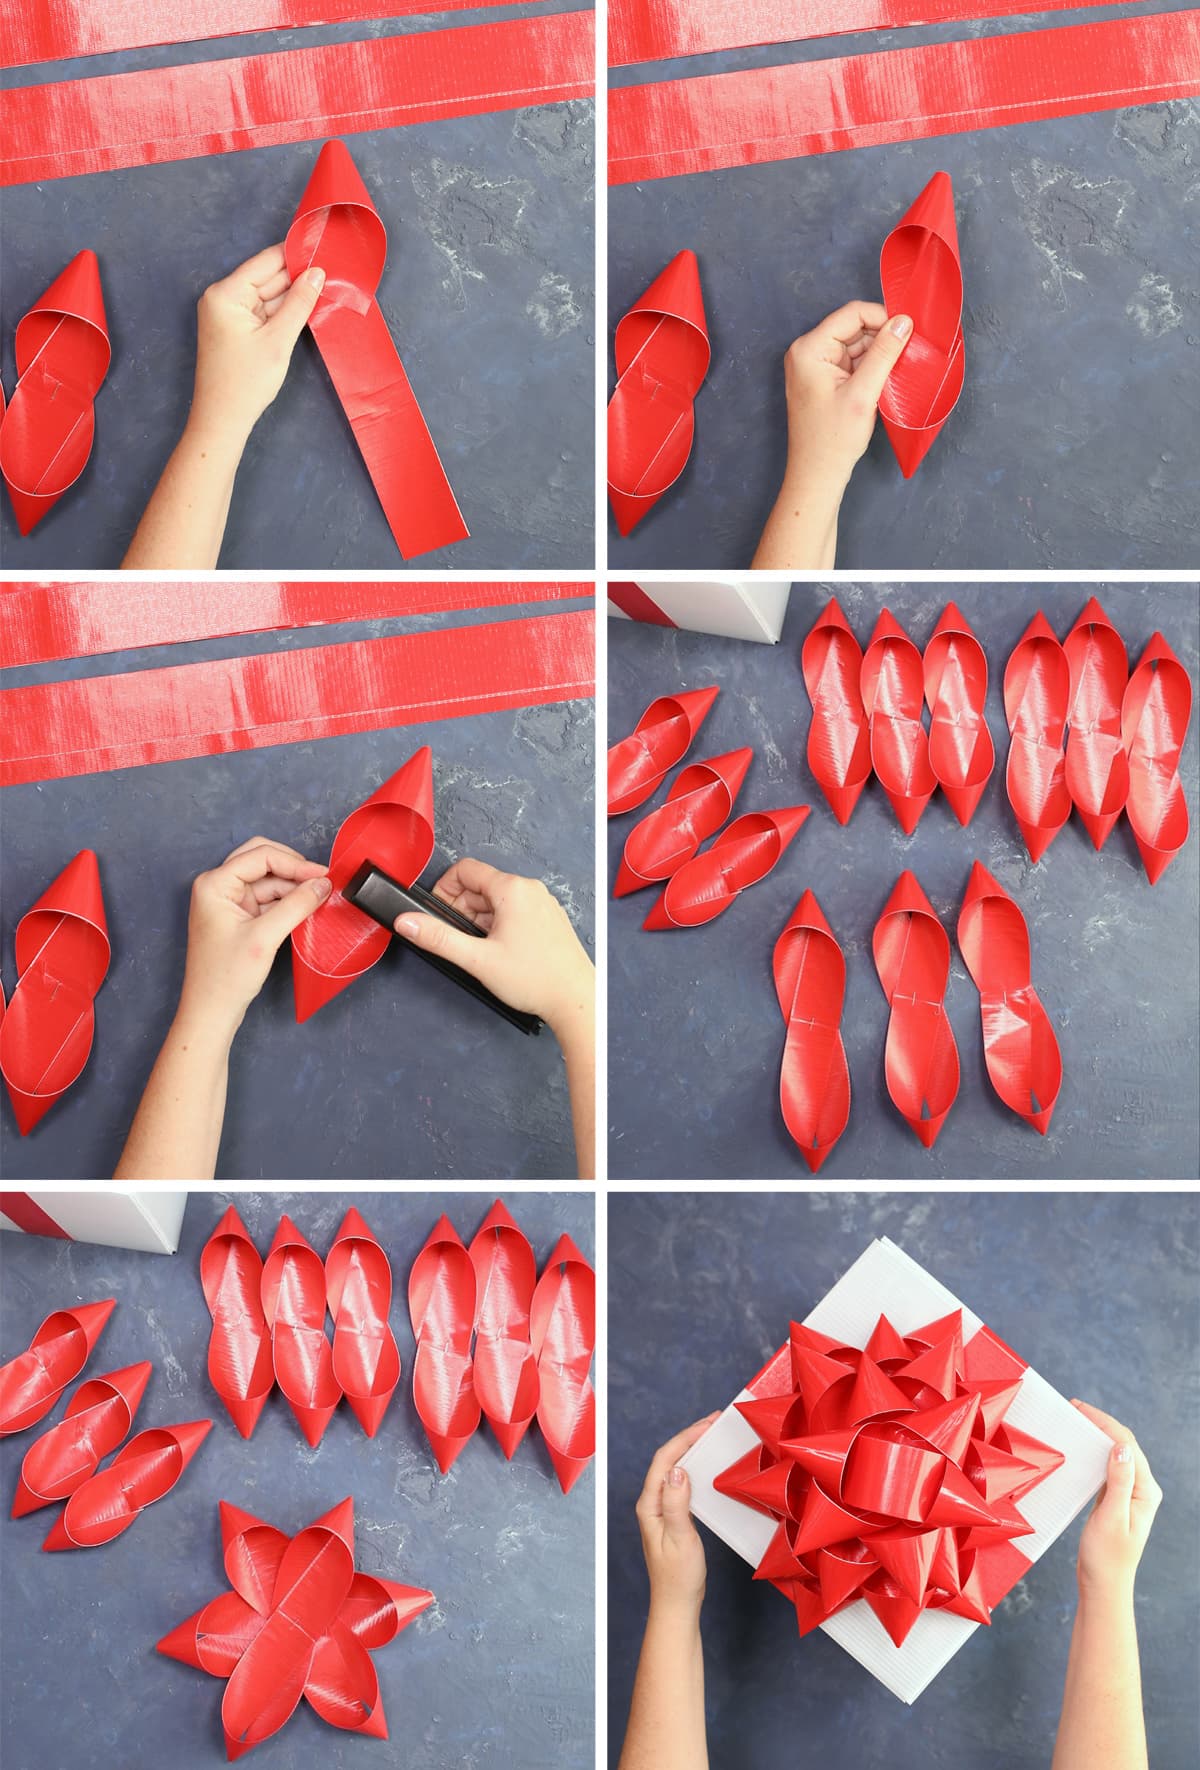
If any of that was confusing, watch the video below. Sometimes it is just easier to learn by seeing!
Step 8: Cut a small hole in the top center of the large and medium boxes. Use those holes to run the Christmas light strands through all three gifts. You can use packing tape to tack the lights in place if desired.
Then plug in your lights and marvel at your gorgeous new outdoor light-up Christmas presents! I mean, seriously… that glow!!!
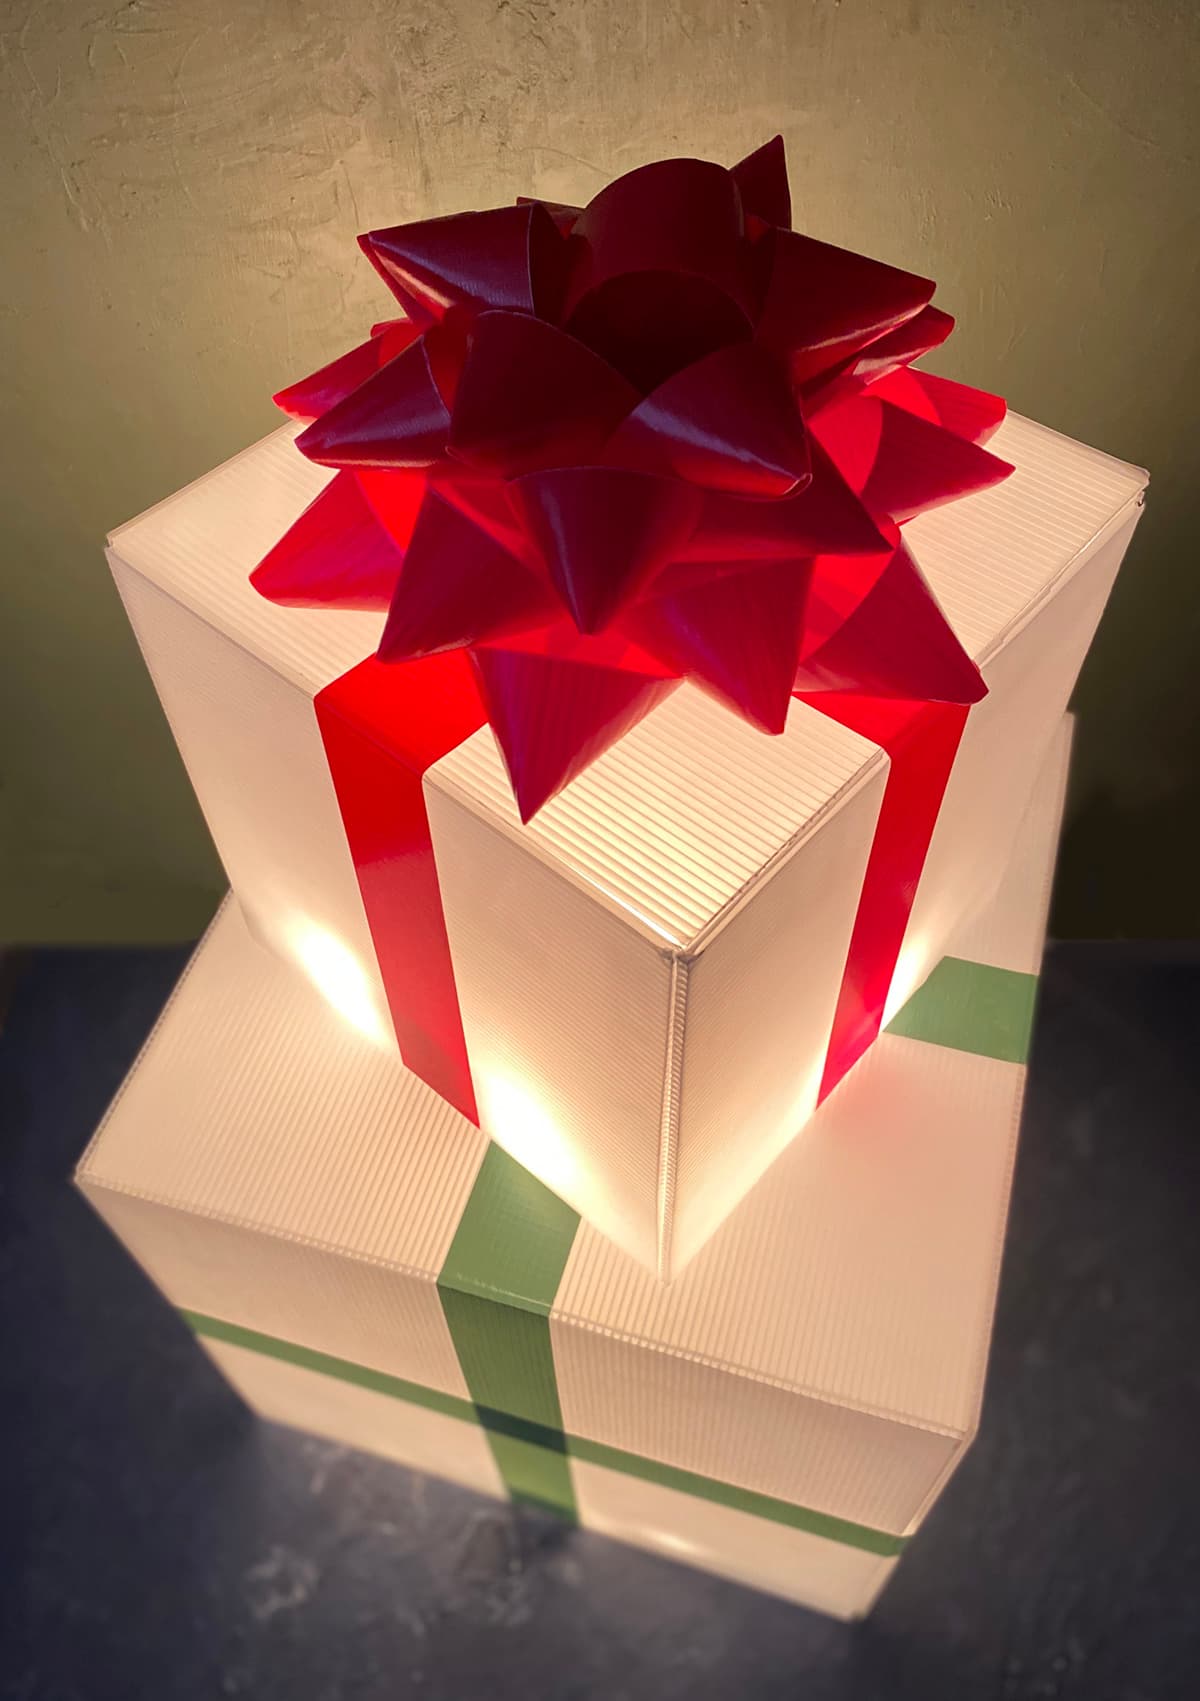
I really love the big impact these presents have nestled on the front porch. They look amazing from the street as people drive by. They are pretty during the day and at night. They are just super cool and unique!
You could also make several smaller presents to put in planters or window boxes. Wouldn’t that be cute?! The best part of DIY is that you can customize the colors and sizes so they fit your needs exactly. I love that!

Let’s Get Social
I’m sharing tons of fun ideas on my social channels and I’d love for you to join me there.