These simple ear savers are made to help protect the ears from chafing when wearing a face mask with elastic.
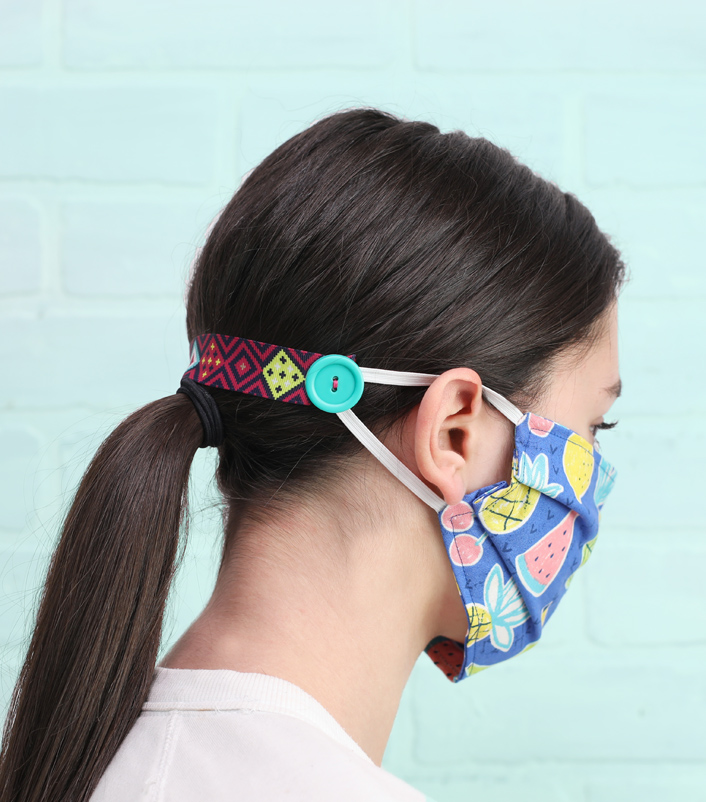
If you’ve been sewing fabric masks, you may want to make these ear savers to go with them. A mask is fine for an hour, but when you have to wear it all day, it can chafe behind the ears.
My sister is a hospital nurse and one of the biggest discomforts she has faced is chafing around her ears because of the elastic straps on the face masks she is required to wear. Some kind souls donated ear savers to her hospital and she’s been so grateful that she suggested I post a tutorial to show you how to make some.
These ear savers are great whether you’re making them for yourself or to donate to hospitals.
Because most of us can’t (and shouldn’t) run to the store to buy supplies, I tried to come up with a simple way to make them with supplies most crafters and sewists would probably have on hand.
With this design, each ear saver only takes about 5 minutes to make, so you can have plenty for everyone in the family in just an hour or so.
And if you’d like a fun way to personalize masks, check out my Sharpie Tie Dye masks. They turn out so cute and there’s no mess involved.
Materials Needed
- Sturdy Ribbon (1 inch or 1.5 inches wide)
- Large Buttons
- Needle and Thread
- Scissors
- Ruler
- Lighter or Candle
- Clear Nail Polish, Fray Stop or Fabric Glue (optional)
Step 1: Cut the ribbon to length. I made several different sizes to accommodate different sized heads. About 8 inches to 10 inches seems to be a good range.
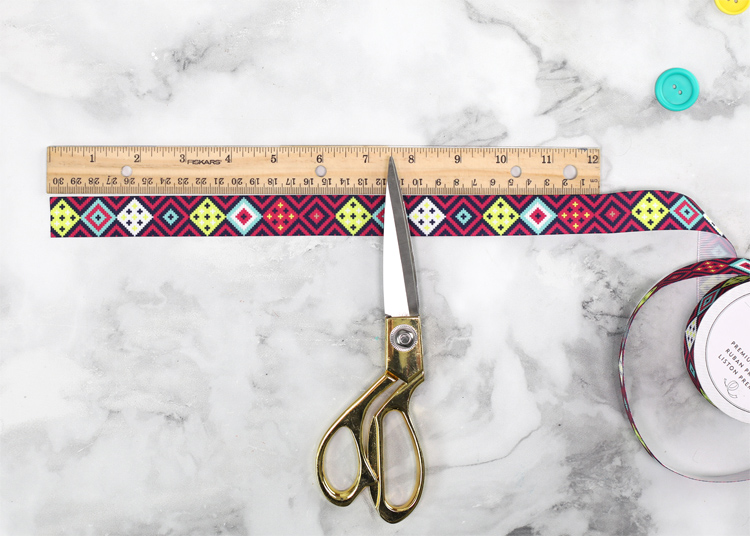
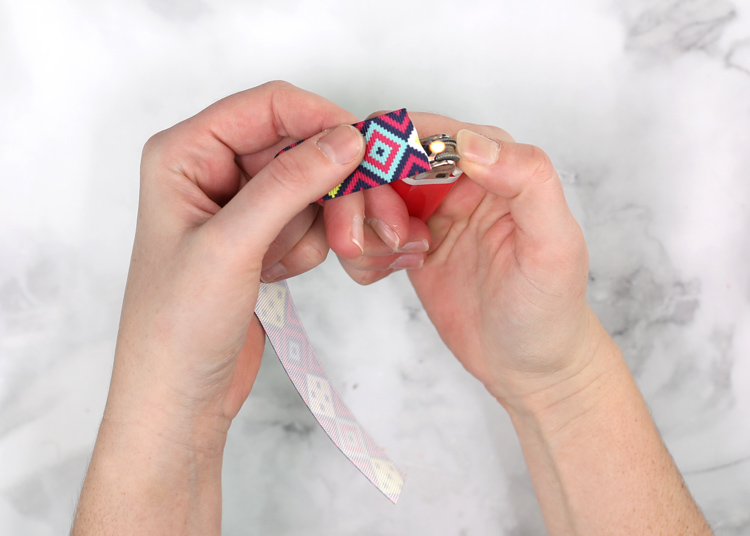
Step 2: Use a lighter to melt the ends of the ribbon. This prevents fraying, which is important since these will need to be washed after every use.
Step 3: Sew buttons on to each end of the ribbon.
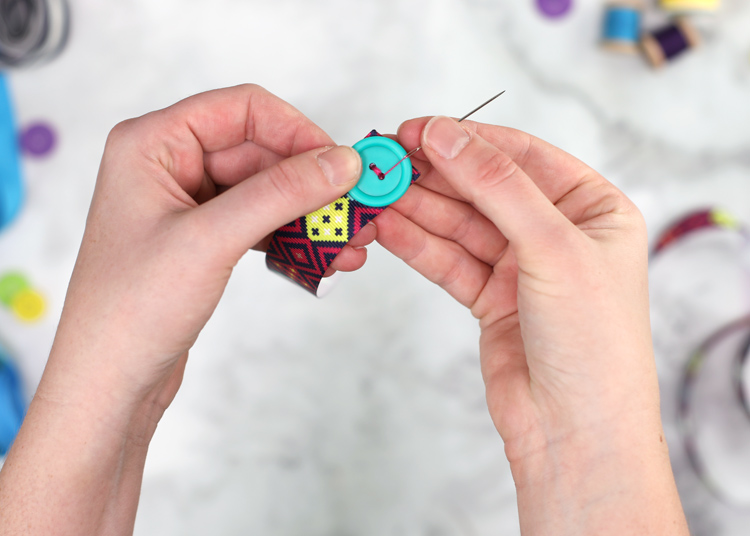
Step 4: Add a small dab of clear nail polish to the thread to help keep the knots from coming undone. This step is optional, but it only takes a second and I feel like it’ll help the ear savers hold up better in the wash.
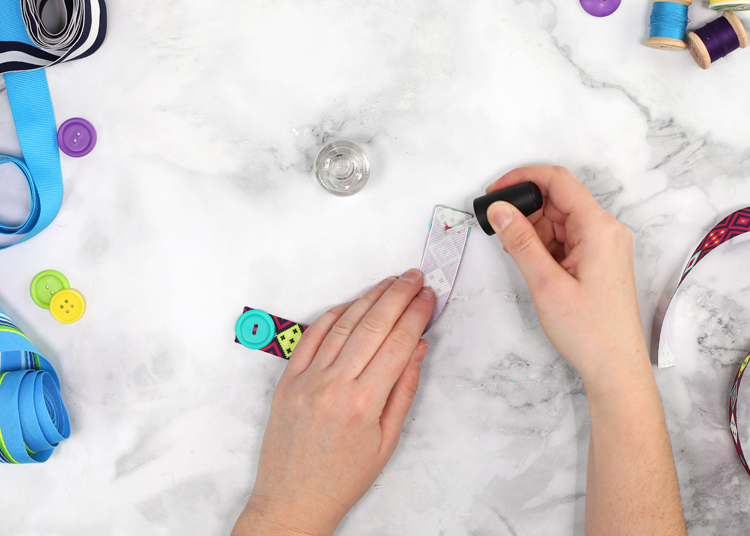
And that’s it! So simple to make!
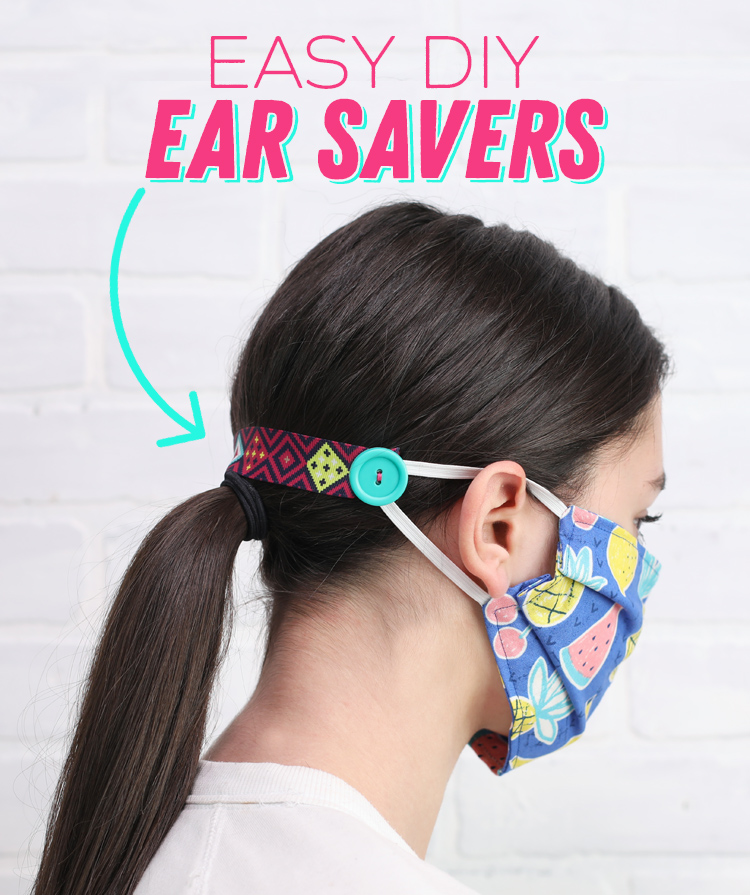
To wear the ear savers, just put on your face mask like normal, then place the ribbon across the back of your head and slip the elastics over the buttons.
My sister prefers to wear a low bun and place the ribbon above the bun to help keep it in place.
To make the ear saver fit multiple people without changing the measurement of the ribbon, you could sew a second button onto each side so that nurses could choose which button fits most comfortably. I’ve also considered adding the scratchy side of Velcro dots on to the underside of the ribbon to help it stay in place in the hair. If your ear saver slips a lot, this could be a good solution.
I’ve also seen headband style ear savers. Just buy a stretchy headband from the dollar store and add buttons!
EASY DIY EAR SAVERS VIDEO TUTORIAL
Please take a moment to pin the image below so others can join in our efforts to support the healthcare workers who are at the front lines of this pandemic.
And be sure to visit my post about DIY Fabric Face Masks to learn more about making masks. It’s a treasure trove of good information.
Happy crafting!

Comments & Reviews
Wonderful tip, we all have a button jar (or several) and left over ribbon. Wish I had thought of it.
Im gonna take the buttons off 1 of my old coats. I can replace them later. Thanks for this great Idea. I work for a communications company and have to go into peoples homes to install or repair their services. The mask and safety glasses kills my ears.
Another idea is to use stretchy hair ties. Just cut the knot off of the hair tie and add your buttons to the ends.
Thank you for sharing this, it is amazing how a simple craft can make a huge difference for so many!
For ear savers: Can wire ribbon be used? The kind for packages, crafting and bows? Then add buttons? The ribbon is heavier and comes in a large roll from warehouse stores at Christmas. Should the ribbon be doubled and sewn? I ask as that is what I have. I can cut the wire off if necessary. Thank you for your help.
Yes. I would pull the wire out of the two sides first, but then it should work just fine. And folding it over might be a great option too.
I would just slide the wire out. If you cut the ribbon, it will fray. Perhaps double up the ribbon if you want something sturdier
Hi! Could you possibly use old denim instead of the ribbon? I have lots of old pants legs from making cut offs. Thank you!
I think denim would work really well!
I just made one of these for my husband and used a piece of felt that I cut into a long rectangle (1.5″ x 9″). I followed the rest of the instructions (thank you!) and it worked great!
I have sewn several masks, but never thought about the ear savers. They are a great ideal. Thanks so much for sharing.
Muchas gracias 🌺🌻
Run a couple rows of hot glue on the backside. It will add some grip to Help prevent slip.
I have made a few using fold-over elastic cut 7-9″. Just fold over each end and sew on the button. The 5/8″ is too wide for my masks, perfect for ear savers. Thanks for sharing.
Great idea!
I have a jar of buttons but not many pairs do you think it would be ok to mix them up?
Sure!
Puffy paint will also add grip. Thanks for the info on making these! I knew they existed but needed measurements.
Thanks for sharing the tutorial, I too needed the measurements and the idea for using ribbons..GENIUS. I have saved so many over the years from gifts and stuff..always looking for the right time to use them..thank you so much.
Love this idea. I wear hearing aids and have to remove them while wearing a mask. This is the perfect solution.
I’m making masks and this is perfect for my elderly mother as well as a friend who wears a hearing aid. It’s great for my 7 y/o grandson who won’t wear his around his ears. My question is – would you make the elastic a bit longer to fit around the back and if so, how much longer do you think it should be? Thanks all!
I think the best way to figure out the measurements would be to safety pin the elastic onto the fabric, try it on, then mark the size. People are all such different sizes that I think this is the only way!
I made these but couldn’t get the ribbon to stay in place 🤔 it just kept sliding down…..
You could try adding the scratchy side of velcro or some hot glue dobs to give it some grip. Or maybe add buttons to a headband instead if you’re having trouble with the ribbon.
Ok I’ll try that thank you 😊
Such a great idea! I bet that is way more comfortable especially for those who have to wear masks all day long.
I am using strips of an old t-shirt, and they don’t bother my ears at all. Cut a 1/2” strip, horizontally off An old t shirt. Stretch it as far as it goes, it will curl inwards. Cut a length that will comfortably reach from your mask, behind your ear, back to the mask; add 3/4” for sewing both ends into the mask. I really don’t even feel them when I’m wearing the mask. If they are a little long or stretch over time, fold the ear cord and loop it to make a small knot, try to have the knot under the ear and not the middle -behind the ear, for more comfort.
How can I make these where small children can handle them by themselves
You could attach the buttons to a headband instead.
Thank you for sharing this, it is amazing how a simple craft can make a huge difference for so many!
Thas was good idea. It’s so easy and simple. I really like your recipe. Thank you for your tips!