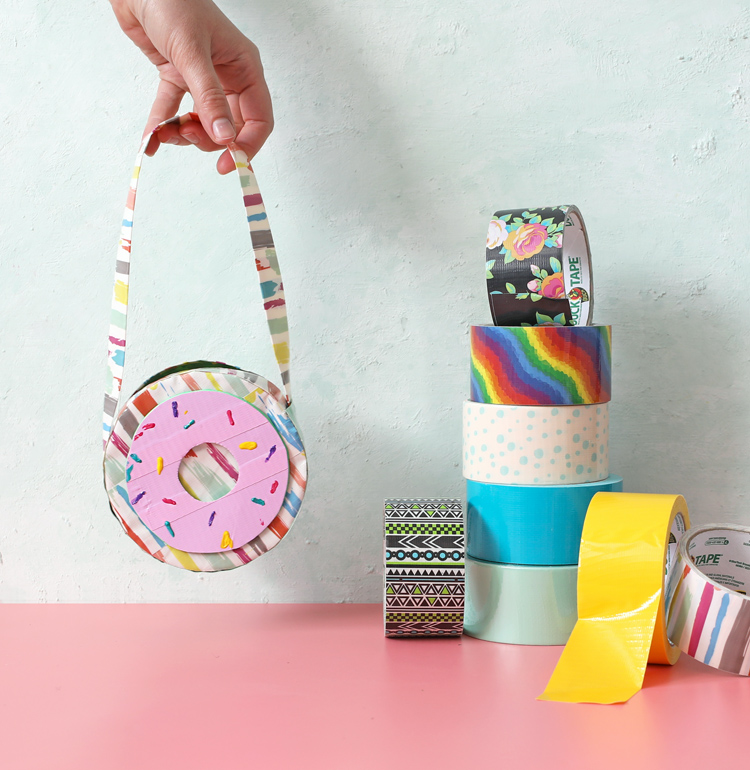
Learn how to make a cute round purse out of Duck Tape.
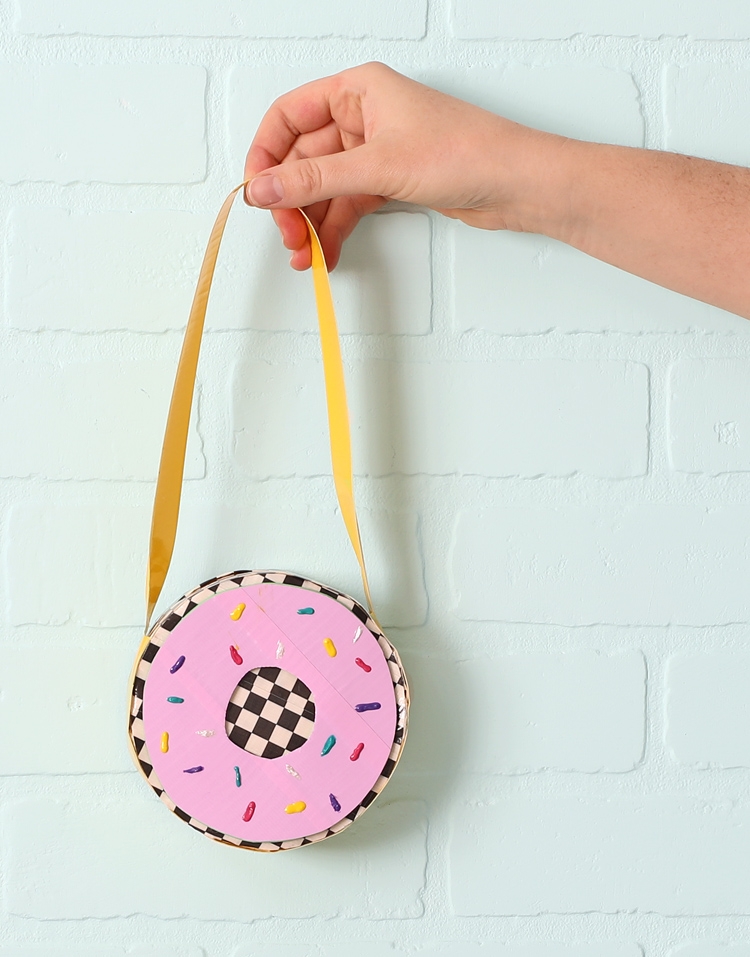
It’s almost National Donut Day and to celebrate, I was challenged by Duck to create a donut-themed craft. I decided to see if I could make a round purse with a donut on the front and wouldn’t you know, it turned out darling! Today I’m sharing the detailed tutorial so you can make one too.
This post is sponsored by Duck Brand. All opinions are my own.
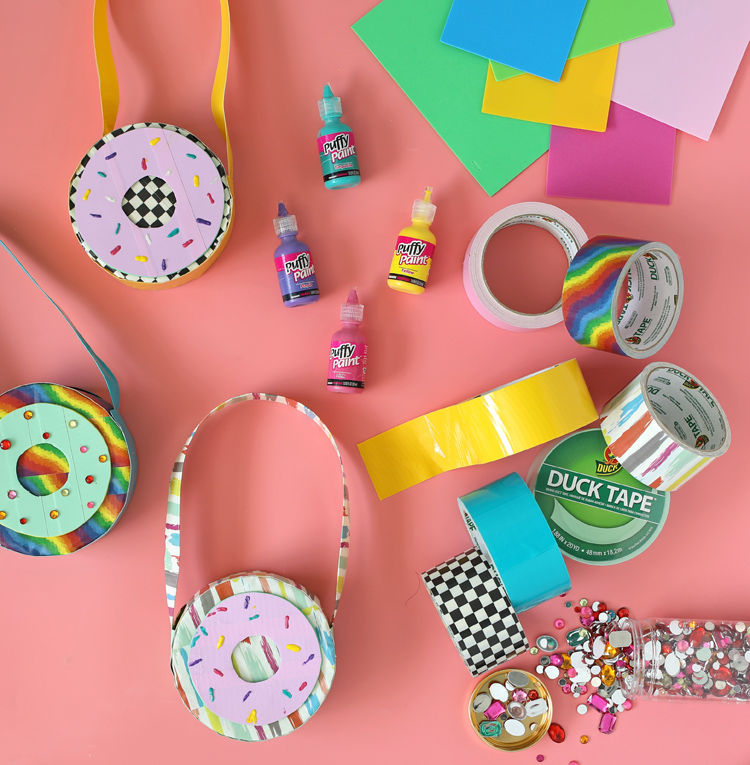
To make your own round Duck Tape purse, you only really need Duck Tape and scissors, but it’s fun to add extra embellishments.
Materials Needed
- Duck Tape (two or three coordinating colors or patterns)
- Craft Blade or Scissors
- Craft Foam Sheet – Optional
- Embellishments (such as puffy paint, buttons, rhinestones, stickers or anything that resembles sprinkles) – Optional
Cut List
KEY: (Quantity) Measurement + Shape | Type of Tape | Name of Piece
- (2) 6 Inch Circles | Solid | Inner Purse Lining
- (2) 5 Inch Circles|Patterned| Main Purse Body
- (2) 8 Inch Strips|Patterned| Purse Opening
- (1) 10 Inch Strip|Solid| Outer Purse Edge
- (1) 8 Inch Strip|Solid| Inner Purse Edge
- (1) 19 Inch Strip|Solid| Purse Handle
Instructions
Boy, this is one of those crafts that can be tricky to write down. I strongly suggest watching the short video tutorial at the bottom of this post. It makes so much more sense!
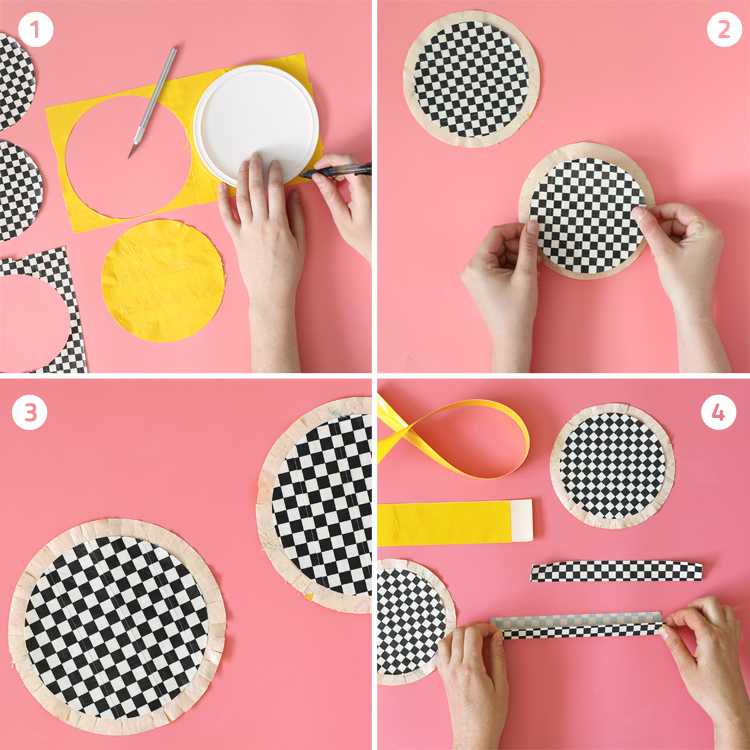
Step 1: Layer strips of Duck Tape together to form a sheet of tape, then cut two 6 inch circles and two 5 inch circles. I traced around a plastic lid to get a good circle, then cut it with a craft knife. The large circle will be the inside of the purse and the smaller circle will be the outside.
Step 2: Flip the large circle sticky-side-up, then carefully center the smaller circle above it and press the two sticky sides together. Be careful to keep the tape smooth.
Step 3: Cut small slits all the way around the edge of the circle. Make sure to only cut the slits through the outer circle. In this case, the slits only go through the yellow tape and no slits cut through the checkered tape.
Step 4: Cut two 8 inch strips of Duck Tape. These pieces will be the purse opening. Fold each piece in half long-ways.
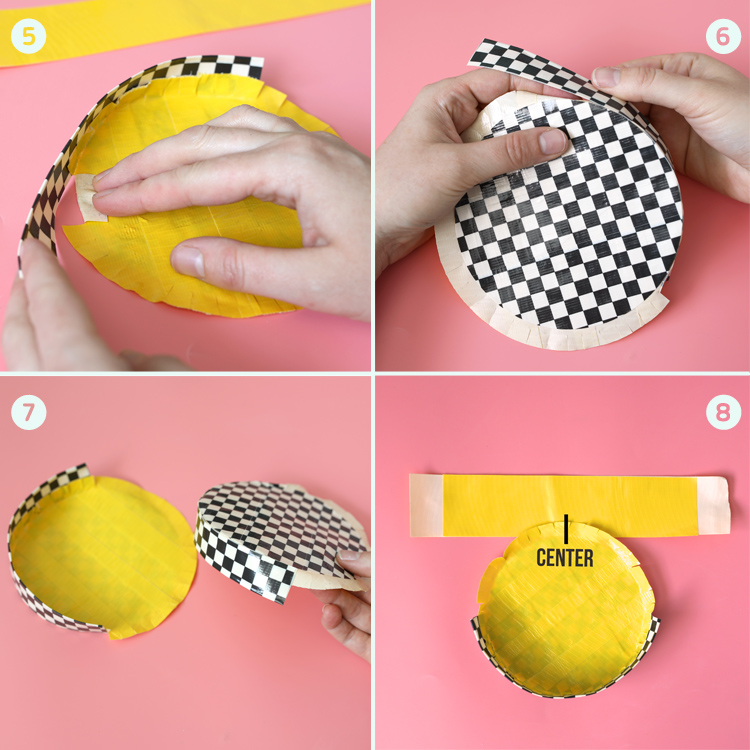
Step 5: Place one circle pattern side down and bend the tabs up. Run one of the purse opening strips along the rounded edge and press the tabs into place as you go. You will be creating a 90 degree angle where the strip and the circle meets. This is what gives the purse its shape.
Step 6: Flip the project over to make sure the seam where the circle and the strip line up stays smooth and straight.
Step 7: Repeat the same process with the other circle.
Step 8: Cut one 10 inch strip of tape and one 8 inch strip of tape. Flip the longer tape over sticky-side-up, then center the smaller tape on it and press the two together. There should be small sections of exposed tape on both ends. Line up the center of this strip with the mark that is halfway between the ends of the purse opening piece. If that’s confusing, refer to step 8 in the photo above.
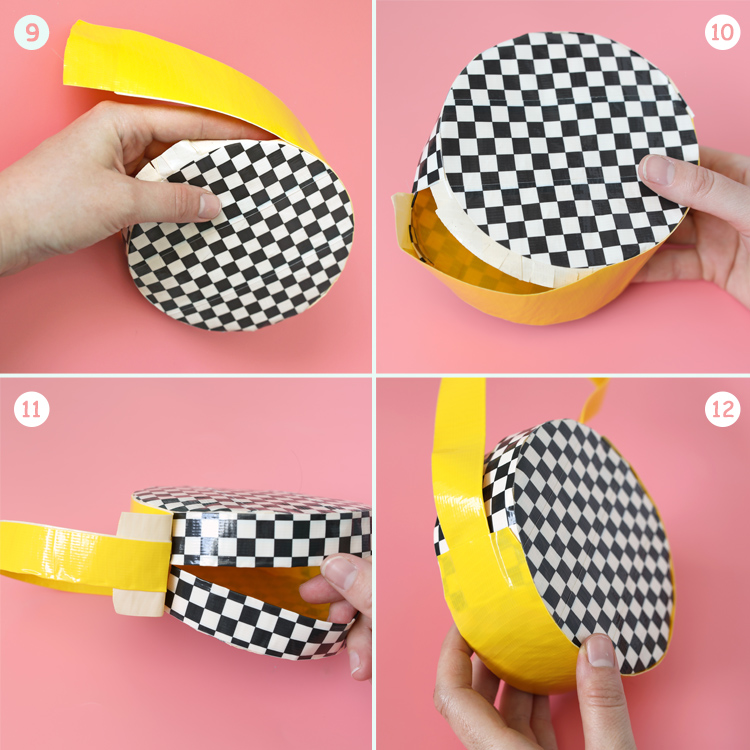
Step 9: Line up the outer purse edge all the way around the circle, forming a 90 degree angle just like with the opening pieces.
Step 10: Repeat with the other side of the circle. This is tricky because as you work, the purse closes up. Reach through the slots as needed to adhere the tabs to the strip.
Step 11: Create a purse handle by cutting one 19 inch strip of tape and folding it in half longways. Place one end of the strip in the center of the outer purse edge that is still sticky.
Step 12: Press the remaining sticky portions down to seal the rest of the purse edges and handle in place. Repeat on the other side to secure the other part of the purse handle. This part of the project can be reinforced with hot glue if needed. You can also add extra pieces of tape inside to reinforce the curved seams if you want your purse to be extra sturdy.
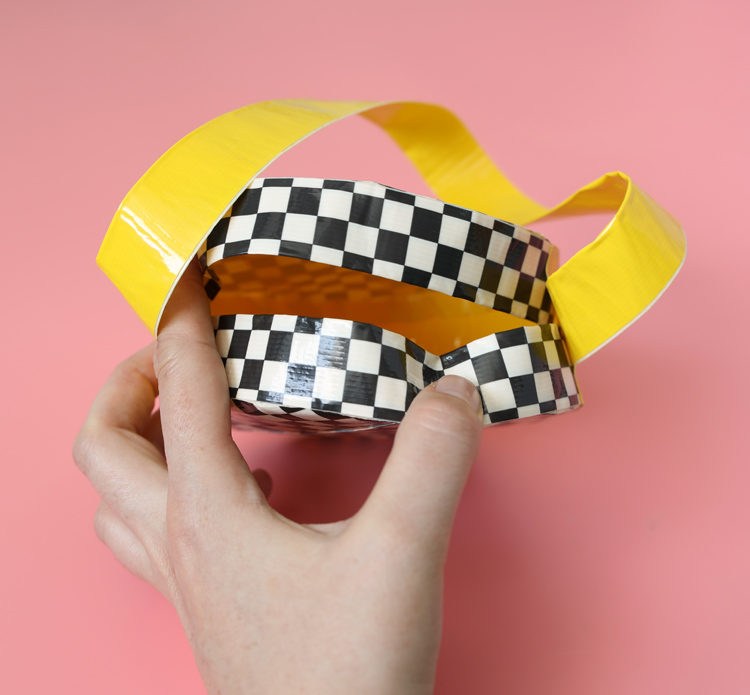
Now comes the most fun part… embellishing!
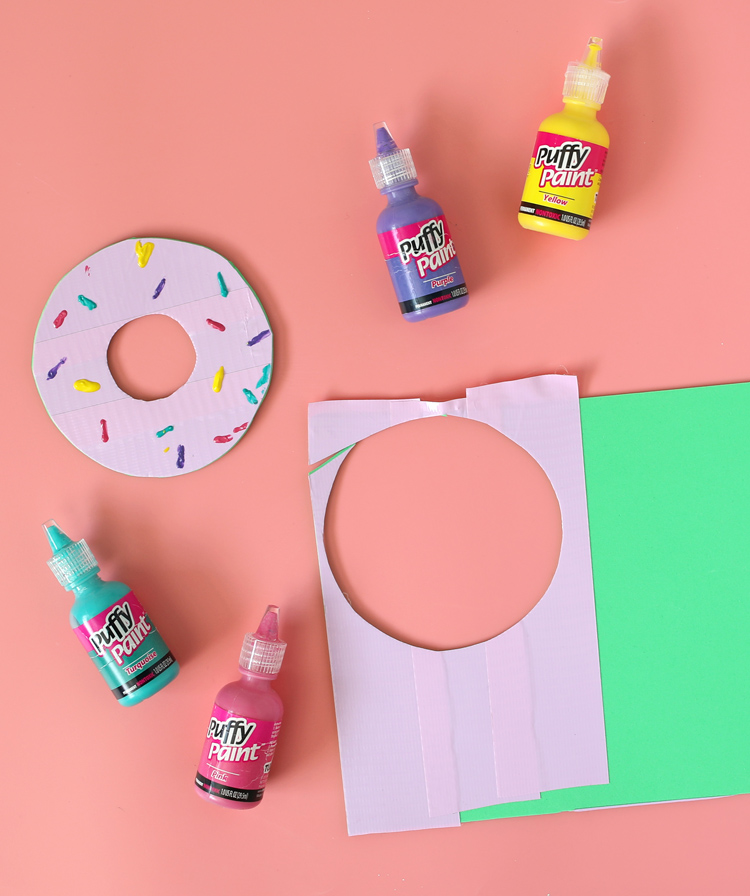
I covered a piece of craft foam with Duck Tape, then traced a circle onto the back of the foam and cut it out, then added a smaller circle in the middle to get that classic donut shape. Then I went to town with puff paint and gems to add “sprinkles” to my donuts. I attached them to the front side of the purse with hot glue.
DUCK TAPE DONUT PURSE VIDEO TUTORIAL
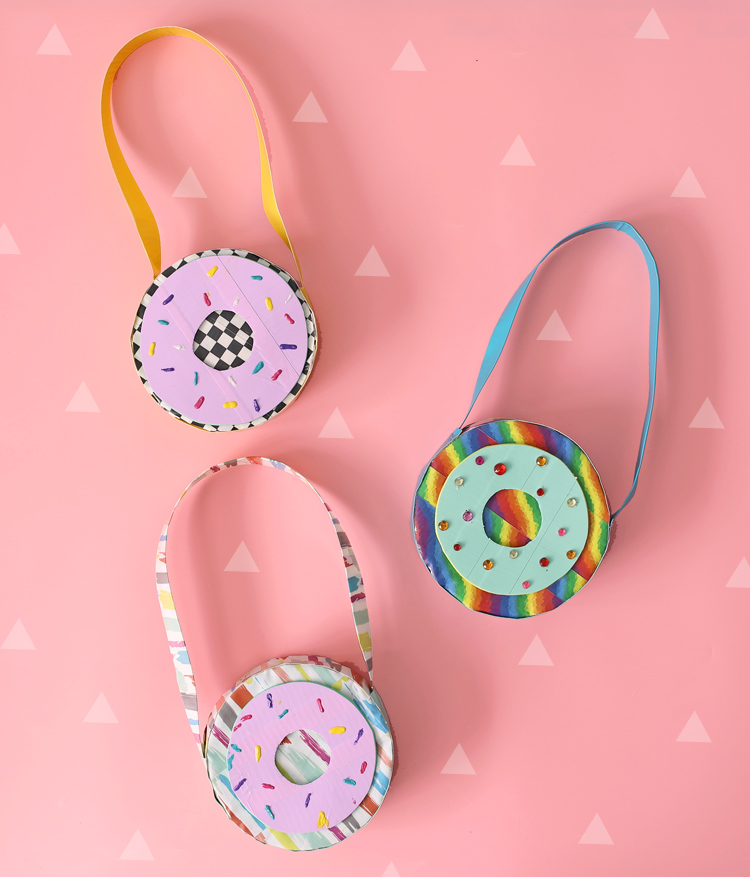
Aren’t my little donut purses sooooo cute?! I love the black and white checkered one the most. It reminds me of a 50’s diner. Anyway, isn’t it amazing what you can make out of Duck Tape?! I hope you’ve enjoyed this one and as always, happy crafting!

Let’s Get Social
I’m sharing tons of fun ideas on my social channels and I’d love for you to join me there.