Make miniature paper Christmas houses with stunning metallic accents using the Foil Quill and a Silhouette Cameo cutting machine. Free SVG cut files.
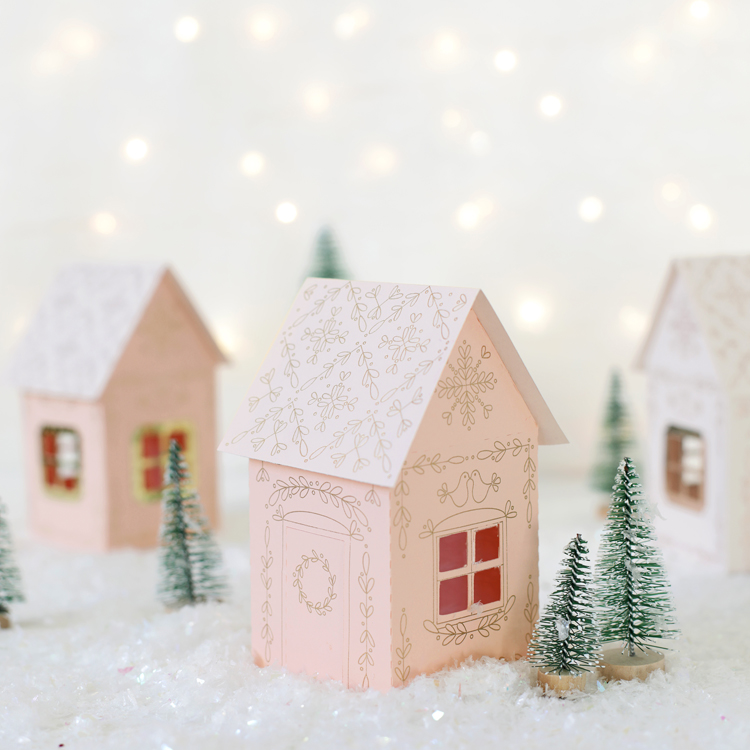
I have been so excited to get my hands on the new Foil Quill ever since I first heard about it. It’s a tool that works with Silhouette, Cricut, Brother and Sizzix machines and allows you to add detailed gold foil designs to any material that can be cut by your machine.
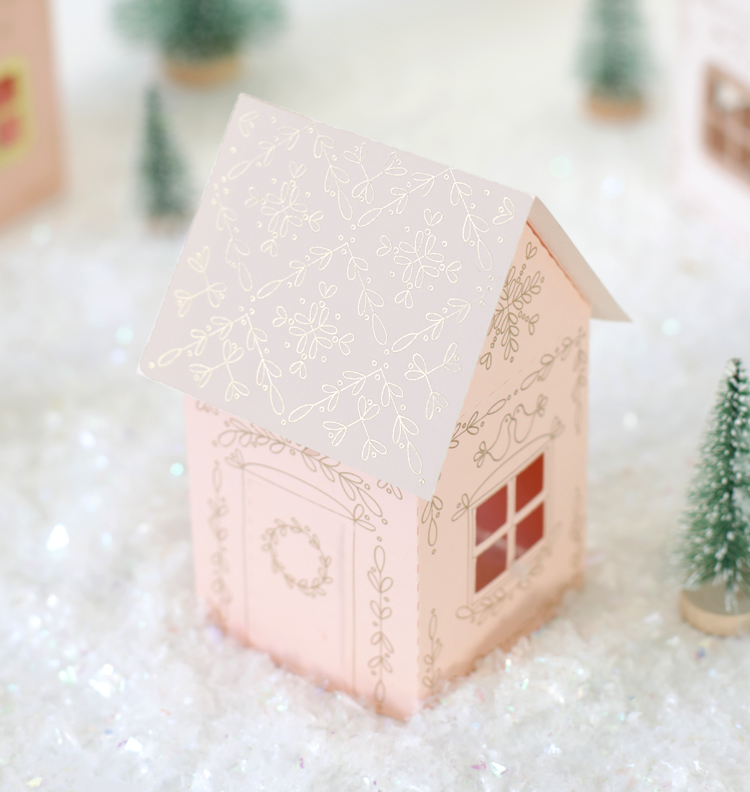
For my first Foil Quill craft, I created these amazing miniature paper Christmas houses with intricate metallic foil designs and I’m sharing the step by step tutorial so you can make them too.
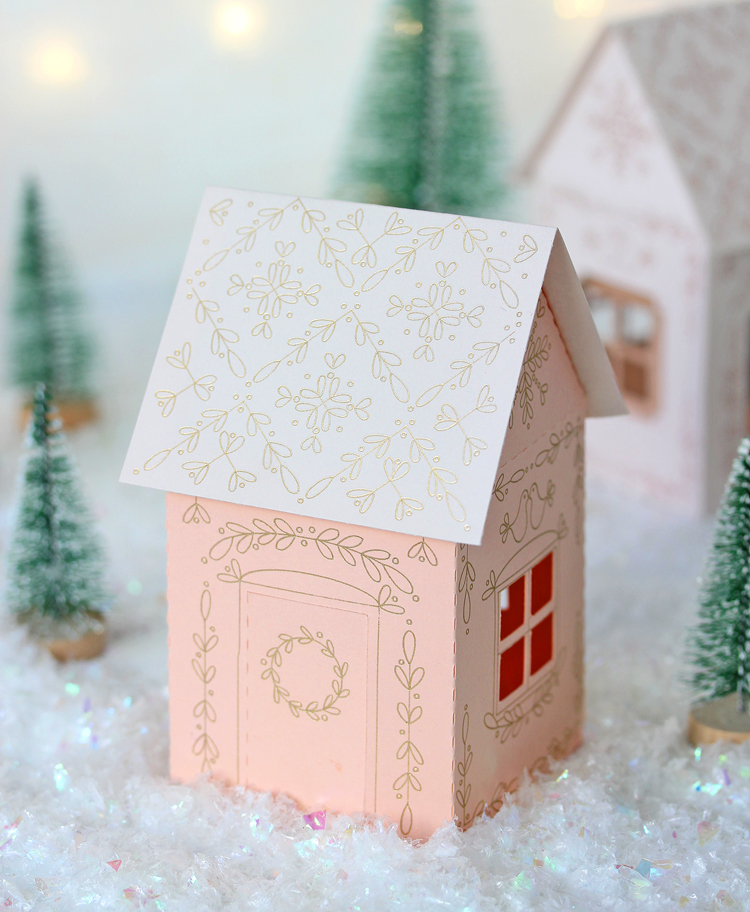
Seriously, you need to scroll down and watch the video tutorial so you can really see just how gorgeous the gold accents are. I am so impressed with the results I was able to get with the Foil Quill. The lines are so crisp and beautifully metallic!
I’ve always been obsessed with anything miniature, so making a cute little Christmas village has been on my list of holiday crafts for a while now. So I sat down at the computer and worked for hours designing something that I love with my whole heart. These houses are covered in an intricate leaf and berry motif and I’m really pleased with the overall feel of them. The SVG files you need for this project are at the bottom of this post. I’m so excited to be able to share them with you at no cost thanks to my sponsors at American Crafts. I hope you’ll make them and love them as much as I do.
Let’s get started with the tutorial! To make your own paper Christmas village, you’ll need the following.
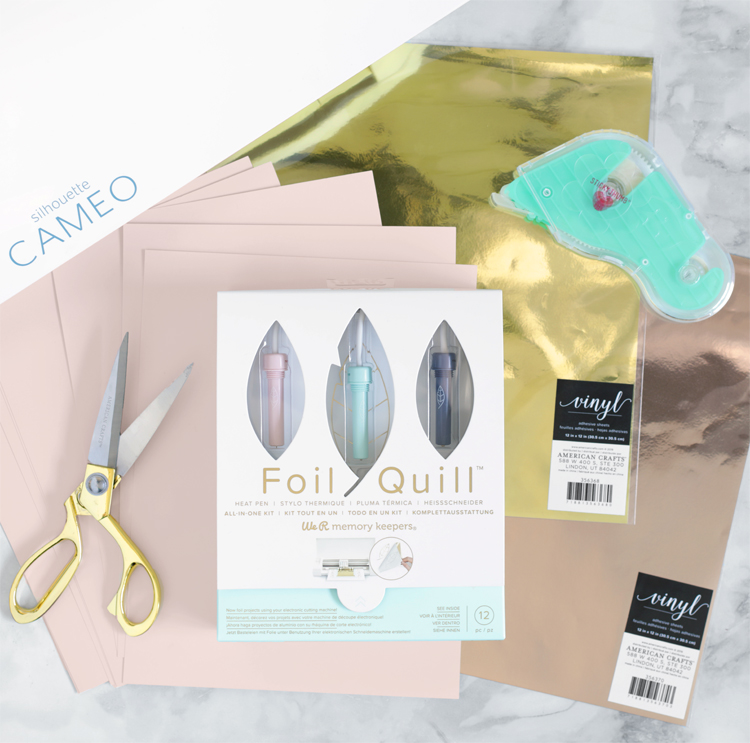
Materials Needed
- Foil Quill Starter Kit
- Smooth Cardstock (I used a mix of white, blush and peachy pink)
- Metallic Vinyl
- Silhouette Cameo (or other cutting machine, but these directions are specifically for the Silhouette)
- Scissors
- Adhesive (Taper Runner or Glue Pen work well)
Instructions
Step 1: Download the cut file from the very bottom of this post (enter your email in the box) and open it in Silhouette Studio. The file includes three parts: the main body of the house, the roof piece and the trim pieces that go around the doors and windows. Separate each part and move the parts you won’t be using off of the cutting mat. Do not adjust the colors of the lines. It’s important that the designs are in black and the shape outlines are red. That’s how the machine will know which parts to cut and which parts to foil.
Step 2: Open the Foil Quill kit. The following items are included:
- 3 Foil Quill Pens (Fine, Bold, and Standard Tips)
- 3 Rolls Foil – 6″ x 54″ Each (Silver, Gold, Copper)
- 4 Adapters (Silhouette, Brother, Cricut, and Sizzix)
- 1 Roll Placement Tape
- 1 Heat Shield
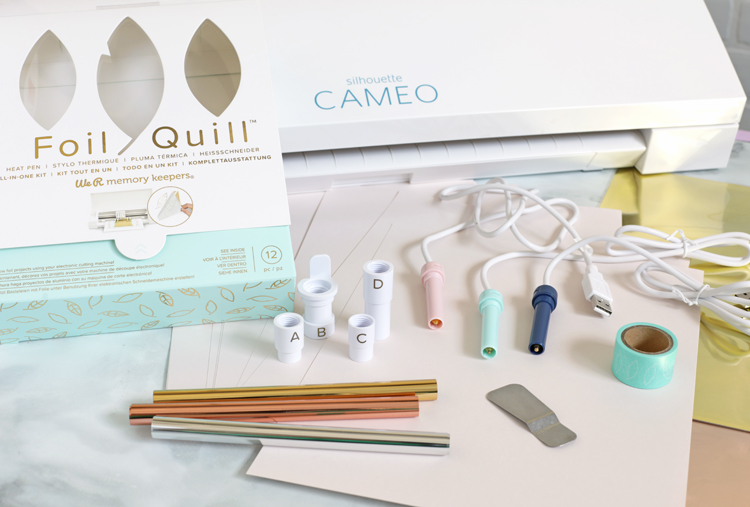
For this project, we will be using the pink fine tip foil quill pen and the Silhouette adapter which is labeled with the letter A.
Screw the adapter onto the quill pen, then put the pen into the second (right hand) spot in the tool carriage on your Silhouette machine. Make sure you have a regular Silhouette cutting blade loaded in the left hand spot.
Step 3: Place the heat shield under the tip of the foil quill pen, then plug the pen in and let it heat up for five minutes before use.
Step 4: Place a piece of cardstock onto a standard Silhouette 12×12″ cutting mat.
Pro Tip- Position the paper at the very bottom of the mat to make it easier to work with while loaded in to the machine.
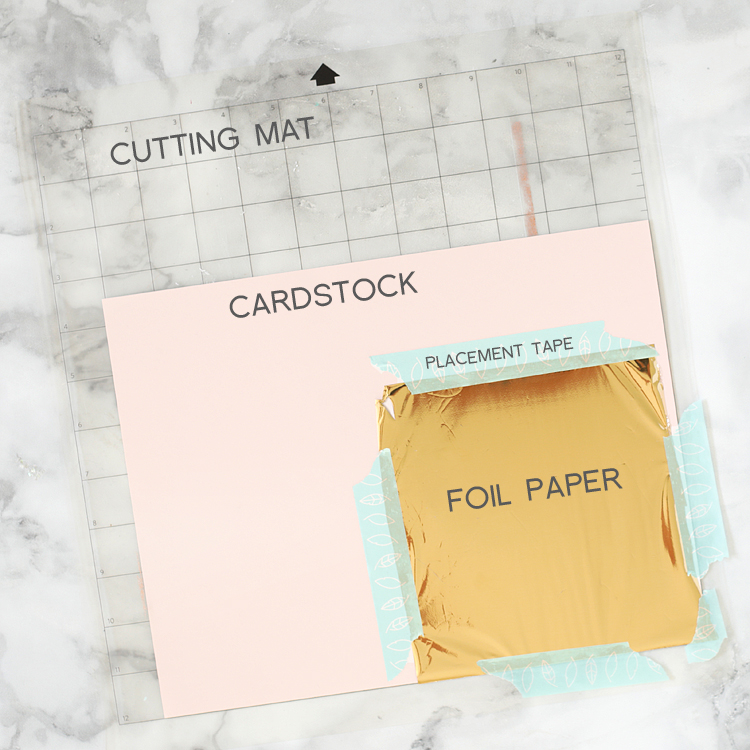
Step 5: Cut a piece of foil slightly larger than the design. Lay the foil on top of the cardstock and tape around the edges using the tape included in the Foil Quill kit. Load the mat into the cutting machine.
Pro Tip- Make sure the foil completely covers all areas where the design will go. The tape cannot overlap these areas or the foiling won’t work in those spots.
Step 6: Adjust your machine’s cut settings. In Silhouette Studio click SEND then LINES. Make sure the left tool (red) is set to cut the red lines and the right tool (blue) is set to sketch the black lines. Drag and drop the order so that the black lines are first. Add a pause between items by right clicking on the black square and choosing “add a pause.” Between sketching and cutting actions, you’ll need to remove the foil, so that’s the reason for the pause.
Whew, I know that’s a lot! When you have all of the settings correct, it should look like this:
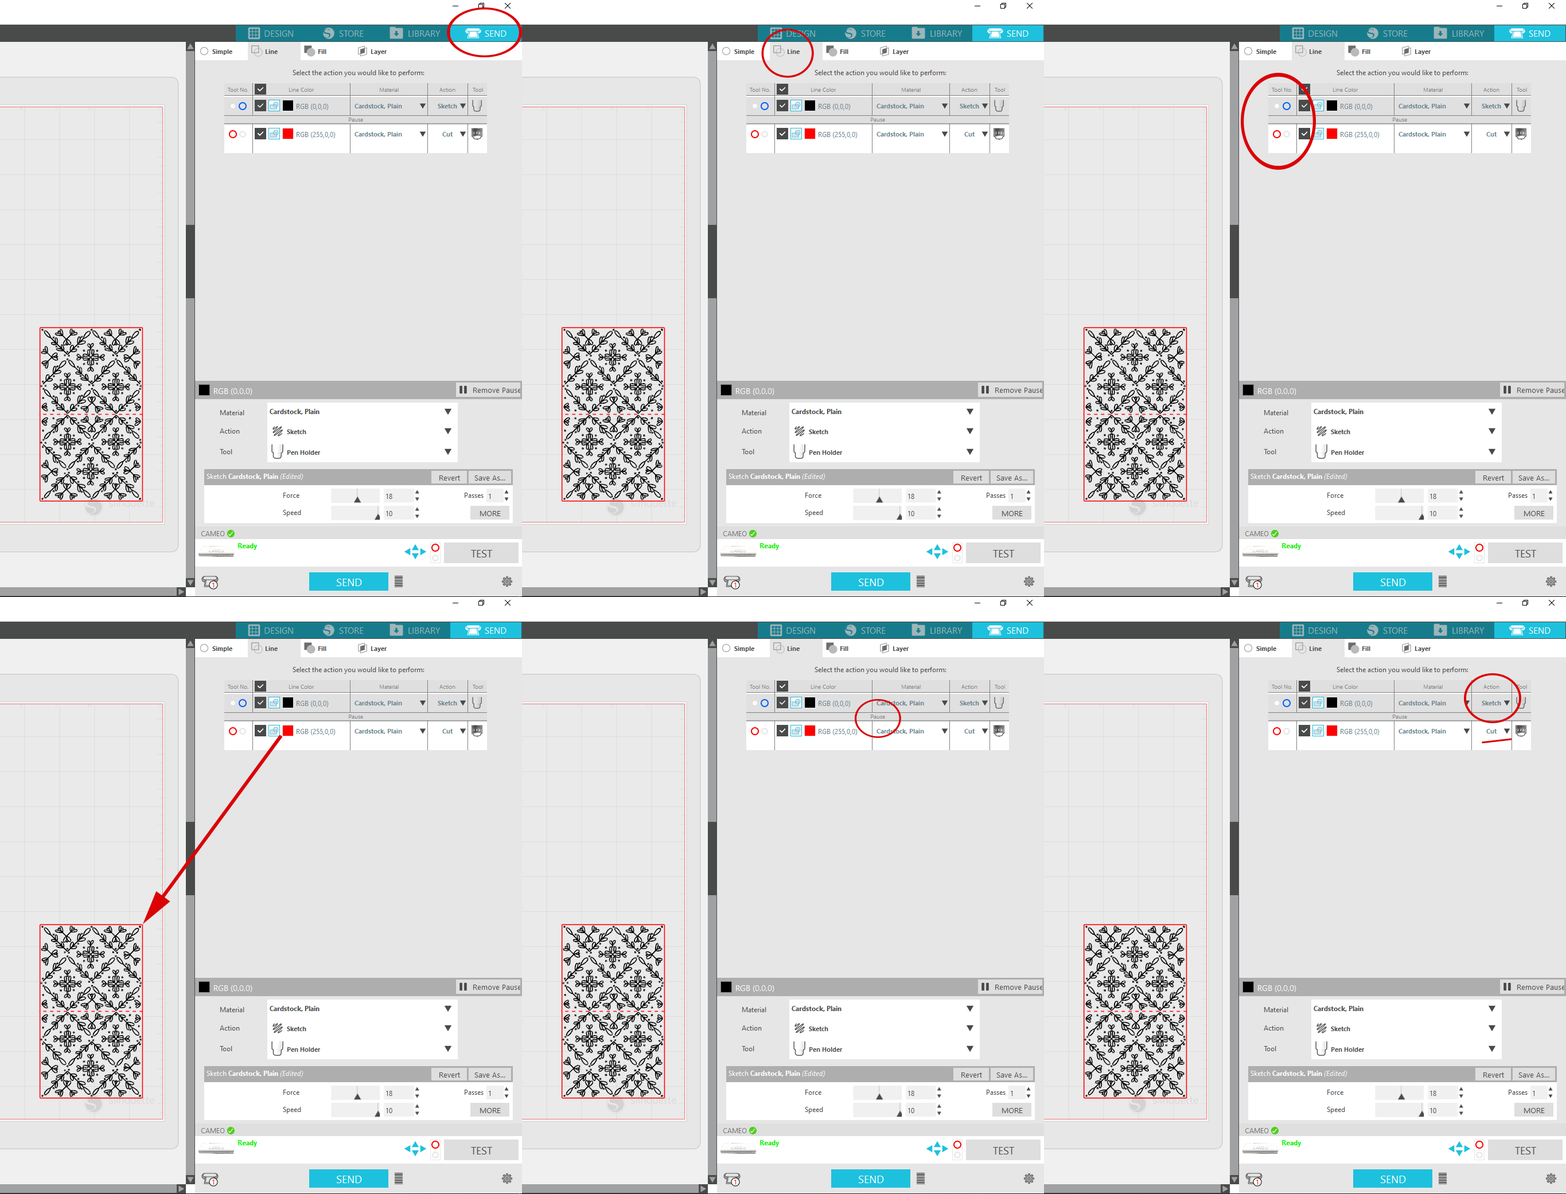
Double check that everything is set up correctly, then hit SEND.
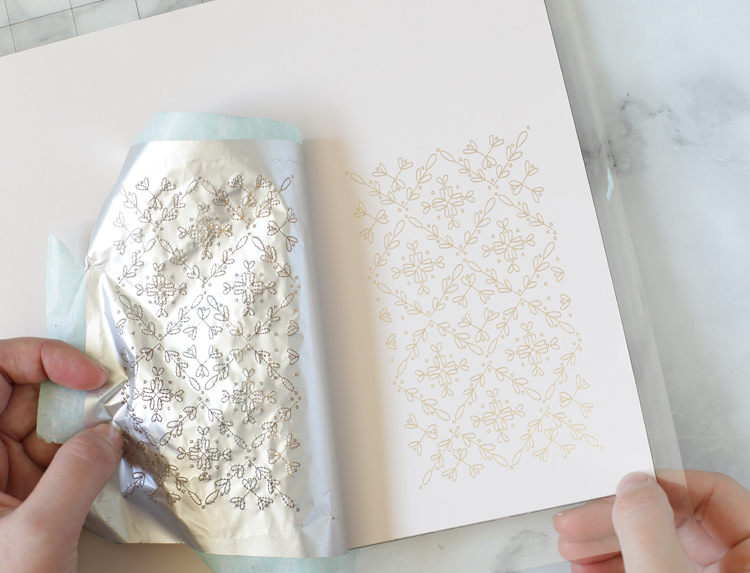
Step 7: At this point, the machine will tell the Foil Quill pen to sketch over the foil. It works the exact same way as a sketch pen, except the tip of the foil quill pen is hot and makes the foil stick to the cardstock underneath.
When it’s done working its magic, your Silhouette machine will pause and the pen will pop up. Carefully unload the mat, then immediately hit RELOAD, making sure it’s lined up exactly how it was before. This step is super important because if you reload the mat slightly differently than how it was loaded the first time, the cuts won’t line up with your newly foiled designs and then you’ll be really sad and cry a thousand tears. (Okay, maybe that’s a tad dramatic.)
Step 8: Remove all of the foil sheet and placement tape from over the top of the cardstock.
Step 9: Click RESUME in Silhouette Studio and the machine will use the left tool to cut the house shape out of the cardstock.
Step 10: Repeat the process of foiling and cutting for the roof piece.
Step 11: To add a bit more shine and interest to the houses, I decided to frame out the windows and doors with metallic vinyl. I used adhesive vinyl from American Crafts that I purchased in the open stock paper section at AC Moore. It’s super shiny and I love the little pop it added to my houses. I cut it on my machine just like I would cut any vinyl, then weeded away the excess and stuck them on the cardstock. No transfer tape needed!
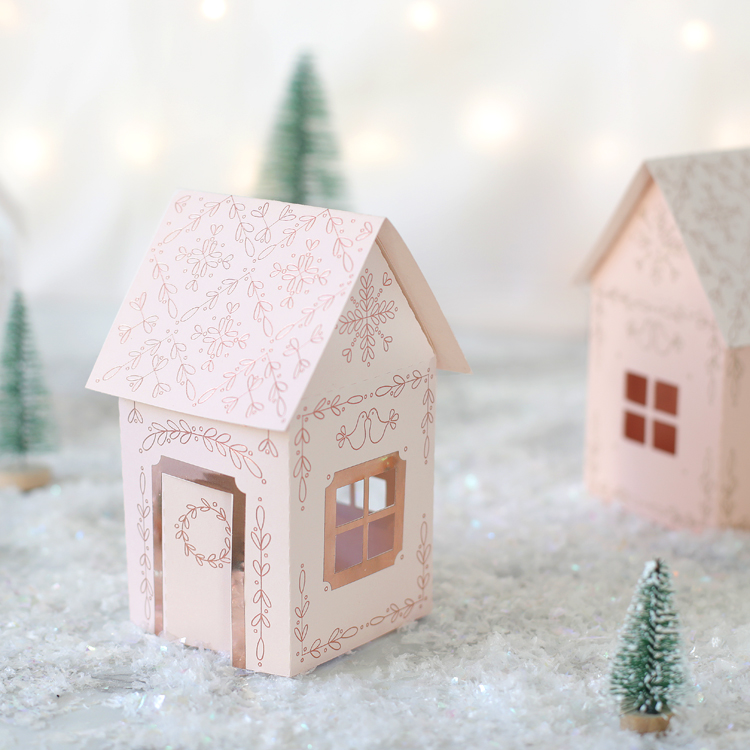
I also made a version of the houses that featured more line details around the door and windows just for variety. Both versions are in the download folder below.
Step 12: Fold along the dotted lines on the houses. Run adhesive on each of the flaps, then fold the house together. Put the roof piece on last.
I used little electric tea lights to light up my village and I have to say, I love how they turned out!
Tips for Using the Foil Quill
- Watch that the foil quill cord doesn’t get caught in the Silhouette’s roller feed or under the tool carriage.
- I used the adapter plug from my phone’s charging cord to plug the foil quill in to an extension cord since my computer is not next to my Silhouette machine.
- Placement tape is included in the Foil Quill Starter Kit, but when you’ve used all of it, regular washi tape works well as a replacement.
- Double check that you have the settings set correctly in Silhouette Studio. This was the biggest area I had trouble with since I haven’t used the Sketch feature very much. However, I think a lot of my troubles will be a non-issue for you if you are very precise in following the directions above.
- We R Memory Keepers recently released a magnetic mat made to use with the foil quill, so instead of taping the foil down you just use magnets. If you try the Foil Quill tool and end up using it a lot, I would recommend purchasing this additional accessory just because it would save a lot of time. You can see the magnetic mat in action in this Youtube video.
I have had several requests for a version of this project you can make without a cutting machine, so I’ve added a printable template version for the houses that you can print on cardstock and cut out by hand. Sadly, you won’t be able to add the beautiful gold foil designs without the Foil Quill and Silhouette machines, but you could decorate the houses by hand with a gold paint pen or add gold glitter. The printable version is in the download folder below.
Gold Foil Paper Christmas Houses Video Tutorial

Comments & Reviews
When I go to download there is nothing there besides an explanation mark.
Hmm, I’m not sure what you’re seeing. I just double checked and the files are there. They are SVG files though, not jpeg or pdf files though. Have you dowloaded SVG files before?
These houses are so adorable! Thank you for sharing the files and tutorial! I can’t wait to make some to decorate this holiday season. 🙂
I also can’t find the files. I download SVG-files often so that’s not the problem.
I re-did the link to the Google Drive folder where the files are stored. Try again and then let me know if it works. Otherwise, I’ll just email the files to you.
I have tried again to download the SVG files and unzip and unblock and they still will not open in Silhouette. I really do want to try the beautiful houses. Thank you
Hi Barbara, I am guessing that the problem is because they are SVG files. Do you have the regular version of Silhouette Studio or the upgraded Business edition? The regular version of Silhouette Studio won’t open SVG files. I am going to talk to some of my Silhouette designer friends to see if I can come up with a file version that everyone can open.
I can’t find how to download it.
Near the bottom of the post, it says, “DOWNLOAD THE FREE CHRISTMAS VILLAGE FILES HERE.” Click on those words. A new window will pop up and there will be several different files. Right click on the file you want, and choose “Download.”
Hope that helps!
Beautiful – thank you for sharing – I can’t wait to make it.
These are so darling and I want to make them so much, but could not figure out how to do it on my Cricut. Boo boo. Any tips or hints how to use this file in the cricut maker? Thanks!
Hi Beverly,
I don’t have a Cricut, but I think this is how you would do it. There are two different file types in the download folder. Make sure you download the SVG files. Then:
1. Log in to Design Space.
2. Click the “Create New Project” button.
3. Click the “Upload Image” button.
4. Click the “Vector Upload” button.
5. Click the “Browse” button and locate your svg file that you want to import.
6. The file will be uploaded to Design Space and will appear in the Uploaded Images gallery. From there you can access it and work with it.
If you try this, please leave a comment letting me know if it works or not so I can pass it along to other Cricut users. Thanks!
Hello – I don’t have any kind of machine. Could you print out a house with the designs on it that I could just
download and print out and cut out myself ? The house is adorable Especially your embellishments.
Thank you. Kathy
Hi Kathy, That will take a bit of work on my end, but if I find some time I will try to redo the files to be suitable for printing.