I have been looking for a corner hutch for my dining room for a long time. The room needs something substantial in that corner to balance the space. You can see some pics (and read about my kitchen dreams) HERE.
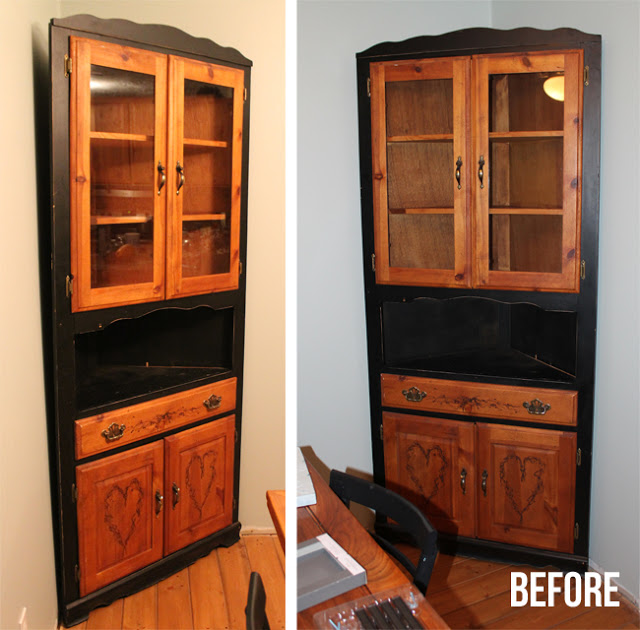
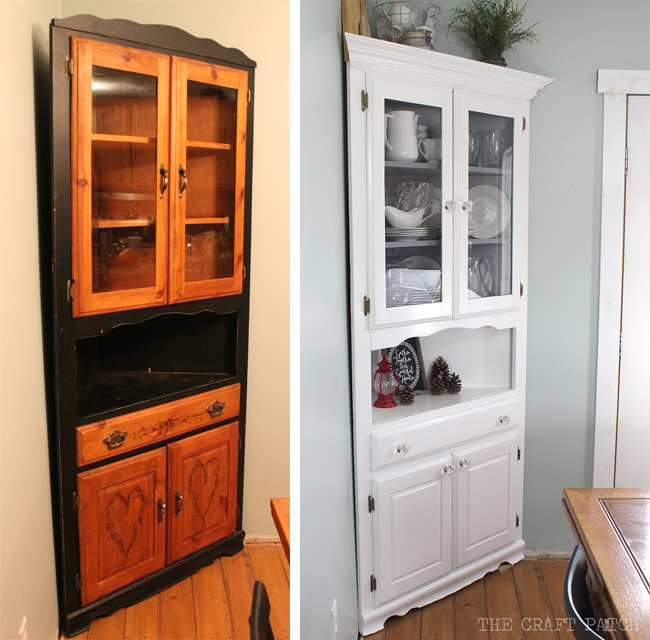
When I found this ugly corner cabinet second hand, I knew I could redo it and make it exactly what I wanted.
It was solid wood, just the right size, and only $75!
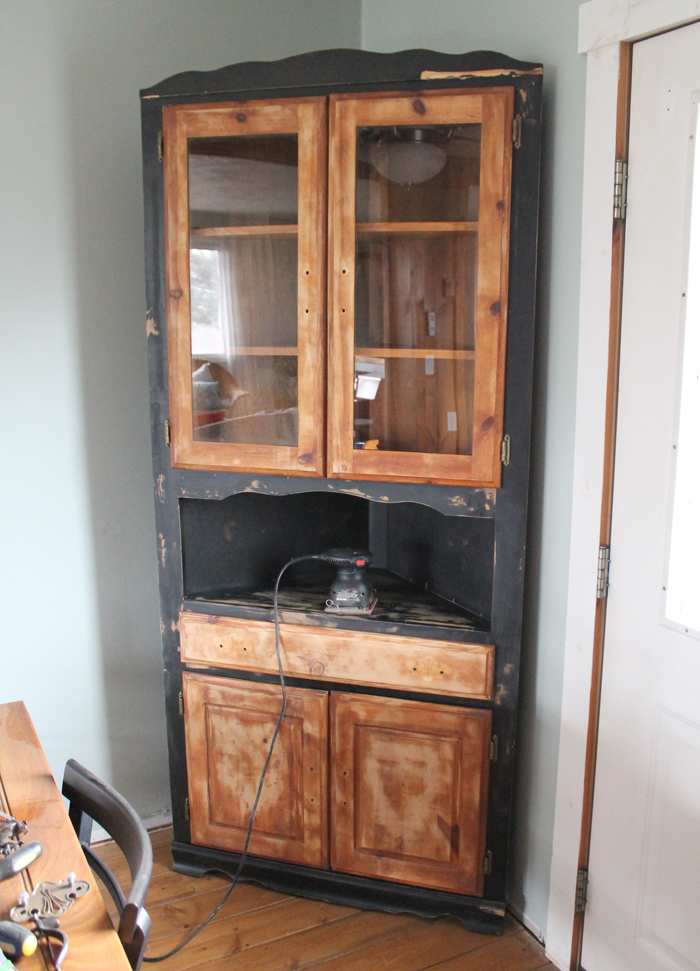
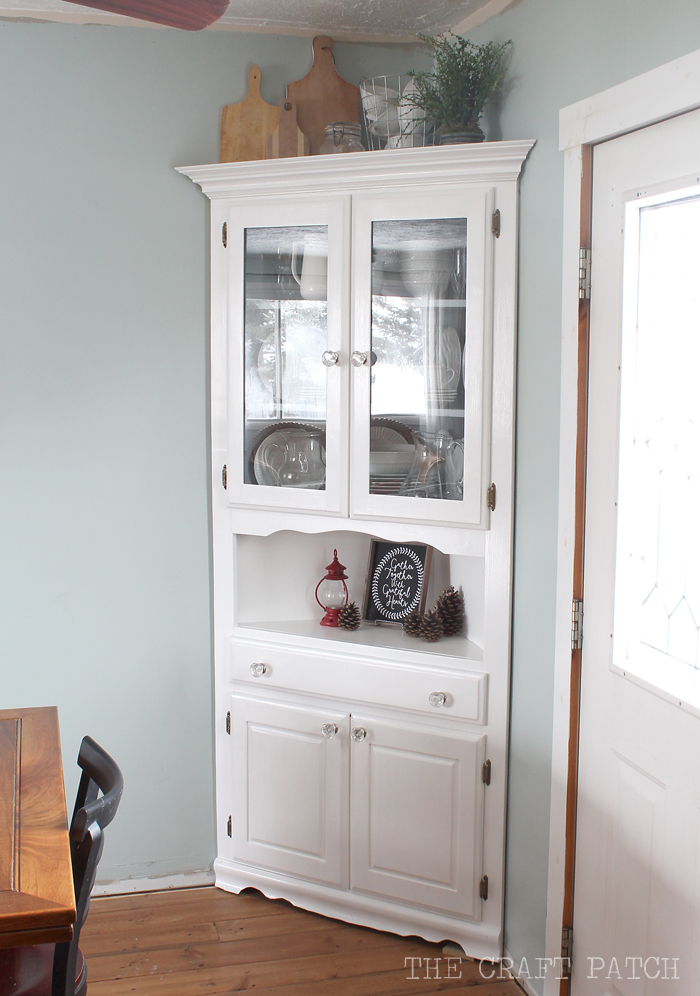
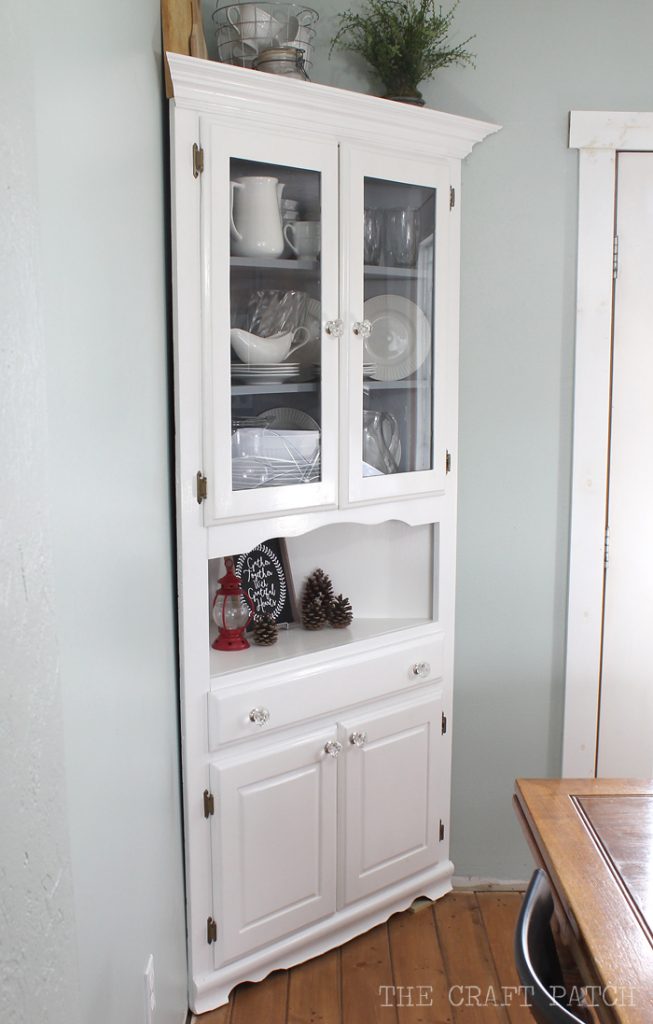
For the makeover, I gave it a good sanding, painted it with regular old latex paint, took off the old wavy top piece and replaced it with crown molding, and replace the hardware with crystal knobs. I got all six knobs for $9 at Ross of all places. I’ve never seen knobs there before, but I grabbed them up quick… that’s a fantastic price for such large crystal knobs.
I’ve learned two important lessons from the many times I’ve painted furniture.
- Always, always, always sand. End of story. For realsies though… any time I’ve skipped this step I’ve regretted it!
- Read the label on your paint can and follow the instructions about dry time. If it says wait 2 hours between coats, wait the full two hours. Painting a second coat over a coat of paint that’s not completely dry will leave your piece feeling sticky… forever! Patience is not my virtue, but I’ve learned that it’s worth waiting between coats!
- Read the label on your paint can and follow the instructions about dry time. If it says wait 2 hours between coats, wait the full two hours. Painting a second coat over a coat of paint that’s not completely dry will leave your piece feeling sticky… forever! Patience is not my virtue, but I’ve learned that it’s worth waiting between coats!
Okay, enough blah blah blah. You came here to see the pretty! Without further ado…
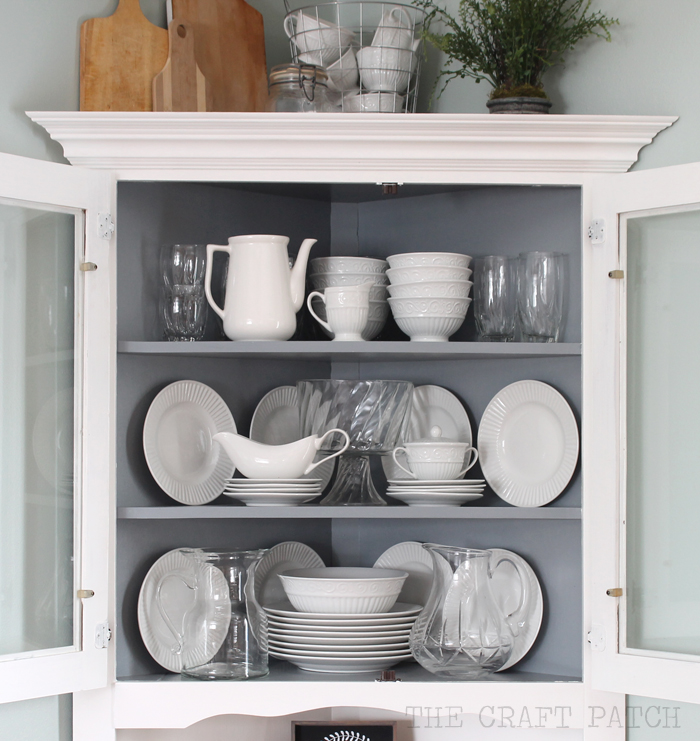
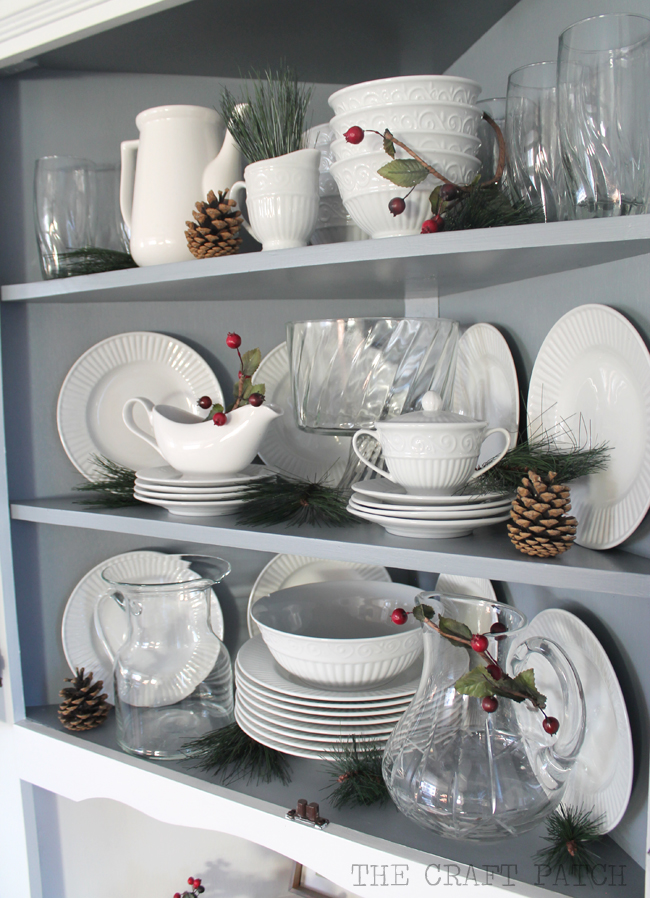
I’m excited to have a pretty place to display my dishes and to decorate seasonally!
Here it is all decorated for Christmas:
You know how it goes though. Putting that gorgeous new piece of furniture in the dining room made me realize that the trim around the back door needs to be replaced. And it’s gotten me itching to finish off the crown molding… and baseboards… and take down the ceiling fan… and rip out the cabinets hanging over the peninsula… and… and.. if you give a mouse a cookie, right?
A side by side comparison:
Ah! So fresh and sophisticated! I just love a good furniture redo! It’s amazing what paint can do, isn’t it?

Comments & Reviews
Wow, I love it! You are amazing!
Thanks, Karen! You're a sweetheart!
Excellent results! Well done.
Thanks… and I love your name!
That is beautiful! It looks like a completely different piece of furniture! I'm pretty jealous right now. Lol! And I love the pine cones. How sweet!! 😀
What a wonderful transformation! Your update is fresh and clean!
This is so beautiful – love the outcome! It really looks like it was made for that space. Your colors are beautiful too!
So cute and fresh and vintage looking now… love the gray interior. Liz
Thanks so much! I love it when a project works out!
When I saw the before I must admit I thought, oooooh why would anyone want that but "surprise" now I'd want that. Great job, it's perfect.
Haha! That's what my husband said when I brought it home!
So beautiful. My grandpa gave me a corner hutch he had in his garage. It fits perfectly in our kitchen. This is quite an inspiration. I want to paint the inside white with light gray on outside I think. Thanks for the sanding plea. I will do it now.
I’ve just purchased a corner display cabinet, can’t wait to give it a makeover!! Well done.
What did you use for the coat/finish and what brand did you use?
I used regular latex paint for this project and it’s held up okay, but I recommend using Sherwin-Williams Urethane Trim Enamel. I painted my kitchen cabinets with it and it is AMAZING.
Hello. How did you go from the hook openings (2 holes?) to a single whole for the crystal knobs?
I filled the old holes in with wood putty and drilled new holes.
It looks fantastic!
I am planning on painting 2 old pine China cabinets grey. I think inside and out.
I wasn’t planning on taking off the doors, but I’m wondering if I have to remove hinges and update them? They look like an antique brass color. I plan on putting on crystal clear knobs like you did.
I didn’t replace the hinges on mine, but you certainly can if you want to.
This corner piece is exactly what I looking for. If anyone knows where I can buy something similar, please let me know.
Wonderful makeover. Wherever did you find a corner hutch that tall? It looks to be seven feet, which is what I’m looking for. Yours is very close to exactly what I want. Wondering what the measurements are. Side depth, front width, overall height?
Hi Monica, I found it on Facebook Marketplace.
Hi Jennifer,
I love the cabinet! I am in the process of redoing mine and love the grey you chose for the inside. I had Repose Grey left over from where I painted my living room. However, it’s just not dark enough for the contrast. What color did you use?
Thanks,
Susie
Hi Susie! I’m so sorry, but I used a can of “oopsie” paint so I have no idea what the color is. I’ve heard good things about Sherwin-Williams Peppercorn for a dark gray.
hi Jennifer…how did you remove the top piece. We JUST moved ours while doing kitchen reno which is very transitional style, our cabinets are colonial for sure BUT if i could take the top off and relace with different molding that would work perfectly. how did you do it…? 🙂
Our top piece was just nailed on, so I used a crowbar with a towel under to pry it off. To attach the new piece of molding, I nailed small blocks of wood into the top of the cabinet flush with the front edge. Then I nailed the molding into those blocks. Hope that helps!
I am replacing the top piece on my corner hutch with crown moulding as well. At what angle did you cut the ends of the moulding?
They are 45 degree angles.
Do you make these and sale them? If so would you be able to make a rustic blue look?
No, I’m so sorry. I don’t sell anything on my site. I only teach people how to do things themselves.
Love it,. Great job. Wondering, What paint color did you use?
Sherwin Williams Pure White
Love what you did to your corner cabinet I have one I am ready to tackle now after seeing this! I’m also in the middle of repainting my kitchen and I was wondering what color that is you have on your walls? I love that as well. Thank you for sharing!
It’s Sherwin-Williams Rainwashed… and I still love it so much even after living with it for six years!
So happy I came across your corner hitch. I purchased an insanely heavy solid oak corner hutch for $70 a few years back. It’s in perfect condition and I’ve been wondering what it would look like painted white. (Sometimes I have a hard time painting over beautiful oak) I’m convinced now to go for it! Your piece is beautiful and fresh.
Do the cabinets you painted with the Sherwin-Williams Urethane Trim Enamel paint look the exact same as this color? Also what sheen did you use? I’m really going for pretty much exactly the same look you did. Just want to use the best paint possible. Also, did you use some sort of protective coat after the paint?
I can’t say enough good things about the SW Urethane Trim Enamel. It has held up so well over the last five-ish years and I have four kids and cook every meal at home! I didn’t use a protective coat after. The color matches really well.