These creative Christmas gift ideas are simple and fun to put together and include printable tags to go with each gift.
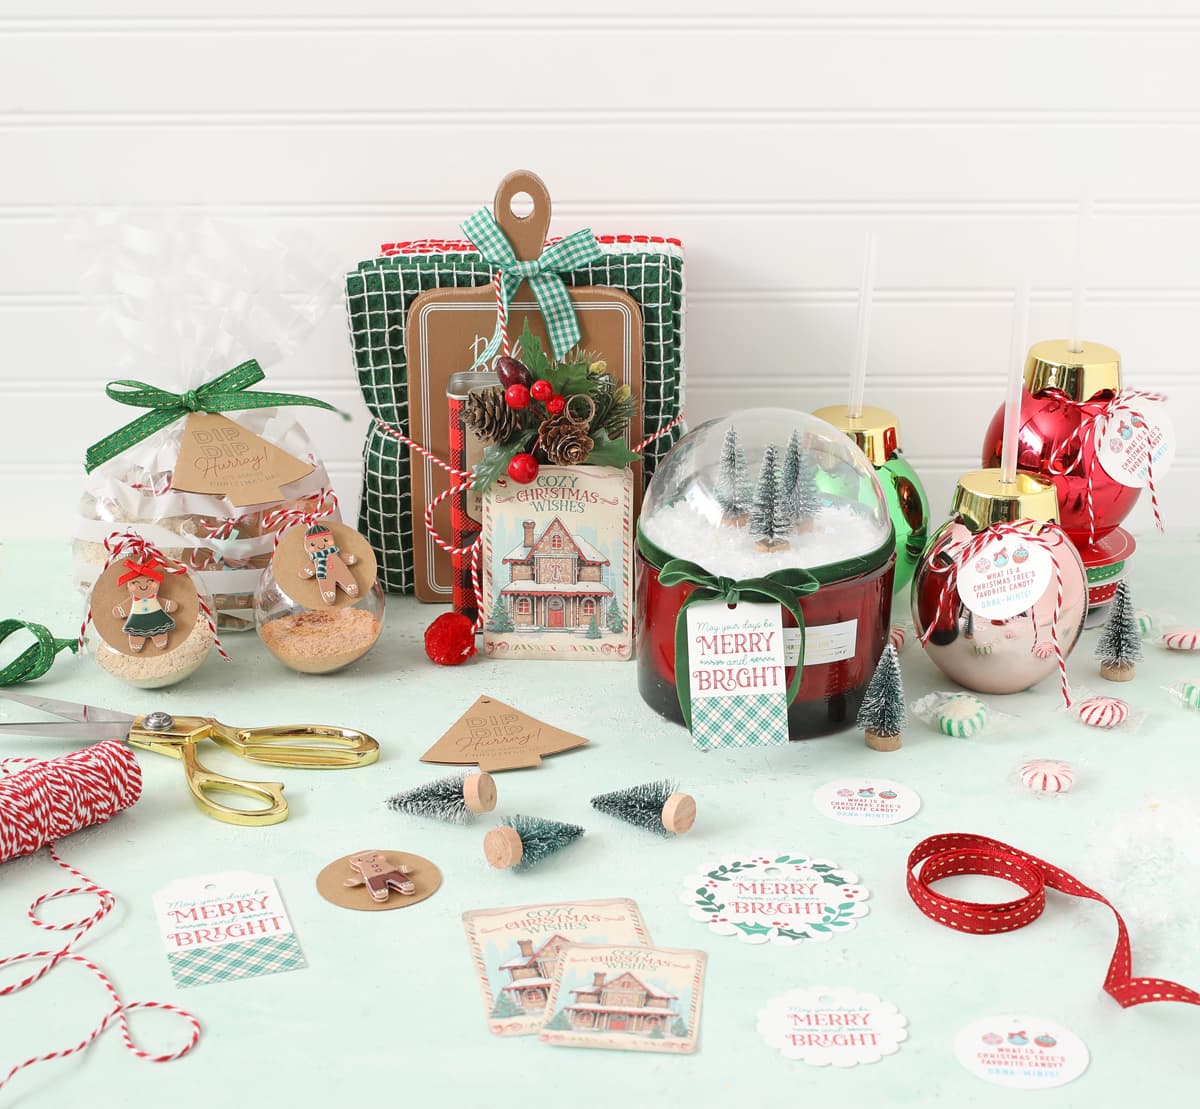
It’s that time of year when everyone is on the hunt for creative and unique Christmas gifts to give to neighbors, teachers, co-workers and all the other people we know and love. Today I’m sharing four fun Christmas gift ideas that all have a handmade touch without being labor intensive. I created printable Christmas gift tags to go with each gift, so that should save you time.
This post is sponsored by Hobby Lobby. #HobbyLobby #HobbyLobbyFinds #ad
Everything I used I purchased at Hobby Lobby. They have so many cute items that would make good Christmas gifts. I love that it was a one stop shop for gifts, ribbon and all the crafty supplies I needed. Yay!
Number 1 – Christmas Kitchen Gift
It doesn’t get any easier than this holiday gift idea. I found some cozy kitchen themed holiday items and I’m putting them together for a lovely gift that any foodie/decor-enthusiast/homebody would love. These are just the ones I picked, but there are a ton of cute Christmas home goods to choose from.
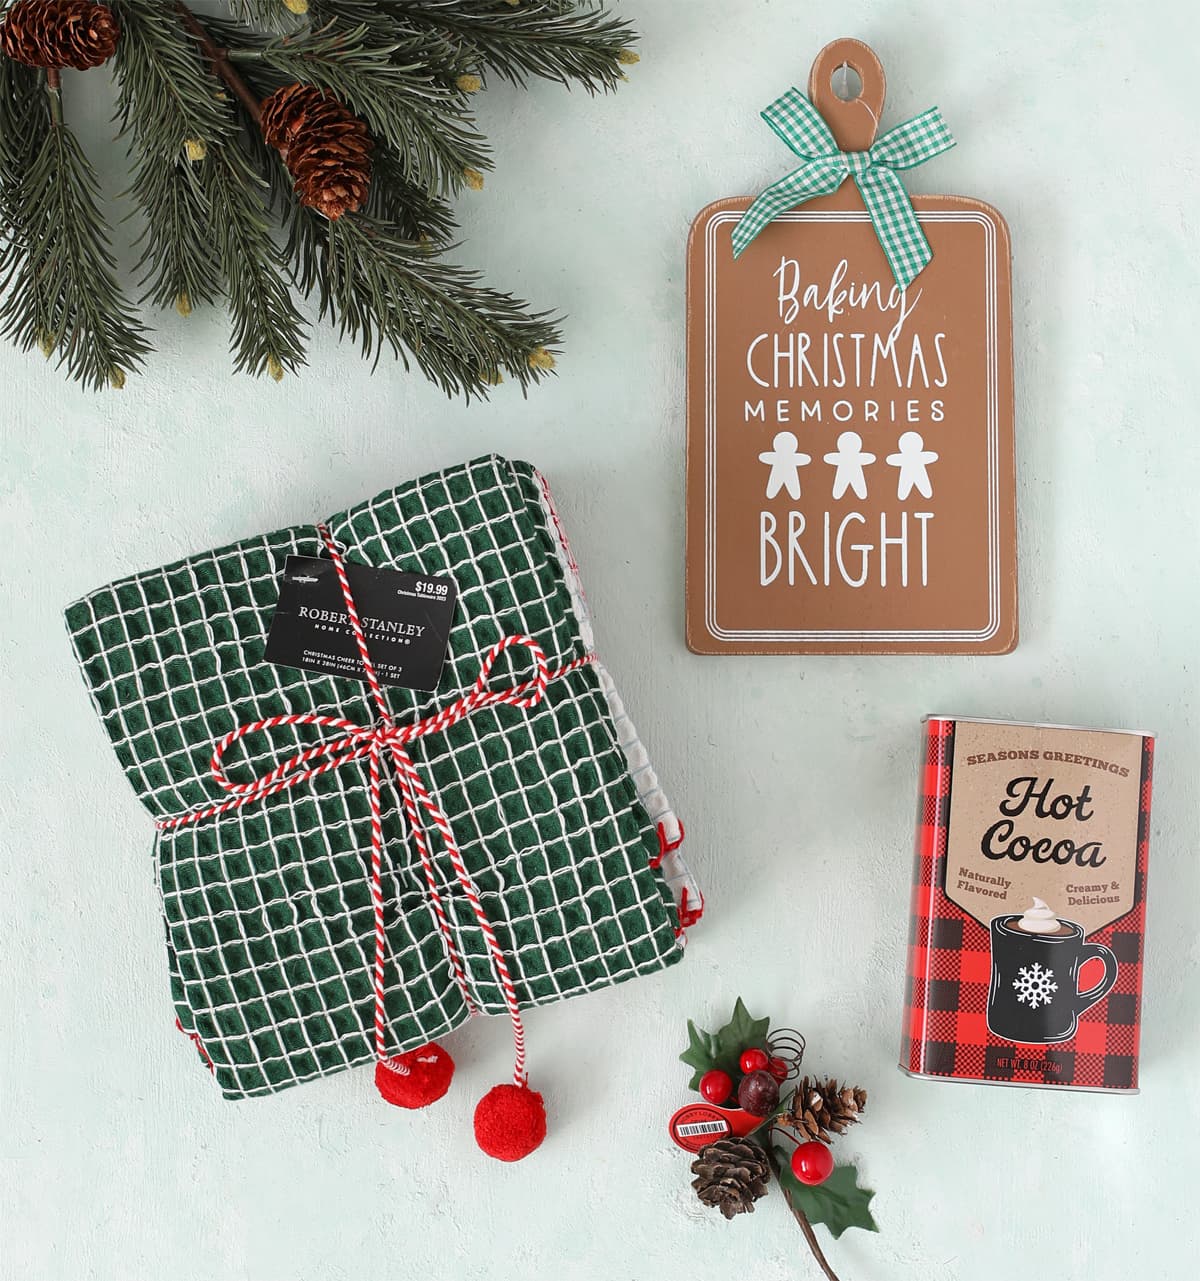
The hot cocoa comes in an old-fashioned metal tin and I just couldn’t resist it. So charming!
The towels (3 pack) come with a cute string already around them, so all you have to do is loosen it a bit, slide in the other cozy goodies, then tie it back up. I added some greenery and a little floral pick to make it look even more festive. Alternately, you could split up the three towels and only give one to each person to make it stretch a little further.
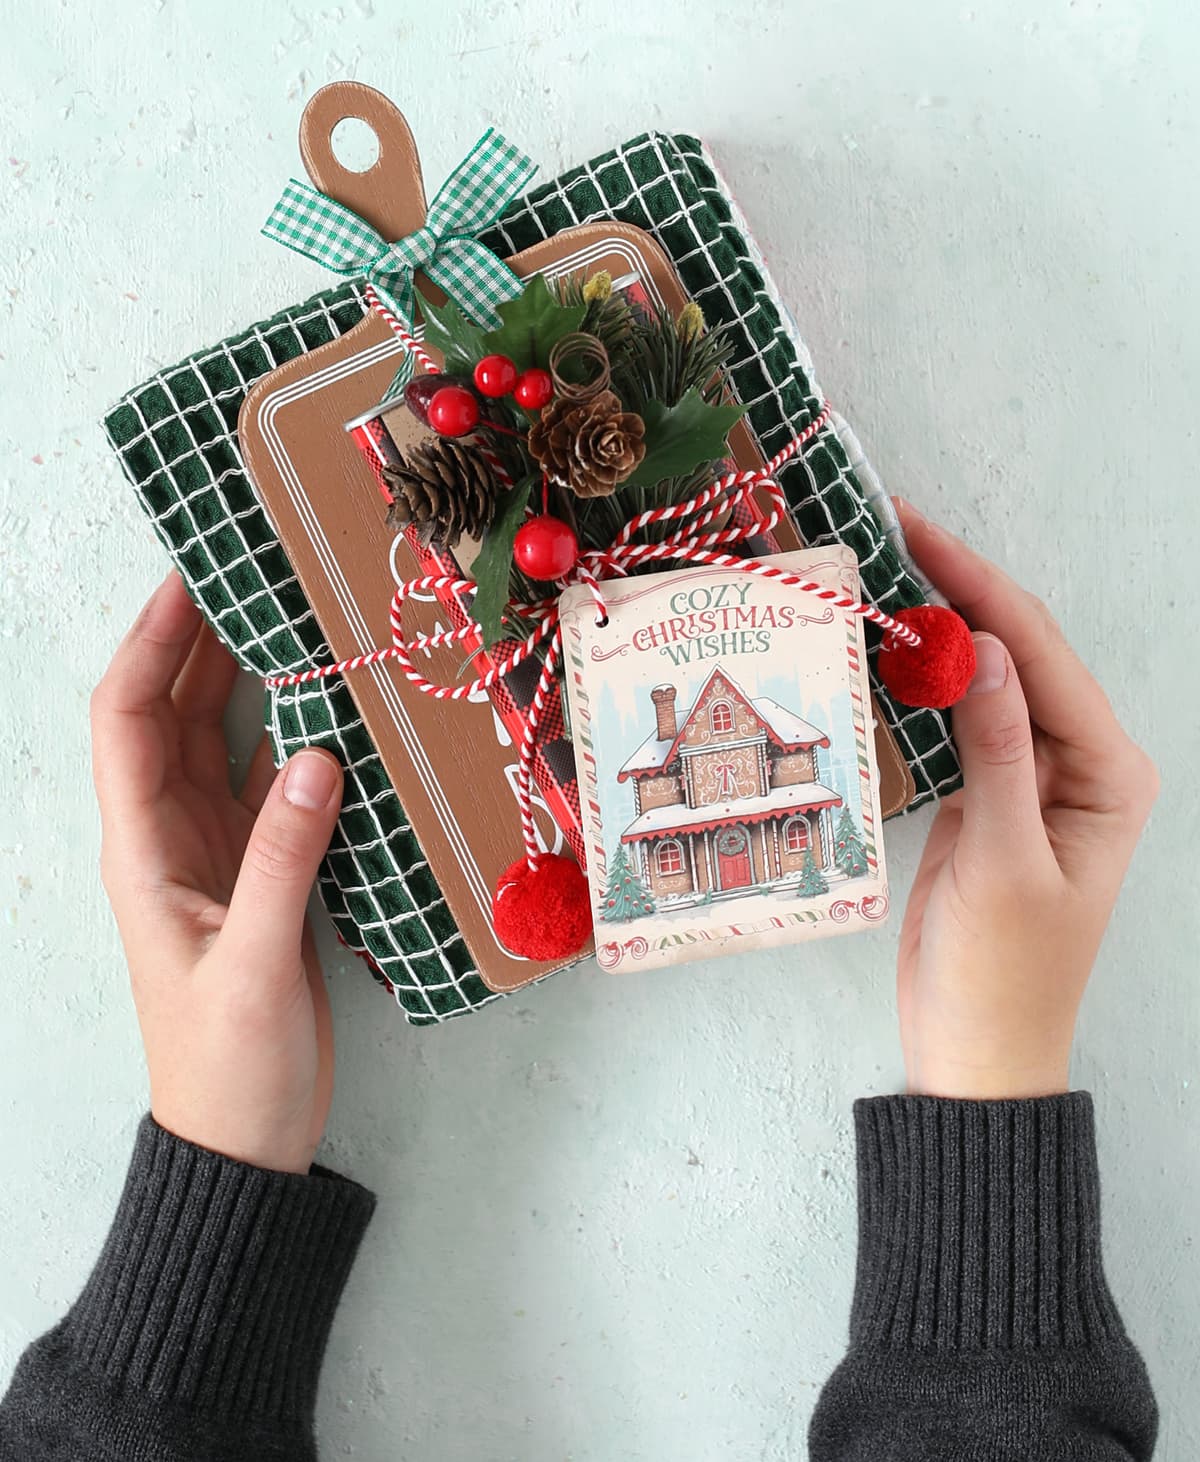
I think the printable tag is the perfect finishing touch. It says, “Cozy Christmas Wishes” and really fits the vibe of the gift. And remember, all of the tags are available at the bottom of this post.
Number 2 – Punny Ornament Cups
This next gift is perfect to give to neighborhood kids or nieces and nephews or grandkids, especially if you let them open it at the beginning of the month so they can use the cups throughout December.
I just thought these little ornament cups were too darling! I love the metallic bright colors.
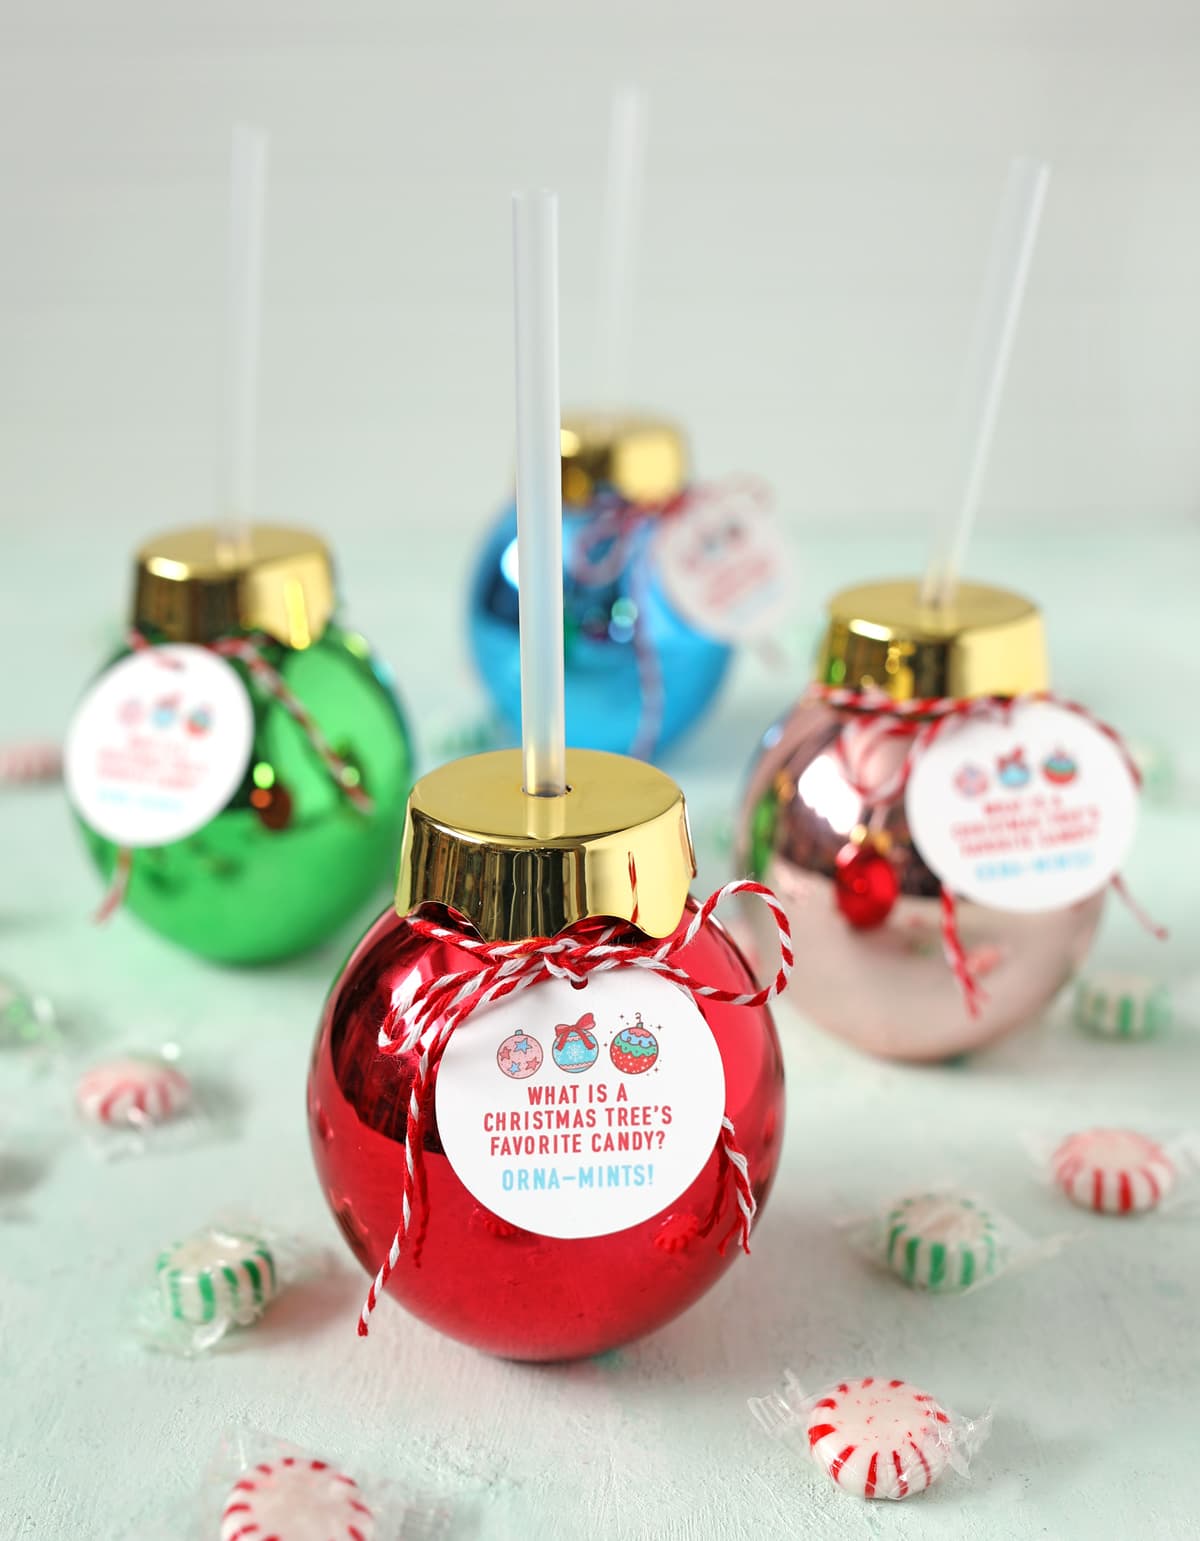
Materials Needed
- Metallic Ball Ornament Cup
- Red and White Baker’s Twine
- Mint Flavored Candies
- White Cardstock (for the printable tag — download below)
Instructions
Step 1: Print the tags onto white cardstock and cut them out by hand or with a Silhouette or Cricut machine. Both file types are available below.
Step 2: Fill the cups with mint candies. I used starlight mints, but you could use mint flavored chocolates or mini candy canes or any other mint-flavored treat.
Step 3: Tie a piece of baker’s twine around the ornament, add the tag, then tie a bow to finish it off.
Easy peasy, but so cute! If you can’t find these specific cups, I spotted a few other darling options:
More Christmas Cup Options
- Christmas Bulb Cup
- Red Christmas Truck Travel Tumbler
- Squishmallow Christmas Egg Cup
- Paw Patrol Christmas Cup
- Hot Cocoa and Christmas Movies Travel Tumbler
Number 3 – Snow Globe Christmas Candle
I smelled this Christmas candle in the store and immediately put it in my cart. The scent is called “Christmas Joy” and I’m not sure what it’s supposed to smell like, but I asked my two older kids what they thought it smelled like and they both said, “It smells like Christmas!”
After sniffing this candle for longer than I care to admit, I think it’s got hints of cranberry, pine, some kind of citrus and maybe just a tiny touch of cinnamon? It smells like one of those holiday simmer pots.
Anyway, to make the candle even more fun to give as a Christmas gift, let’s turn it into a snowglobe! You will need the following supplies:
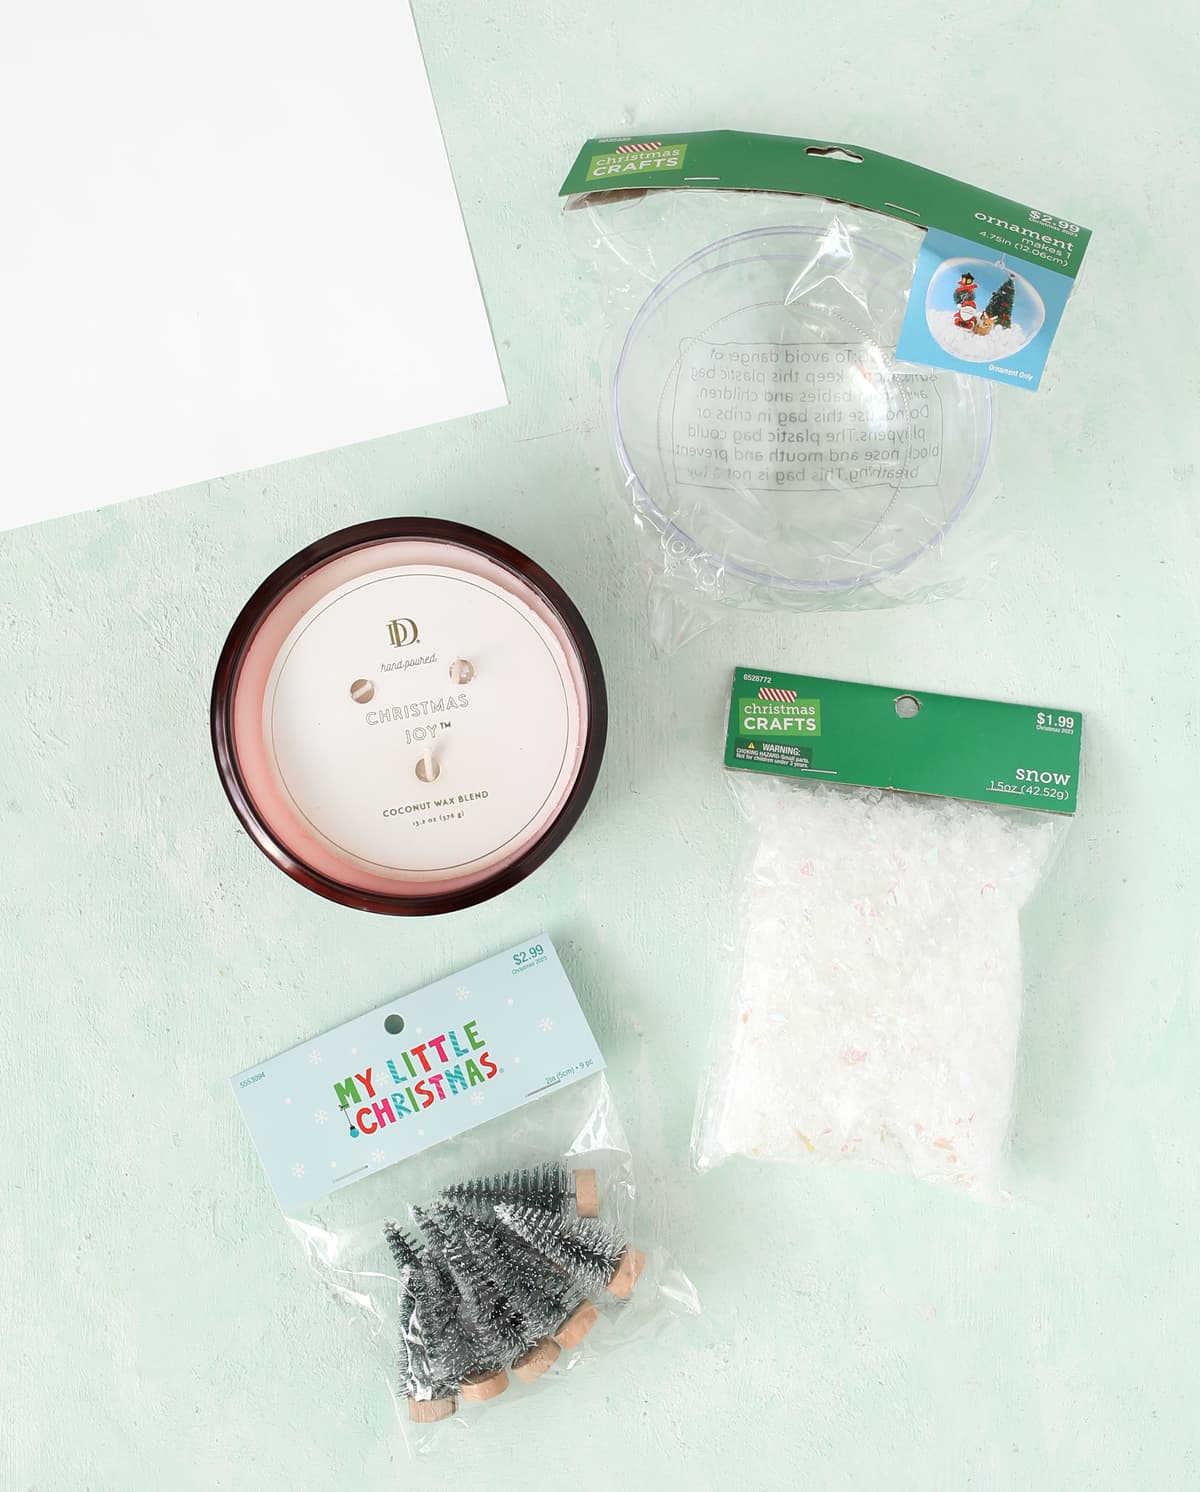
Materials Needed
- Christmas Joy Candle
- Plastic Ornament
- Iridescent Glitter Snow
- Mini Bottle Brush Trees
- White Cardstock
- Glue Gun + Glue Sticks
- Scissors
- Ribbon
- Printable Candle Gift Tag (snag it at the bottom of this post)
Instructions
Normally when I’ve seen people do this, the candle they use has a lid on it. If you buy a candle with lid, you can attach the snow globe directly to the lid. You already know how I’m obsessed with this candle, so I wanted to figure out a way to make it into a snowglobe sans lid. So let’s do it.
Step 1: Open the plastic ornament and trace it onto a piece of white cardstock. Cut the circle out about 1/4 inch from the line you traced so the circle is slightly bigger than the ornament.
Step 2: Use hot glue to attach mini trees to the cardstock. You could also add little figurines or other miniatures. Just remember that they need to fit inside the ornament half.
Step 3: Add some fake snow to the inside of the ornament half, then line the edge of the ornament with hot glue. Place the cardstock onto the ornament half so that the trees are inside the dome and press it down securely into the hot glue to seal up all the edges. You don’t want any holes or the snow will fall out.
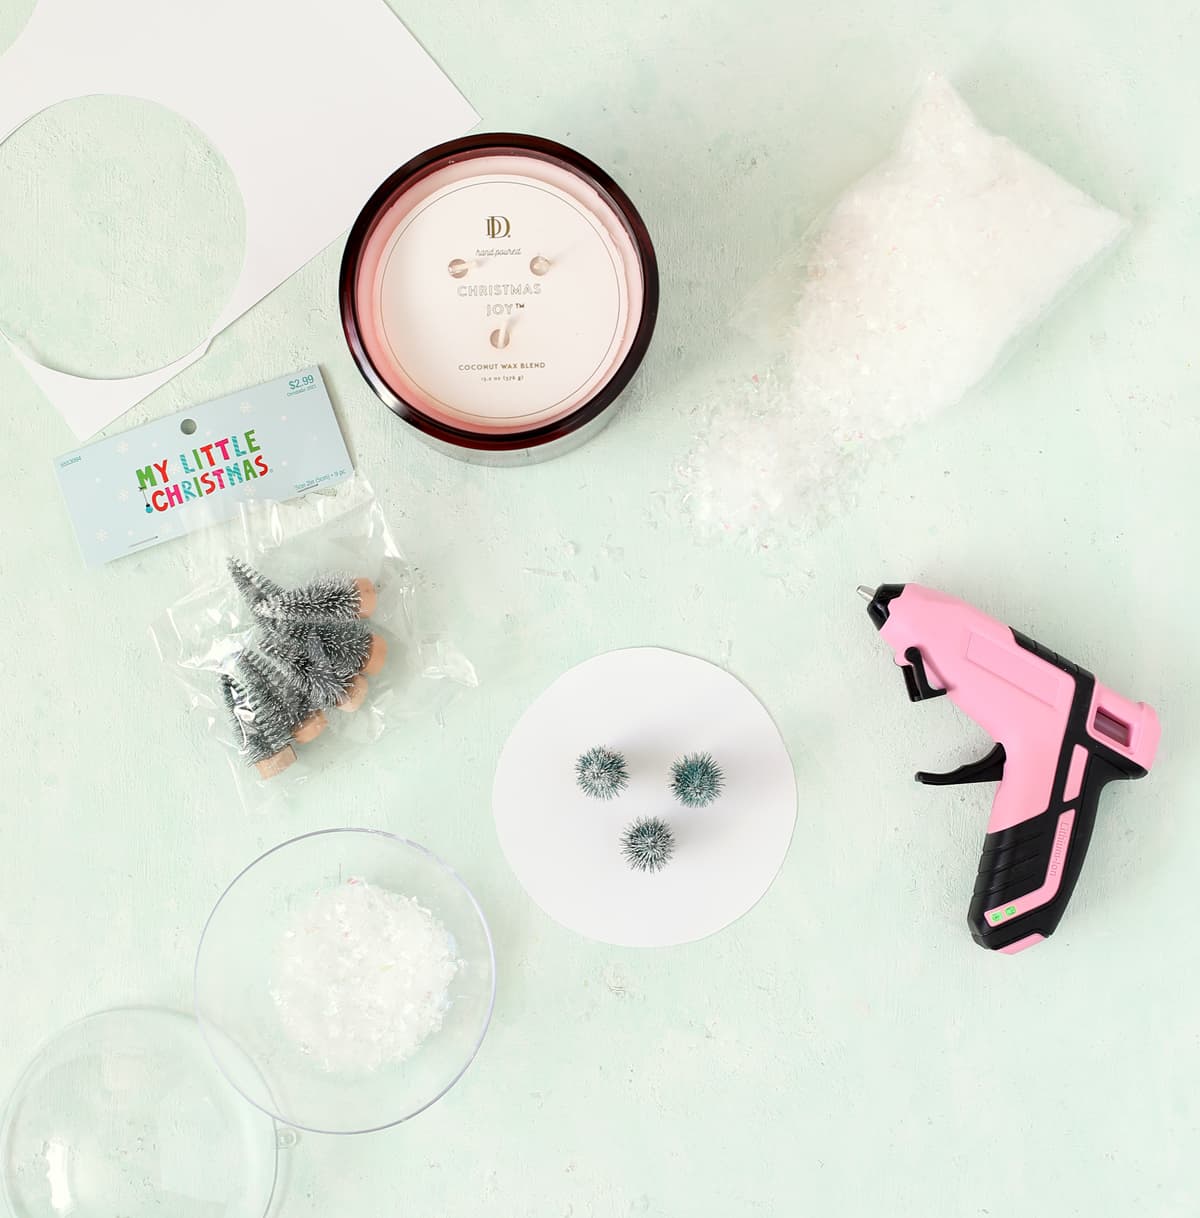
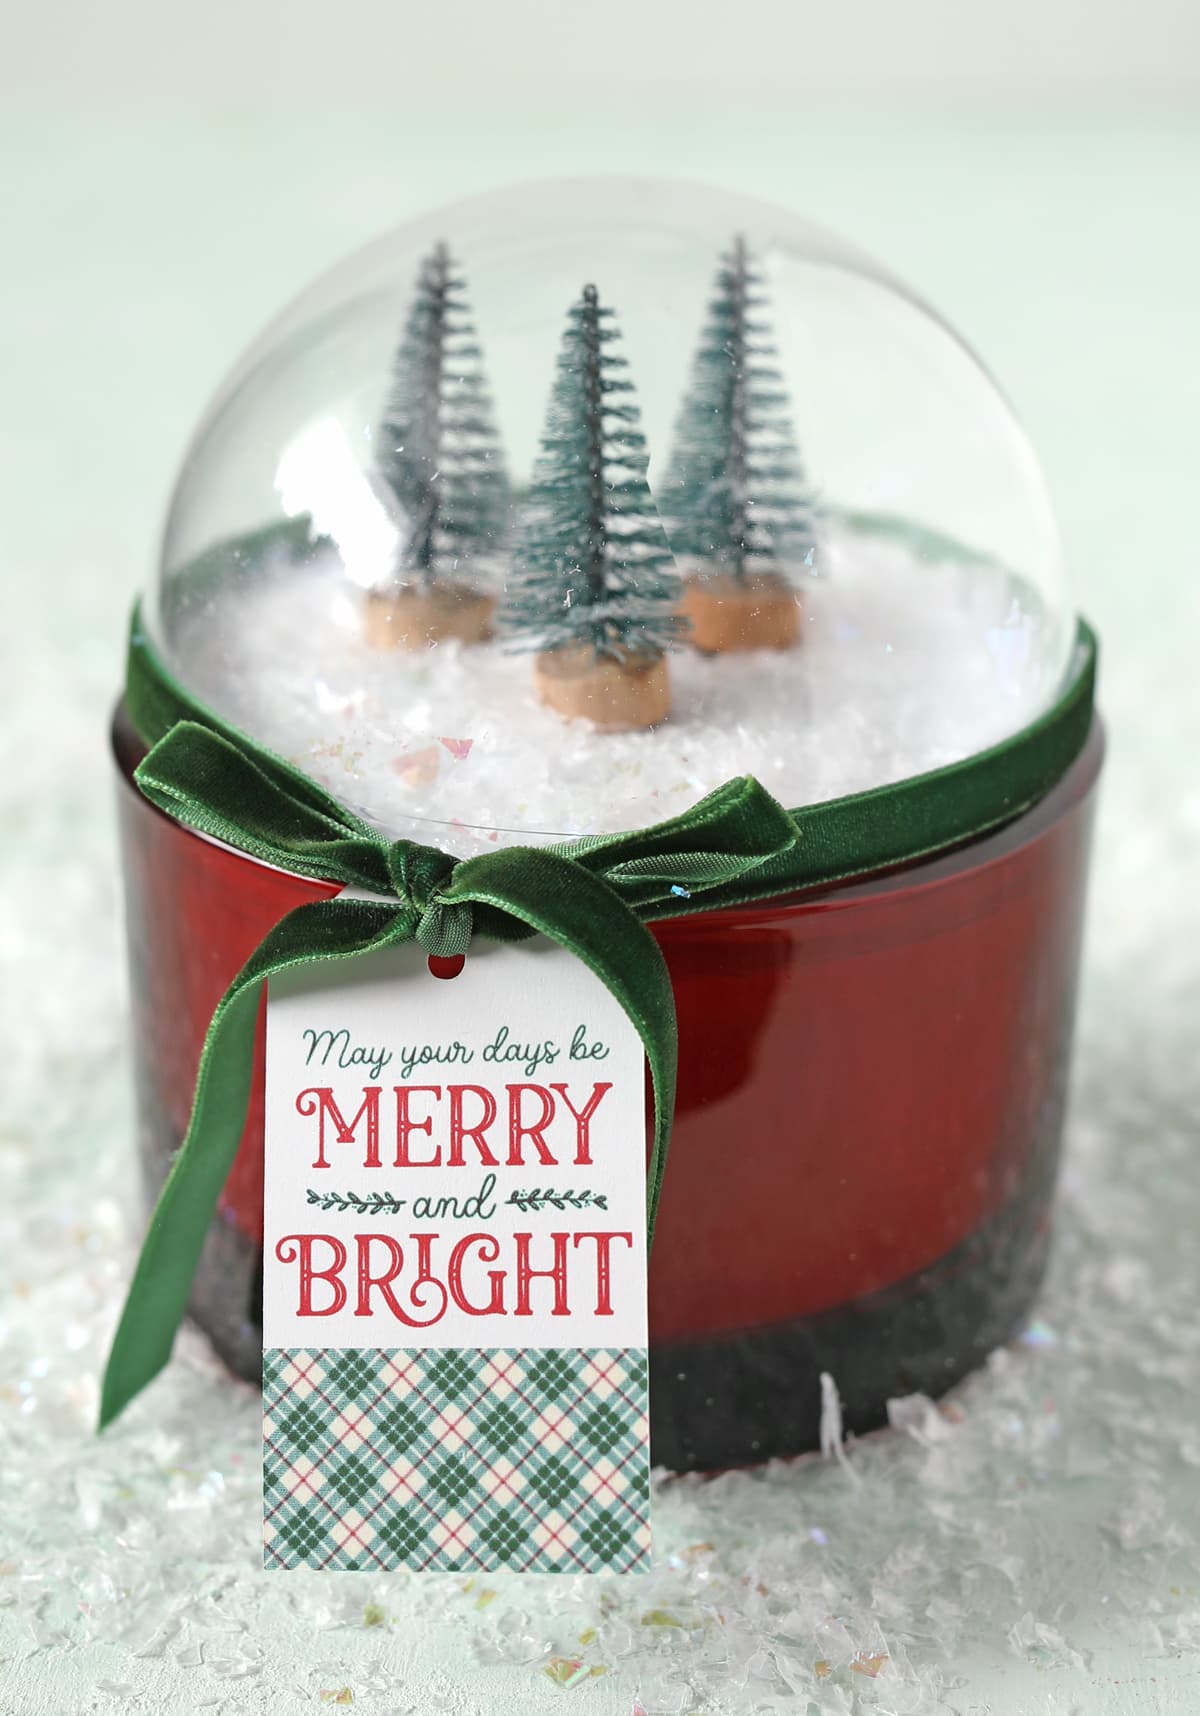
Step 4: Cut away any extra cardstock that is showing around the edges of the ornament, then tack the snow globe to the top of the candle with the tiniest little dots of hot glue. You want as little glue as will hold the snow globe on without making it hard to get off when you want to use the candle. Alternately, you could use Glue Dots so it peels off nice and easy.
Step 5: Tie a ribbon around the candle and attach the cute gift tag that says, “May Your Days Be Merry and Bright.” Get it? LOL. I sure do love a good pun.
Number 4 – Dip Mix Ornaments Christmas Gift Idea
I saved my favorite idea for last. I saw this Dip Mix collection in the Christmas treats section and the ideas just started flowing. It’s certainly cute as is, but you know I can never leave well enough alone. We’re going to put the dip mix inside of clear Christmas ornaments and add our own darling labels to take this gift up a notch.
One cool thing about this is that you can give all eight dip flavors to one person or divide up the different dips to give to multiple people.
You will need:
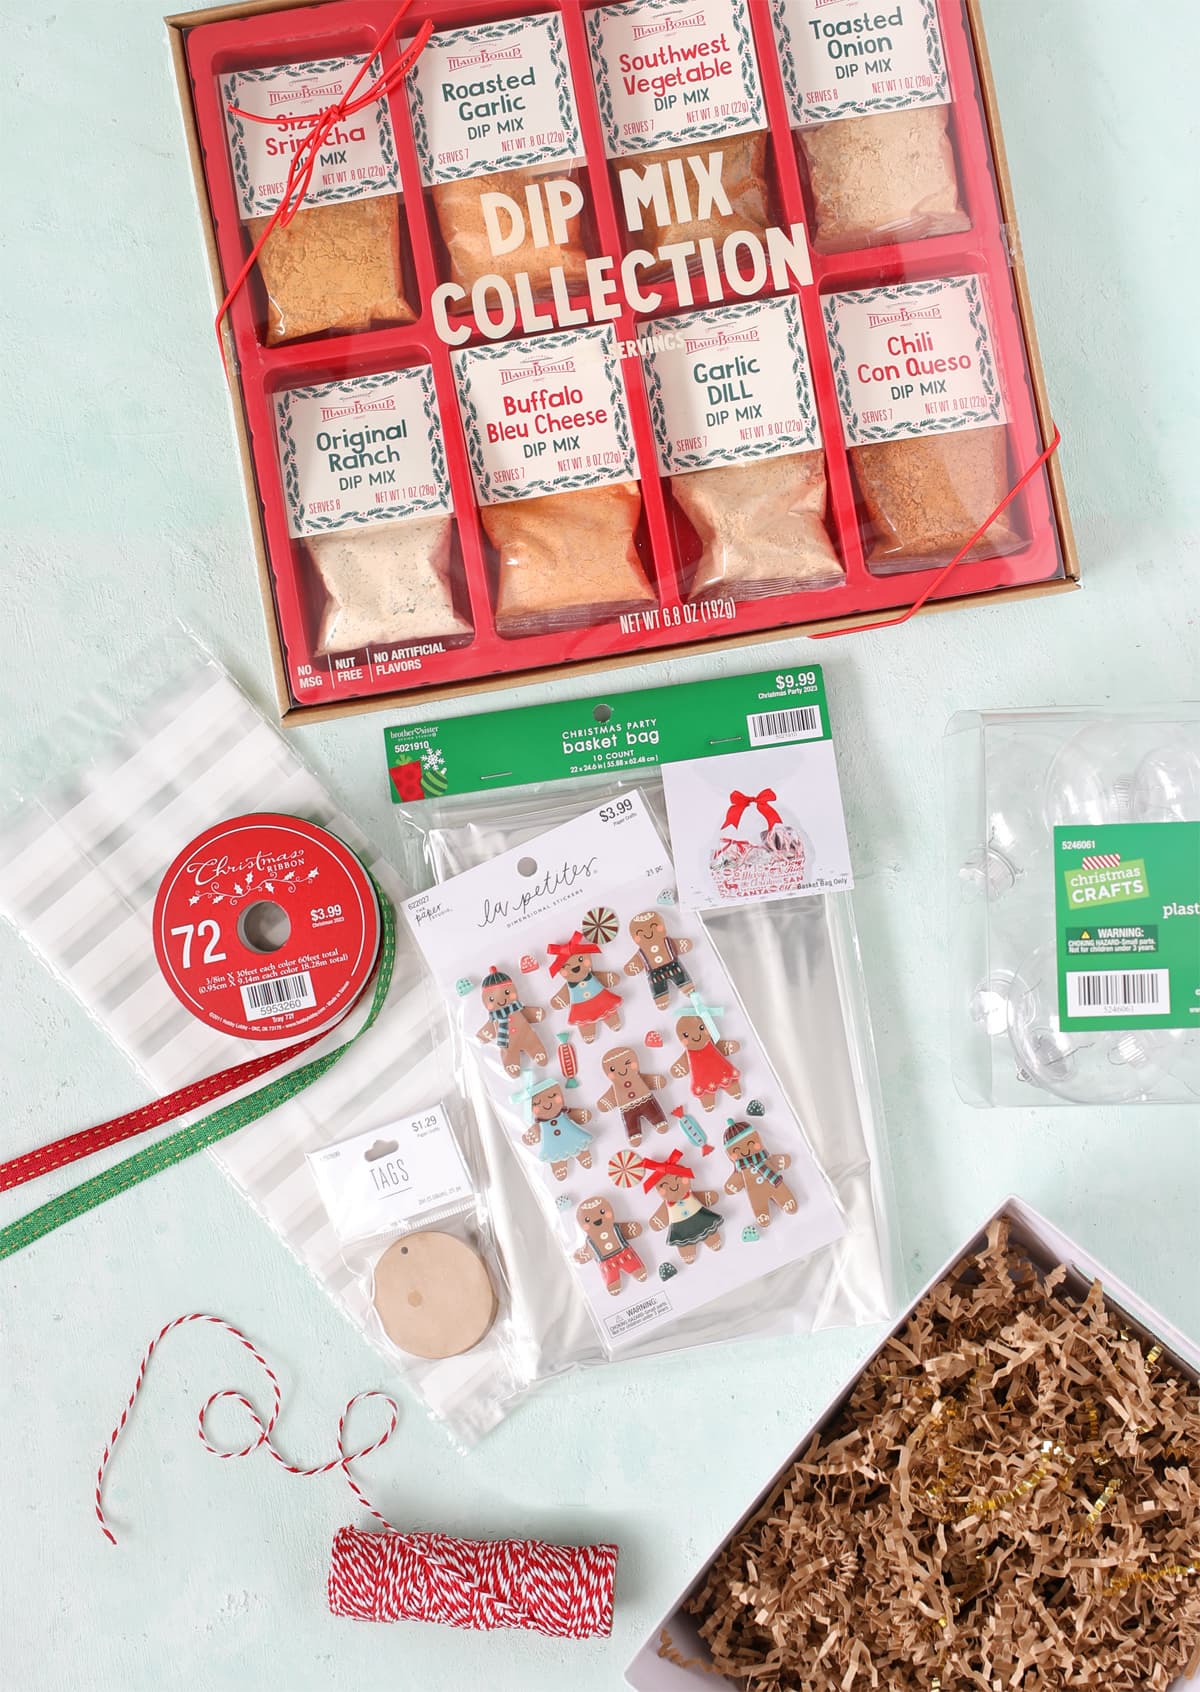
Materials Needed
- Holiday Dip Mix Collection (look in the Christmas food gifts section)
- Plastic Ornaments (2.65 inch set of 8)
- Gift Box
- Basket Bag
- Paper Shred (Red+Green or Kraft)
- Clear Gift Bags (if making multiple smaller gifts)
- Kraft Paper Circle Tags
- Gingerbread People Stickers
- Baker’s Twine
- Christmas Ribbon
- Small Funnel
- Scissors
Instructions
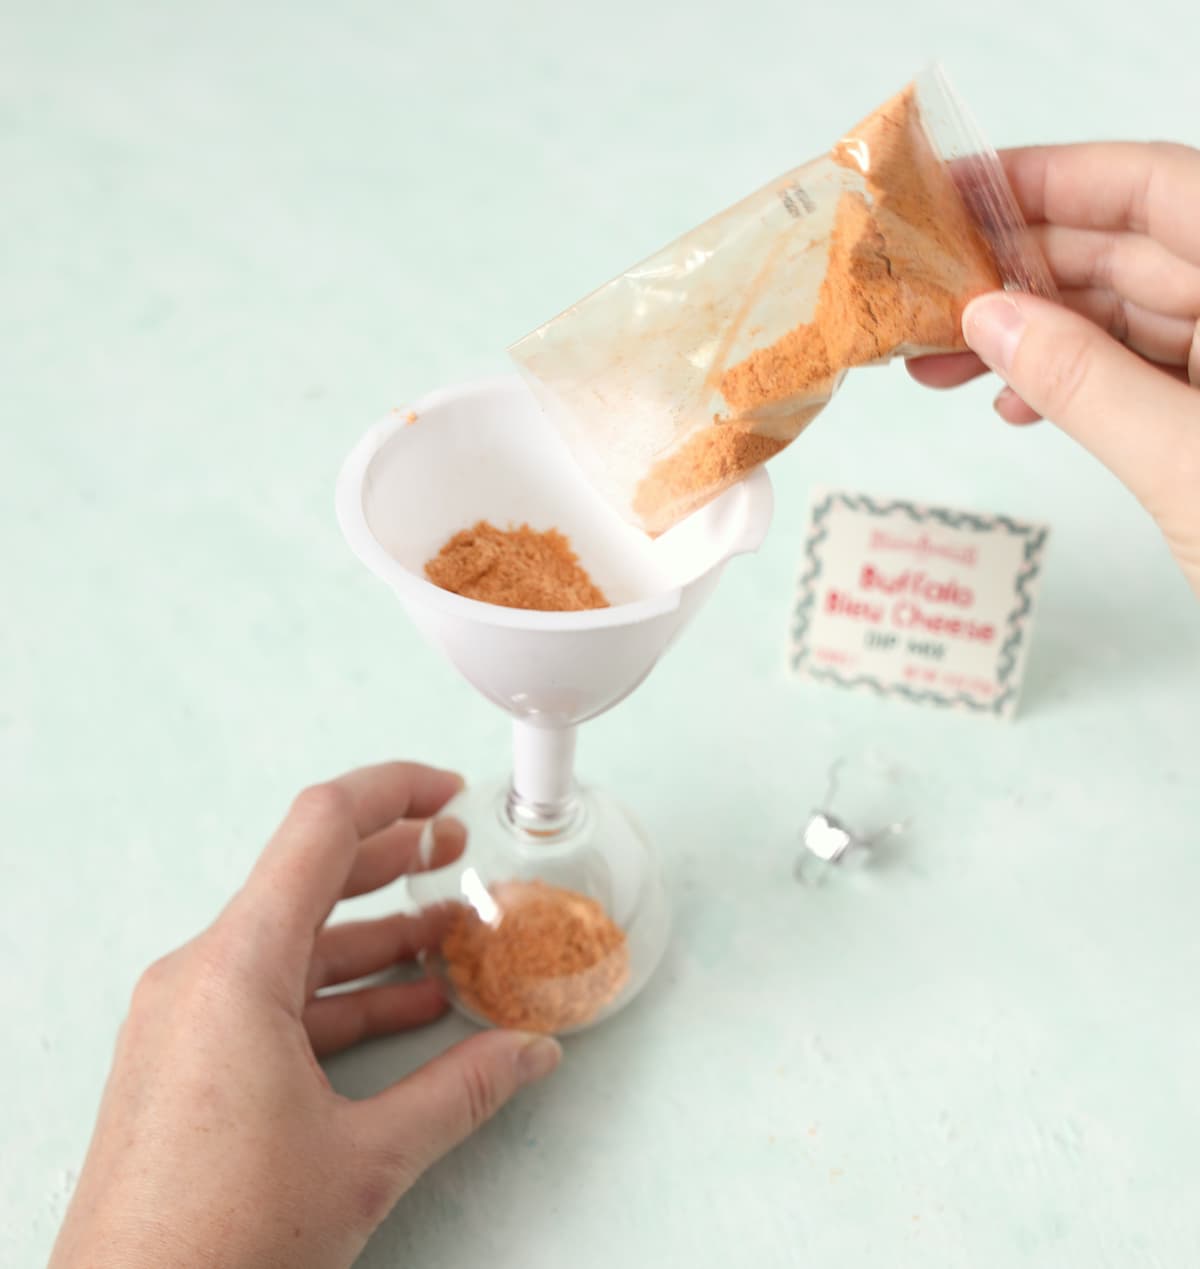
Step 1: Open one package of powdered dip mix at a time so you don’t forget which flavor you are working with. Take the metal topper off of an ornament and place the funnel inside the hole. Pour the dip mix into the funnel and gently tap the ornament until all of the mix is inside. Replace the metal ornament top.
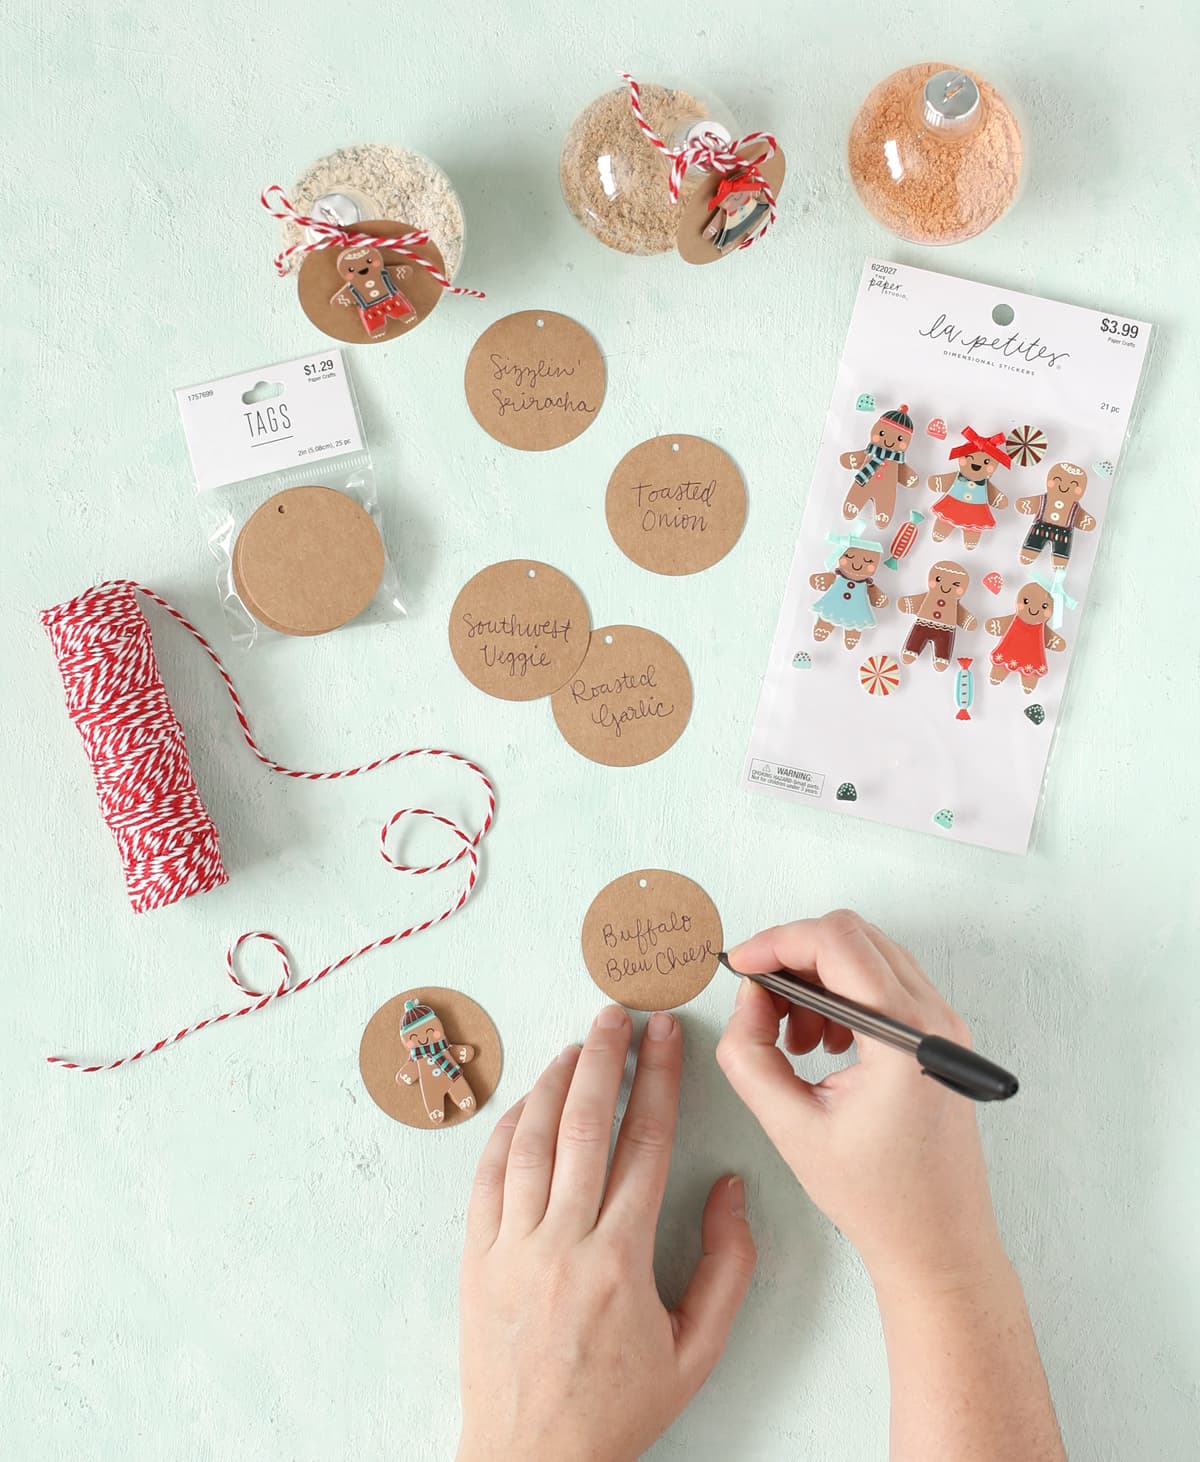
Step 2: Make labels for each dip variety by writing the dip type on one side of a kraft paper tag, then adding a cute gingerbread sticker to the other side. If your handwriting makes you self-conscious, you could always print out the dip labels, then cut them out and add the cute stickers. But just a side note… write them by hand! It’s more personal that way and nobody is judging you. <3
Step 3: Attach the tags to each ornament with a bit of baker’s twine. It works best to go through the hanging loop on the ornament.
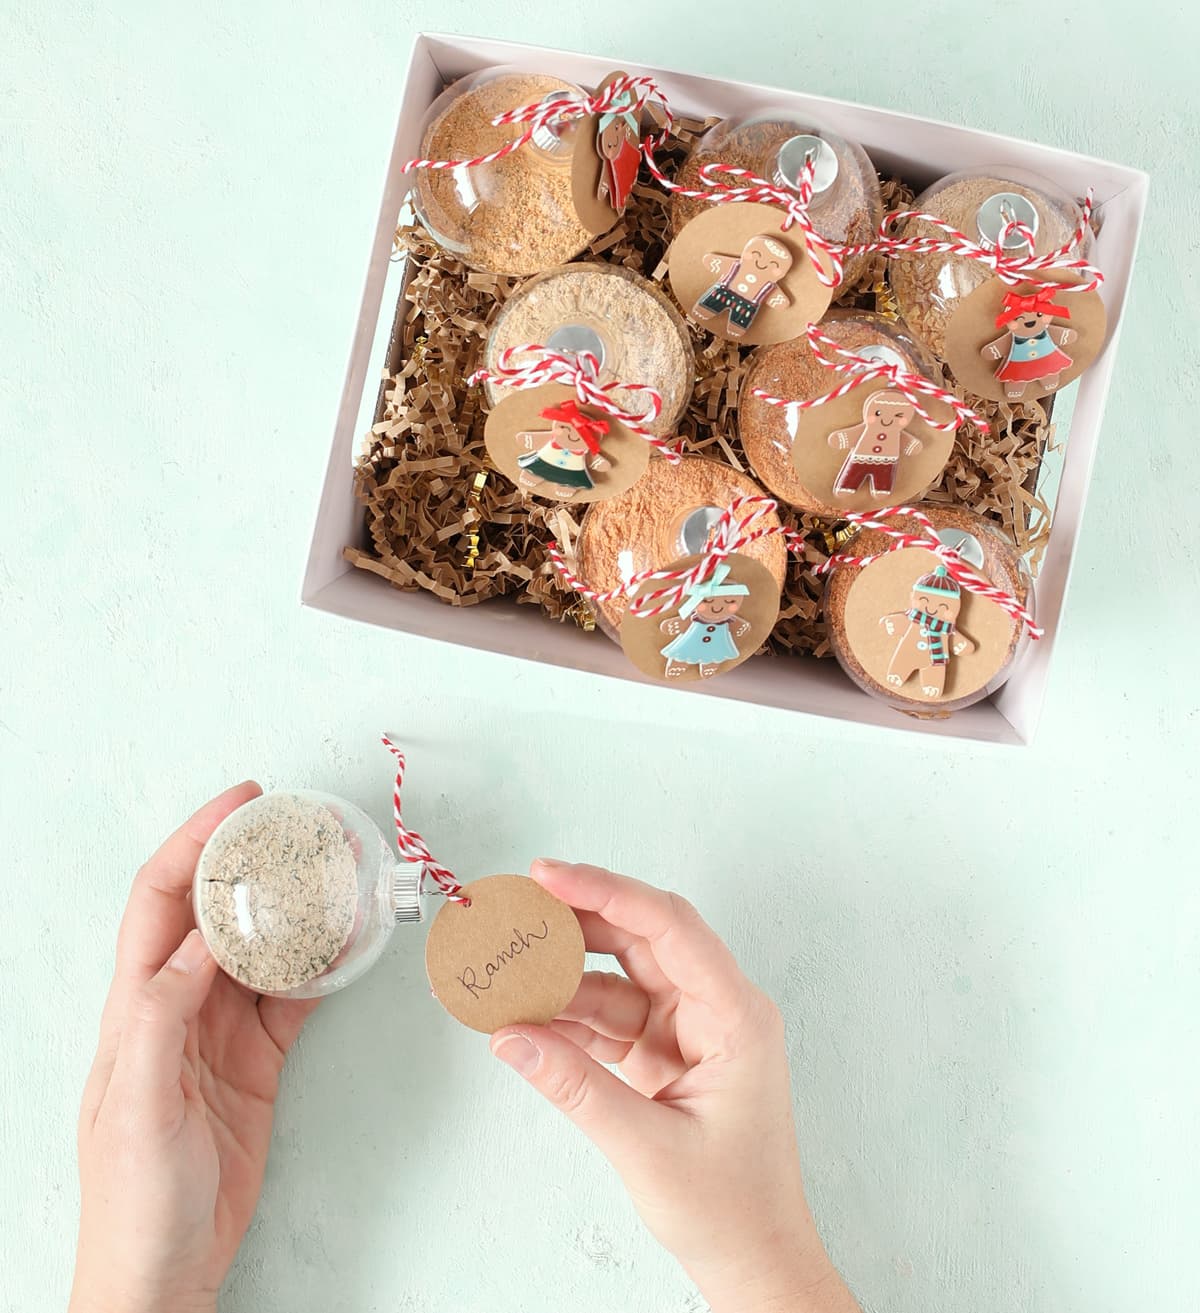
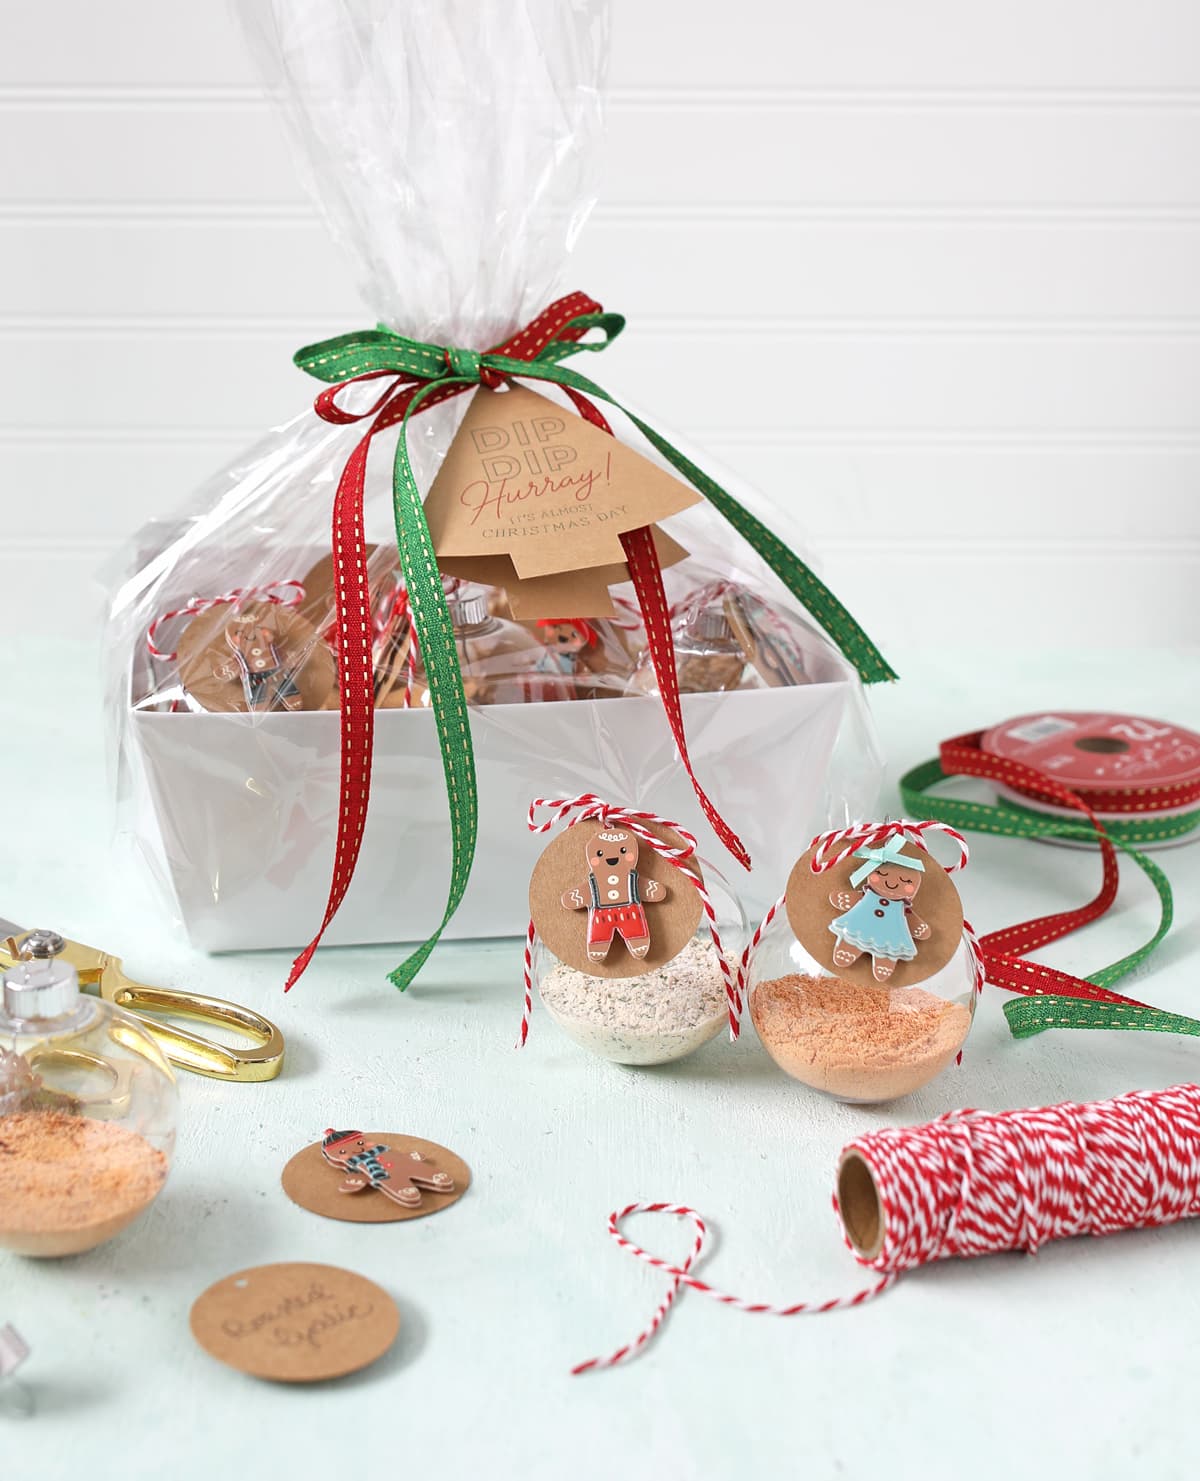
Step 4: If you want to give all eight flavors of dip as one gift, fill a gift box with paper shred, then nestle the ornaments into the box.
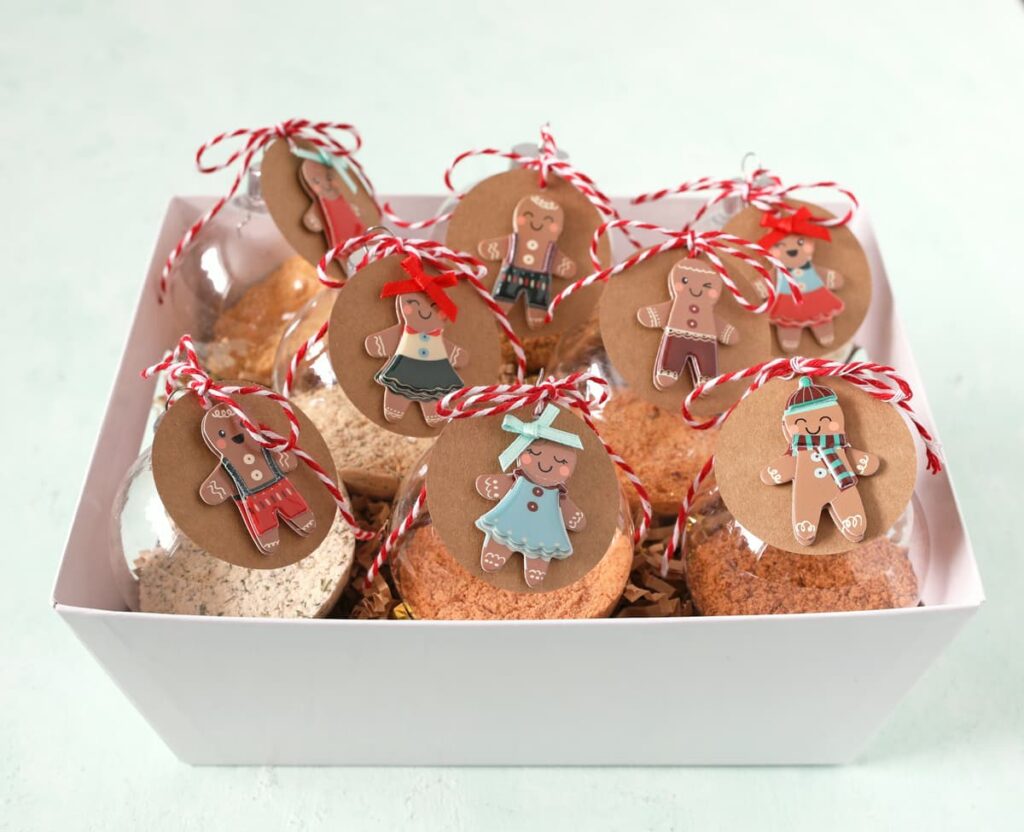
Place the box inside a cellophane bag, tie it off with ribbon, then add the printable tag that says, “DIP DIP Hurray! It’s almost Christmas Day!” with instructions on how to make the dip on the back.
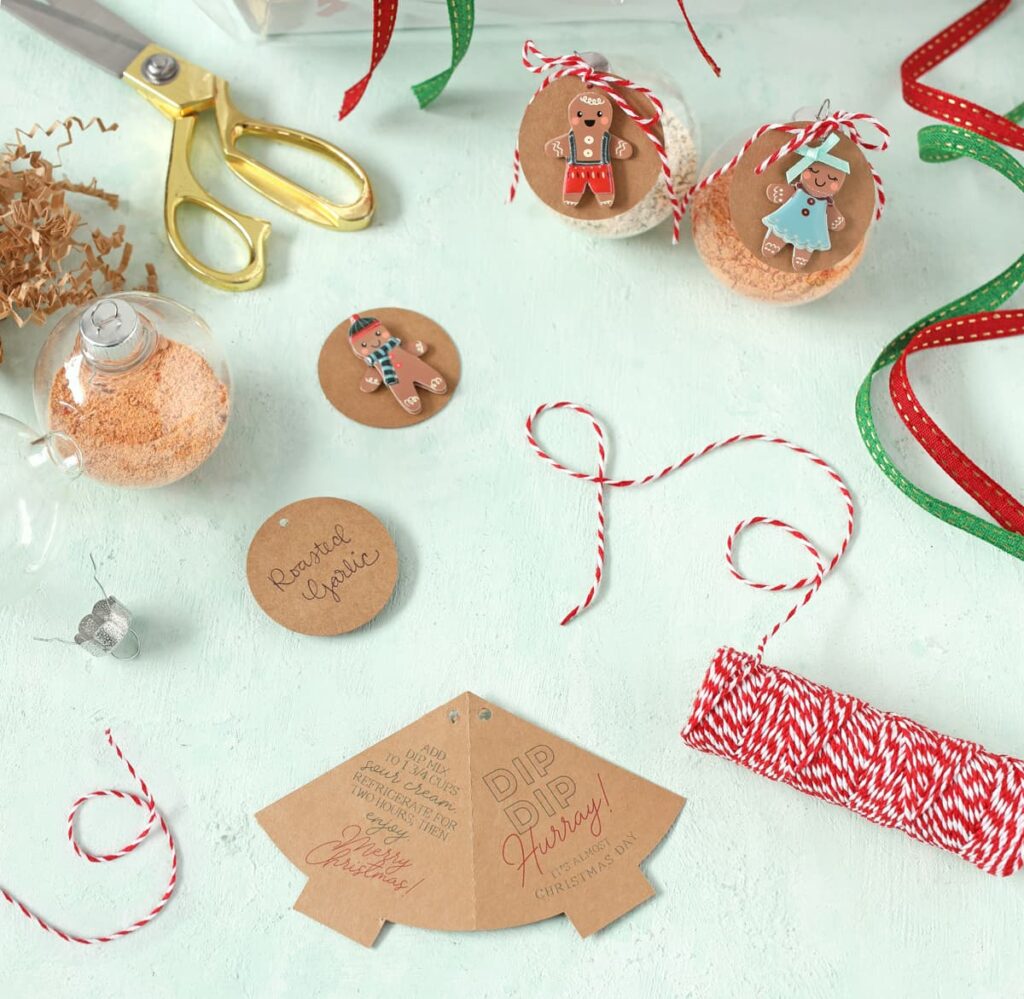
Here’s a closer look at the printable tag. I cut mine with my Silhouette machine, but I’ve got some you can cut out with scissors too if you don’t have a cutting machine.
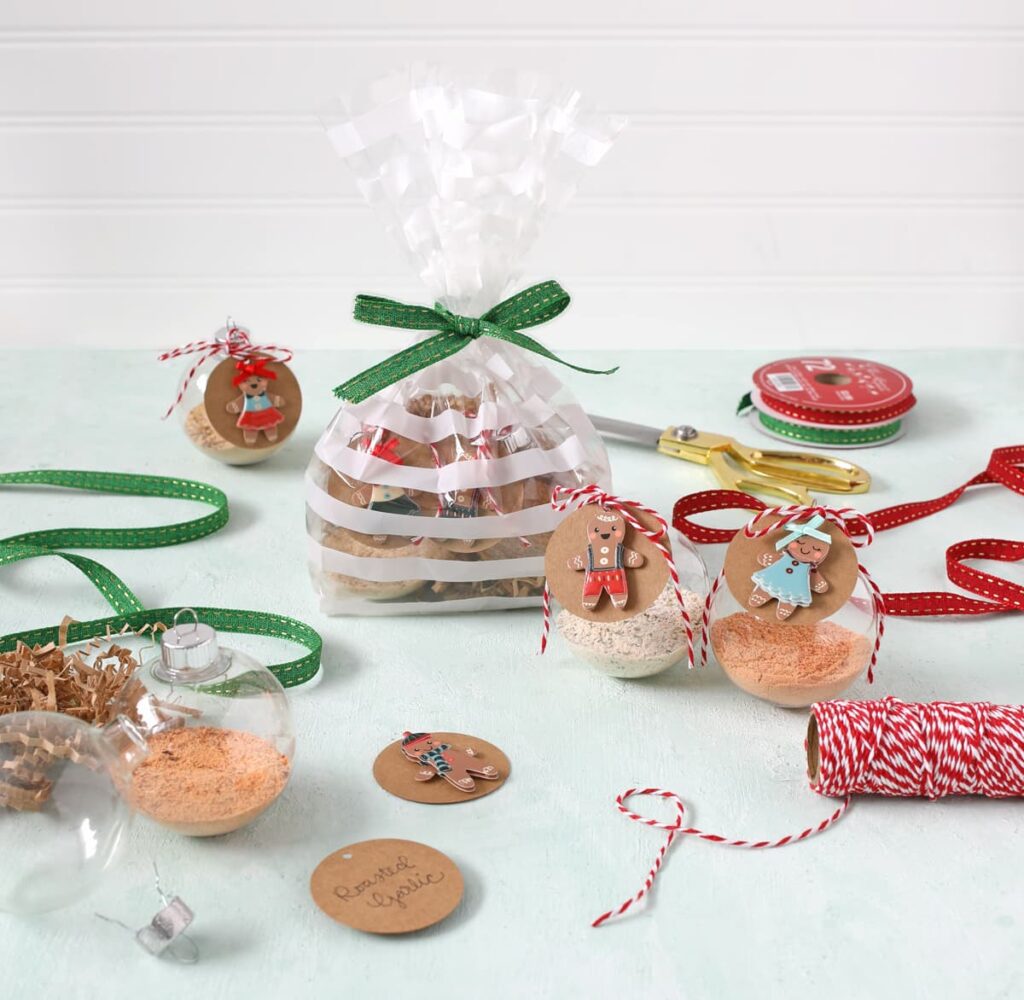
If you want to split up the ornaments, use a smaller treat bag instead. They are just the right size for two ornaments. Add some paper shred, then the ornaments, then tie it off with ribbon and add the printable tag.
I like that this gift is savory since I typically have wayyyyy too many sugary treats at Christmas time. I also like that it’s something that keeps for a while, so you could use the dip after the other holiday treats are long gone… maybe for game day?
So there are the four creative Christmas gifts I came up with. Hopefully it gave you some ideas that work for someone on your list this year. Which idea is your favorite?
Christmas Gift Ideas Video
Printing the Tags
I have included all of the tags in the same folder on Google Drive. Look for the tag that goes with the gift you want to make and download it. Open the file on your computer. Load cardstock into your printer, then print out the tags using the best setting on your printer to ensure vibrant colors. Cut out the tags with scissors or a paper trimmer.
If you have a Silhouette or Cricut machine, I’ve included an SVG file that has all four tags on the same page with the cut lines in place. You can adjust the individual tags and sizing etc. in Silhouette studio. You’ll want to use the Print & Cut feature for Silhouette users (tutorial here). Cricut users, sorry… you’ll have to google it.
To get the printable tags, click this button right here:
Note: Some schools and businesses block access to Google Drive. If you are having a hard time opening the files, try again on an unrestricted computer. All tags are for personal use only, please.
Merry Christmas and Happy Crafting!

Let’s Get Social
I’m sharing tons of fun ideas on my social channels and I’d love for you to join me there.