Give your ceilings a makeover with no drywall work, no painting and virtually no mess using WOODHAVEN Planks and the Easy Up track clip system.
Do you have ugly ceilings? Are you overwhelmed with the thought of having to drywall and paint a ceiling? Do you wish you could update the look of your popcorn ceiling without scraping it off? Then this post is for you!
The main room in our downstairs had a plethora of ceiling issues. The texture is different in different areas of the room and we also have a few holes in the drywall from when we had to cut through to access wiring for projects upstairs. We have lived with it that way for several years now mostly because the thought of taking down an entire 14’x25′ room’s drywall ceiling was overwhelming. We hate drywall work! It is dusty and tedious and hard to get perfect!
A few months ago I happened to stumble across the Armstrong Ceilings website and after looking at their surface mount products, I realized this was the perfect solution for our problem! So I contacted the company to see if they wanted to partner with me here on the blog and I’m so glad they said yes. This is a game-changing product that really made our lives so much easier that I can’t wait to tell you all about it and show you our amazing new ceiling.
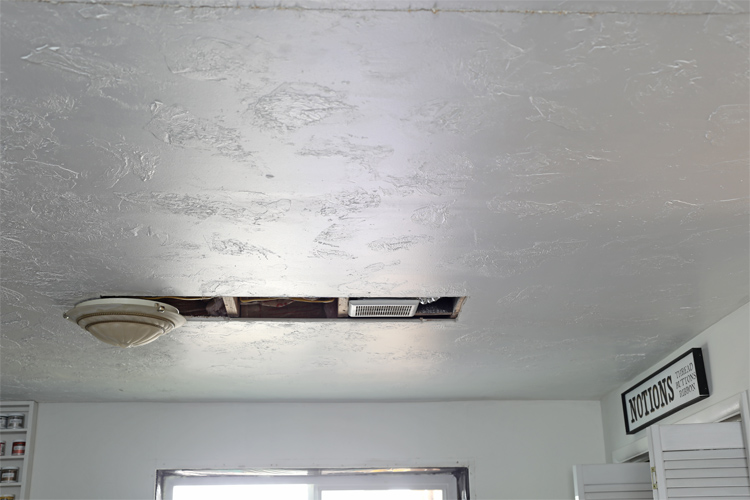
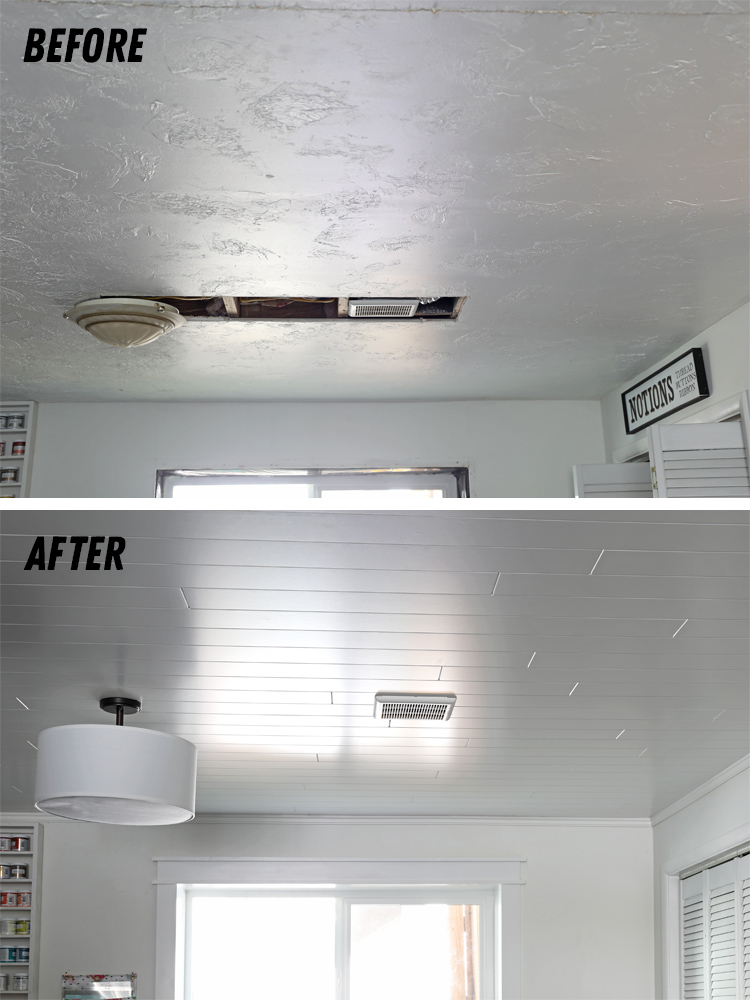
Let’s start with some BEFORE photos:
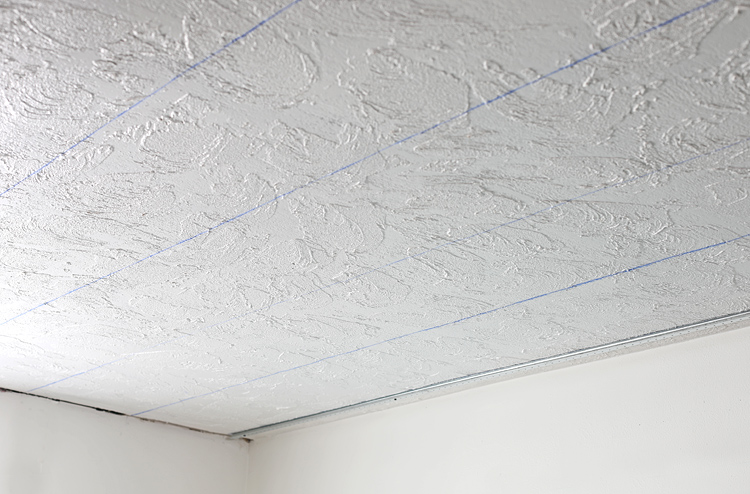
This is the part of the room that has the least amount of ceiling texture. The rest of the room has really heavy texture that is super dated.
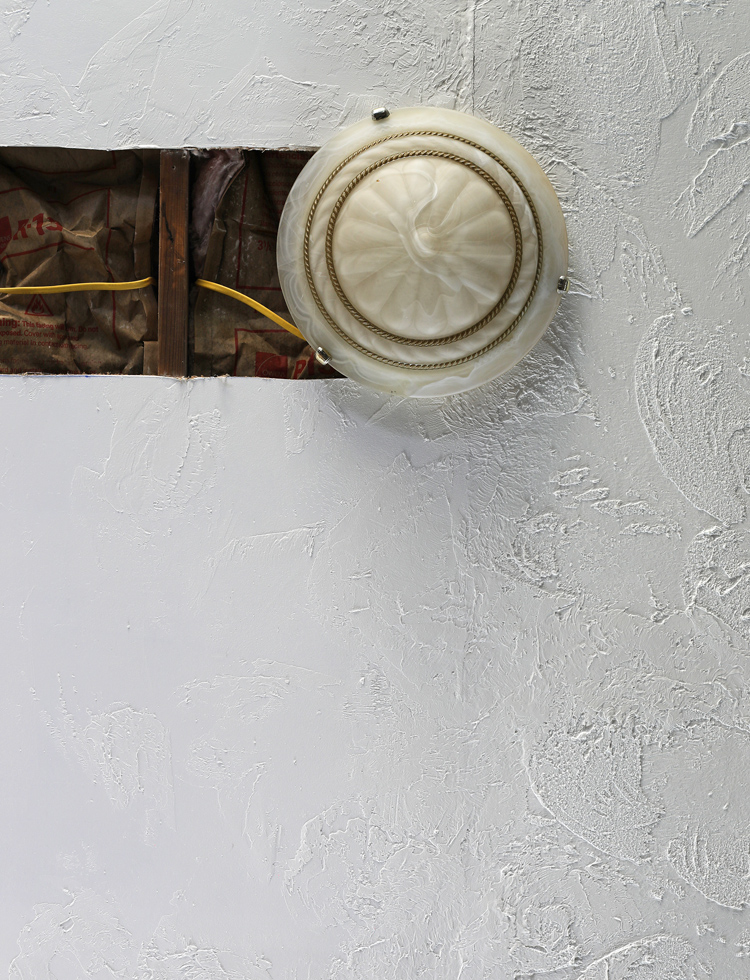
Here’s a close up that shows some of the difference in texture:
Now times that by the entire 14×25 foot room and that’s a whole lotta ugly.
So how exactly does this ceiling system work? Let me show you!
Disclaimer: This is not meant to be a full tutorial, it’s just meant to give an overview of the process so you can decide if this is something you want to use in your home. Please visit the manufacturer’s website for detailed installation instructions.
Materials Needed
- WOODHAVEN Ceiling Planks
- Easy Up Surface Mount Ceiling Tracks and Clips
- Drill
- Screws
- Chop Saw or Compound Miter Saw
- Chalk Line
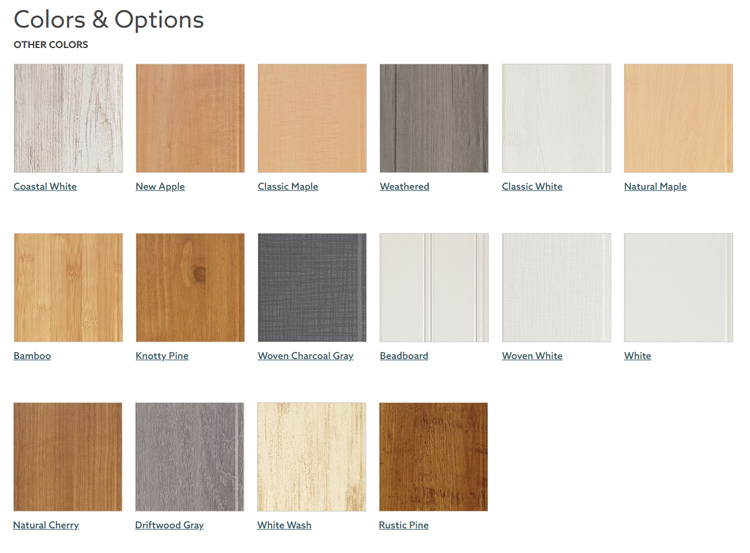
WOODHAVEN planks come in several different styles and colors. We chose the White painted shiplap style. Here are the other options:
Instructions
Step 1: If you are installing your ceiling directly over drywall, mark the ceiling joists with chalk lines.
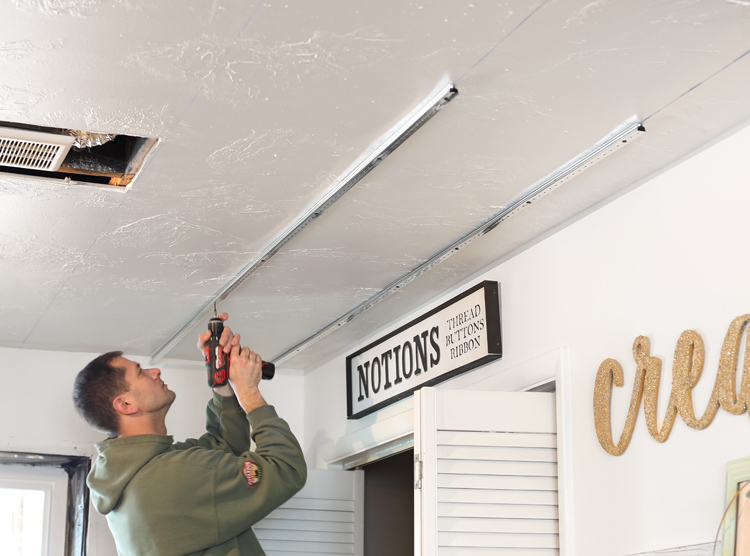
Step 2: If your ceiling is level, use the chalk lines as a guide and screw the Easy Up Ceiling Tracks into the joists. If your ceiling is unfinished, screw the Easy Up tracks directly into the joists. Check that all of the tracks are level and add shims as needed. This step is important, so don’t skip it!
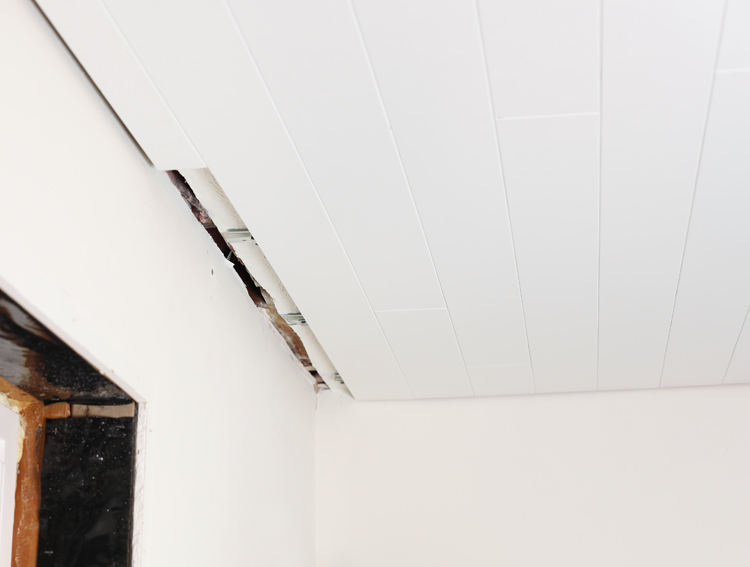
Step 3: Screw the first row of planks into place, leaving a small expansion gap along the wall on all four sides of the room. This gap and the screw heads will be covered at the end by a piece of crown molding.
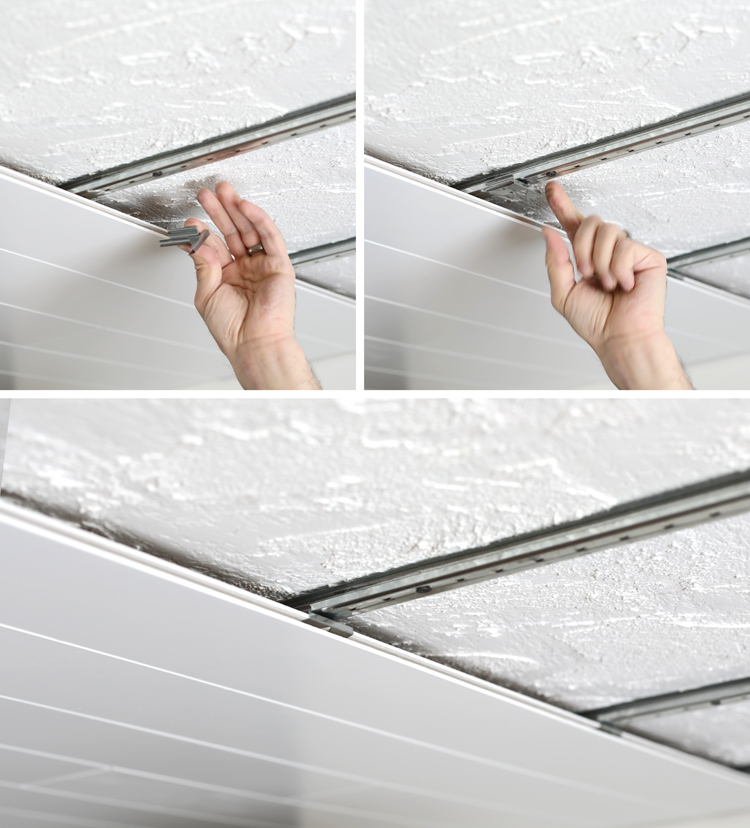
Step 4: This is where the magic happens. The rest of the ceiling planks are installed using the Easy Up clips. Tap a board in place so the tongue-and-groove parts meet up snugly with the board before it, then slide a clip onto the plank where the tracks intersect and IT IS INSTALLED. No nail guns, no screws… just slide that genius little clip on and you are done. The tongue of the new plank will slide into the groove of the receiving plank, hiding the Easy Up clip.
Step 5: Cut the last row down to fit in place and screw it to the Easy Up track with a
single screw. Make sure you place your screw close enough to the edge so that your crown molding will cover it.
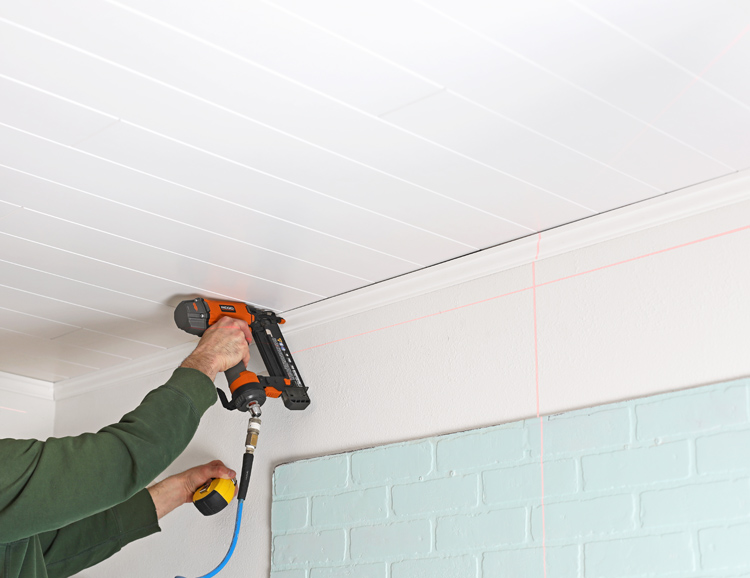
Step 6: Add crown molding to finish off the edges of your ceiling. If your leveling prep work was pretty accurate, you may not even need to caulk. Our ceiling was really uneven, and even though we did our best to level it, we still had a few wonky places. A bit of caulk to fill in the gaps between the ceiling and the crown and no one will ever know.
Now the moment you’ve all been waiting for… the big reveal!
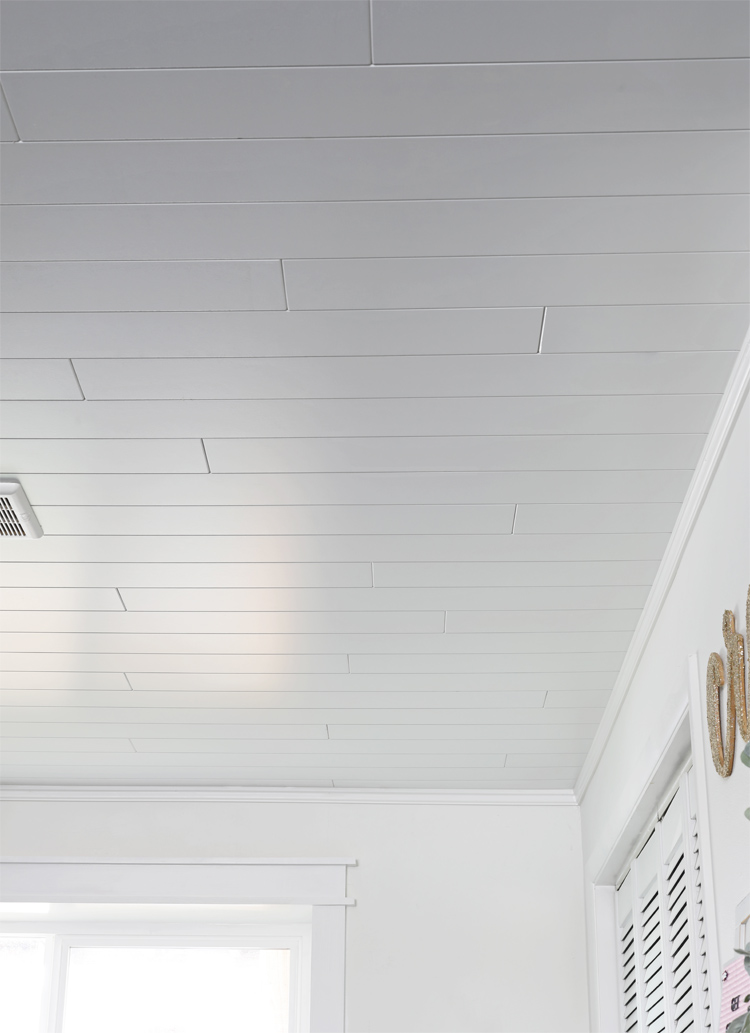
Can you even?! What once was the ugliest ceiling is now the crowning jewel of the room. I can’t believe how much it elevates the entire space. It feels completely different and I am absolutely blown away by the change.
What once was a dated and neglected basement room is now a bright and polished space that’s full of charm. Do I want to shiplap every ceiling in our house now? Yes, yes I do!
Why Should I Choose WOODHAVEN Planks and the Easy Up track clip system?
- It’s easy to install. All you need is a drill and a saw. The Easy Up clips do the hard work for you! If you choose traditional shiplap material, you’ll need to use a pneumatic nail gun to nail every single board into place.
- It’s already painted. If you’ve ever tried to paint a ceiling before, you know how awful it is. Paint falls down in your face, your arms hurt from holding things up and you’ll most likely end up with a huge crick in your neck. That’s why it’s so amazing that this product comes pre-painted without even so much as a nail hole to fill. Once it’s up, it’s done. Can I get a hallelujah!!!
- It’s not messy. The room we installed this ceiling in is my home office and studio space. I could not afford to have the room out of commission for even a few days. I also have kiiiiind of a lot of stuff in here and moving it all out would have been impossible. We were able to work around the furniture and massive amounts of craft supplies to install the ceiling over the course of a few nights and a Saturday with only a tiny bit of chalk dust and a bit of sawdust from cutting. We could not have done that if we had drywalled.
- It fixes uneven ceilings. Because you shim the tracks, once the planks are installed on top, your ceiling will look level no matter what’s hiding underneath. One great perk is that it doesn’t lower the ceiling as much as a traditional drop ceiling. Ours only ended up being about an inch lower.
Where Can I Buy These Products?
The WOODHAVEN planks and Easy Up track systems are available nationwide. You can search for a retailer near you on the Armstrong Ceilings website. I will warn you that the convenience comes at a bit of a cost, although any shiplap ceiling is going to be more expensive than drywall. We felt the price was well worth the benefits, especially because if we had done drywall we would have hired it out (more $$) and we don’t want contractors coming in and out of our home right now for health reasons, not to mention the fact that everyone is booked out for months.
Watch this video to see the whole installation process!
If you have any questions, feel free to leave a comment and I’ll do my best to answer. And be sure to check back in a week or two for the big reveal of the entire craft room. It’s going to be amazing!


Comments & Reviews
I love this! If you don’t mind my asking, how much did it cost you to do that size of a room?
Actually, I don’t need to know because I just went to the website and got my answer 🙃 I really really like this and what a huge difference it made to your room!
It is beautiful and you say so easy, what a great fix, I really like it. Good job!! Who knew such a great product existed
Woodhaven planks look nice. Are there more matte planks? Can they be painted?
You could paint them I’m sure, but they are actually not as shiny as they appear in the photos. I’d say they’re a satin or eggshell finish.
How much per square foot
You can look that information up by choosing a retailer through the website.
Did you come across any info regarding the possibility of moisture building between the shiplap and ceiling? Perhaps the rails allow for a bit of airflow?
I didn’t read anything about that, but I don’t think there should be any problem.
Hi! My ceiling is WAY uglier than yours! I’ve been considering Shiplap for about a year. My biggest concern is that I have large coves around the whole room. I just picture how to finish it off without the coves looking dumb. The coves measure 12′ from top to bottom. Any thoughts? Thanks!
Do you mean that your ceiling is rounded on the edges or that you have crown molding in place. I’m not sure I can help without more info.
Looks great! I see they just sell the clips and that they can attach to an existing drop ceiling grid. Do you think we could use any tongue and groove plank flooring that we already have? I’ve seen the question asked, but Armstrong (of course) answers with “we only recommend Armstrong Woodhaven planks”. So they never truly answer the question. Thanks in advance.
That’s a really tough one. I think you would have to buy the clips, then try them on other boards to see if they would work. The dimensions would have to line up just right, so my guess is that it really wouldn’t work, but you could sure give it a try.
Looks great and relatively easy to install. My only question is. “How heavy are the boards?” In other words, “Would 1/2 drywall be heavier or lighter than the plank system?”
I’m not sure I am qualified to answer that question, but you could definitely get in contact with the manufacturers.
It looks awesome! Do you know if this would be able to be done over a popcorn ceiling without removing the popcorn 1st?
Absolutely!
So beautiful! Can you show what trim piece you used? And what color of what your walls are?
The trim was from Home Depot. It’s not crown molding, just a wall molding with a thick enough edge to cover the gaps. The walls are Sherwin-Williams Pure White.
I am painting my gameroom the same color!
Just what I am looking for!
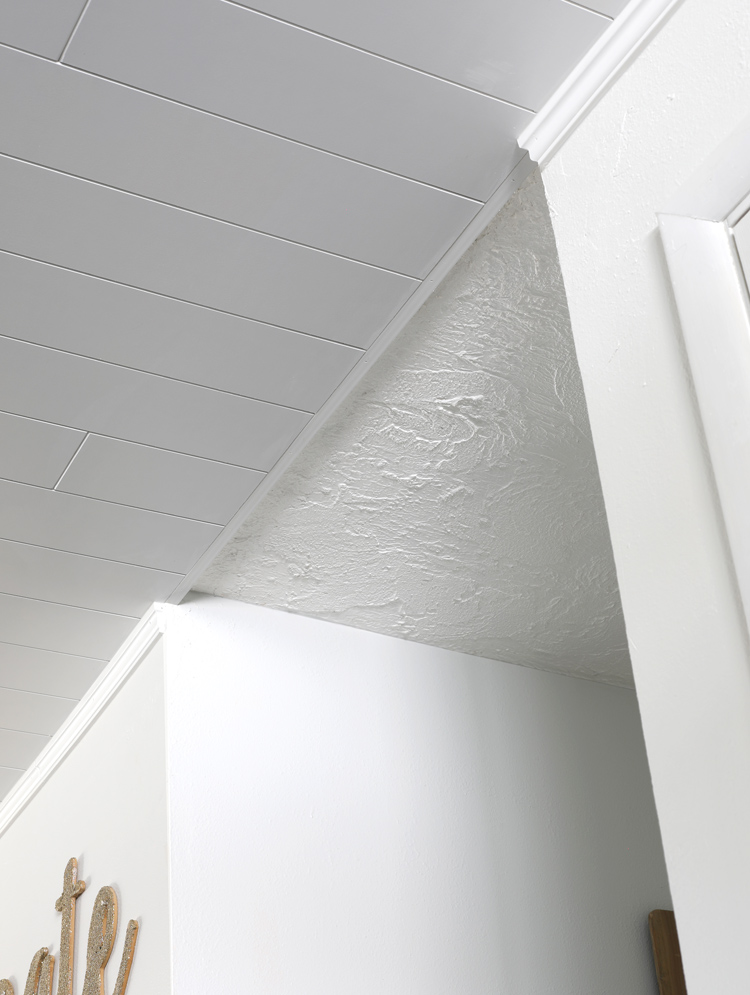
What transition piece did you use at the hallway end? I see the shiplap stops there with a vertical straight piece. It’s lovely!
It’s a piece of wood we cut to size and painted to match.
I love it I wish I had someone treasonable to do this
It’s gorgeous. Great job!!
Your ceiling looks lovely, great job! We are getting ready to install this same product. I was wondering with your room length of 25′ if you put in an expansion gap? The spec says to put one in if it’s over 21′. I have 29′ in length and I really don’t want to do that as I feel it won’t look as nice.
I would follow the directions to a T. You don’t want to risk your ceilings buckling. The thing to do is put crown molding around the room to cover the expansion gap.
Can this system be used on walls?
Do you make a system for floors?
This is just a review that I did of a product I used in my own home. The company that makes this shiplap is called Armstrong Ceilings.
What is the length & width and what is the material, wood or vinyl?
You can find all that information on the manufacturer’s website. https://www.armstrongceilings.com/residential/en-us/suspended-ceiling-systems/wood-look-ceiling-planks
Were do you get this product at and how much does cost, ?
I have linked to the website for this product several times throughout the post. Click on those links to go to the manufacturer’s website for more info.
Looks and sounds great. I have a room with a cathedral ceiling. Do you think this would work just as well?
Click through the link to visit the manufacturer’s website. They’ll have the information you need.
Very nice ceiling and results!
Just a little bit of direction if I can,I am not able fro find the correct part numbers for the easy up track and clips. Would you happen to have those for your project?
https://www.armstrongceilings.com/residential/en-us/suspended-ceiling-systems/easy-up-installation-system.html