Learn how to build and install laminate countertops from scratch using this helpful, step-by-step tutorial.
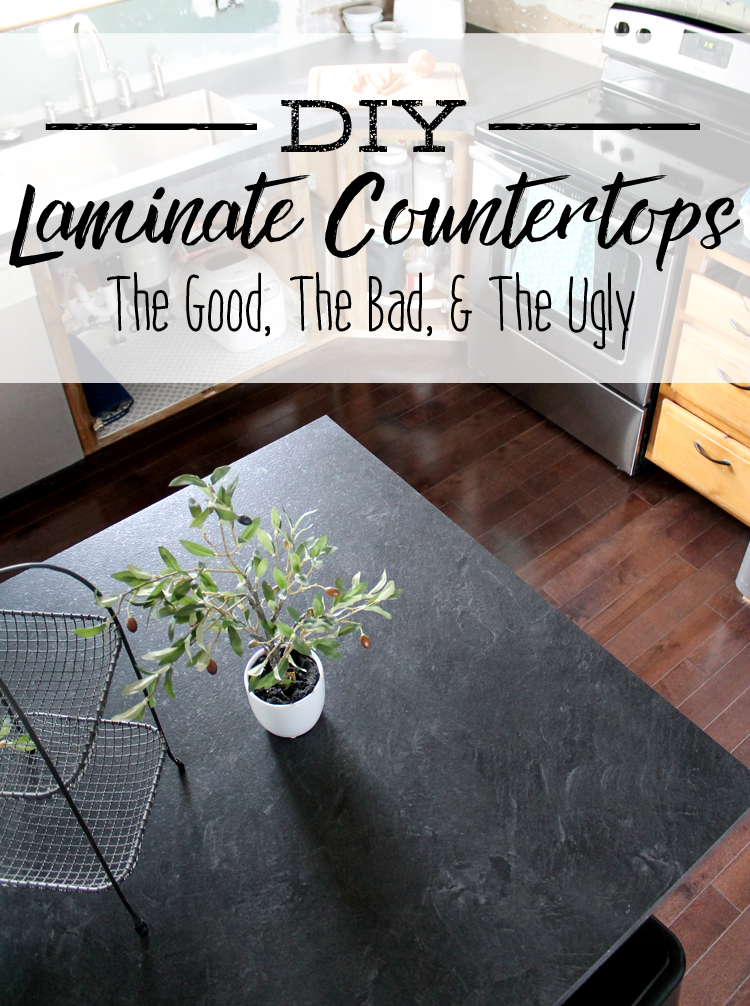
Hi friends! We made some good progress on our kitchen remodel this weekend and I’m excited to show you the changes!
When it came time to choose new countertops, we headed to Home Depot to price things out. I knew natural stone would be expensive, but holy crap. Stone is EXPENSIVE!!
So we ruled that out pretty quickly. I don’t think our home value can support $5000 worth of countertops, I don’t care about having granite that much, and I knew we could come up with something else that would still be pretty.
Next we looked at laminate countertops. If we had ordered laminate countertops from Home Depot, it still would have been about $1800. Ouch!
So I got on the internet and researched every option for inexpensive, durable countertops that we could install ourselves. Here are the DIY countertops we considered:
- I love the look of concrete countertops, but hubby vetoed them. He said they were too likely to stain, too rustic and too trendy. I complained a little before moving on.
- We looked at butcher block countertops next, but the maintenance seemed daunting and it wasn’t really the style we wanted. We USE our kitchen hard, so I didn’t think wood could withstand my kids.
Then I came across THIS post by the amazing Anna White and knew that it was the solution we were looking for. We could build our own laminate countertops!
Laminate has come a long way, friends. It is really pretty nowadays and comes in so many styles. I was amazed at the samples. I considered the Formica Argento Romano:
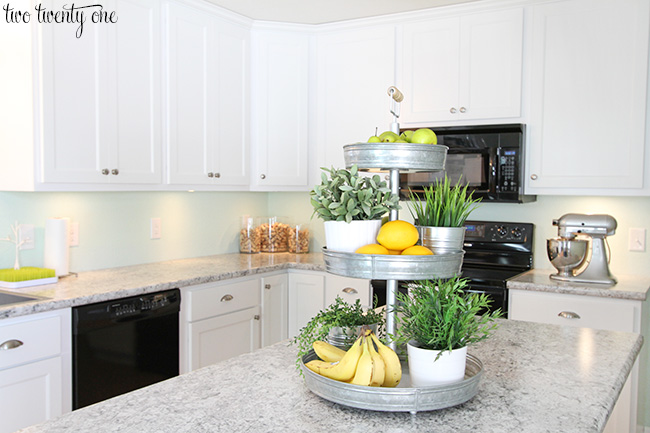
I loved the soft look and the mix of gray and white. Isn’t Chelsea’s kitchen so pretty?
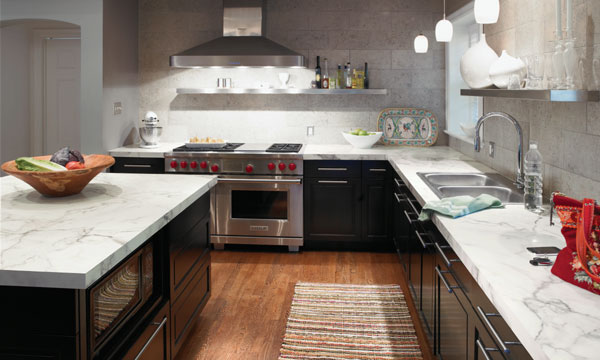
I considered the Formica 180fx Calacatta Marble:
The look of marble without the maintenance? Sign me up!
But my husband wanted more contrast. We are painting our cabinets white and I want a white backsplash, so light countertops would have made the whole kitchen white. Which I would love, but the hubster not so much. And I did like the idea of contrast, so we narrowed our choices to a black countertop.
We chose Formica Basalt Slate Scovato Finish. It’s black, but not solid black. It has a lot of natural movement, but nothing splotchy or too busy.
So we went back to Home Depot and special ordered one 4’x12′ and one 4’x8′ laminate sheet. There are places online that you can buy laminate sheets, but shipping costs add up and special ordering from Home Depot ended up being the cheapest. We paid $200 total for both sheets, plus another $200 or so for the MDF and other supplies to build the actual countertop forms.
If you are thinking about doing your own laminate countertops, here’s a run-down of the process:
1. Build MDF Countertop Bases. We glued and screwed (from the bottom side) two pieces of 3/4 inch MDF together to get the right thickness for the countertops, then cut them to the shape of our counters and sanded the edges smooth. The countertops have to be pulled away from the wall when you place the laminate on, so just keep that in mind.
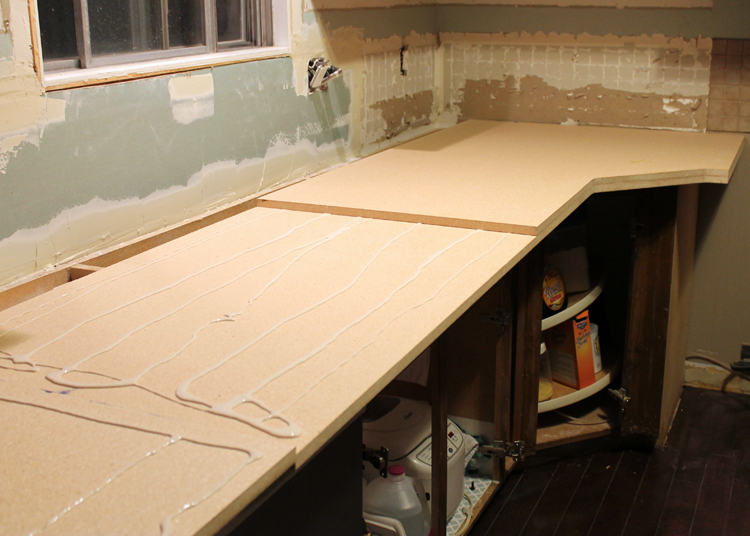
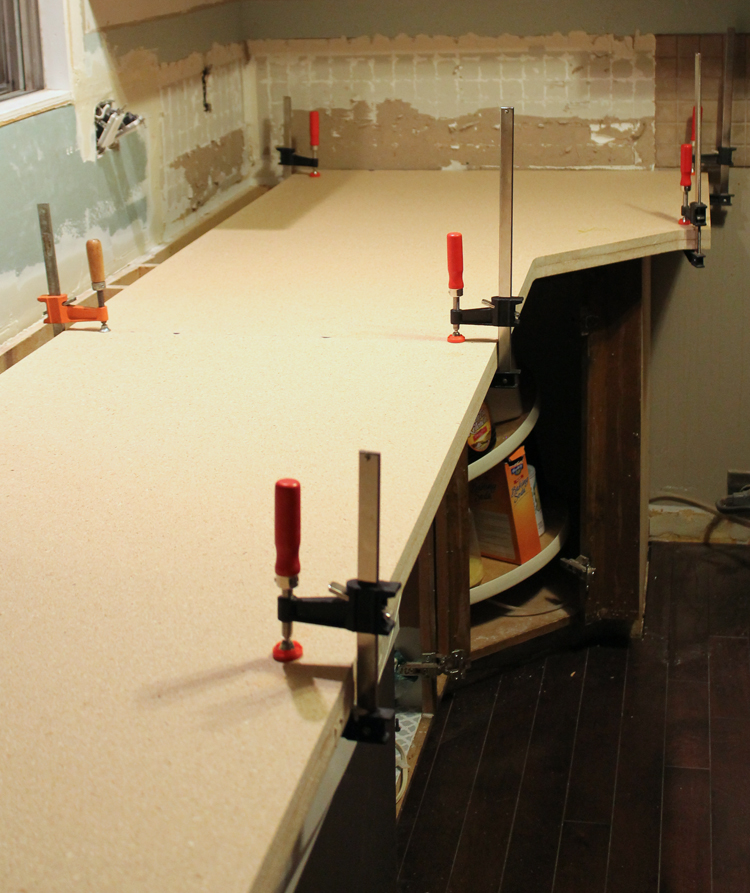
2. Rough Cut Laminate. Cut strips of laminate to cover the edges of the countertop, then cut a big piece to go on top. Leave at least two inches of overhang on all sides of the projects. Trust me on this one… you want to start big and trim it off afterwards. We used our circular saw to cut through the laminate.
3. Glue Counter Sides. Cover the backs of the long strips of laminate pieces and the countertop sides with an even layer of contact cement. We found the easiest way was to apply the cement using cheap foam rollers from Harbor Freight. Let glue dry for 30 minutes (check the instructions on the can since some brands may have different dry times).
There is another way to do the edges of a laminate countertop that I just recently found out about. They sell special pre-made edges that you can glue onto your countertops. If you want a fancy ogee, bevel or bullnose edge, this is something you might want to look into. I think it’s a great idea and it actually looks easy to do. HERE and HERE are two different videos showing how this type of edge is applied and HERE is a place that sells the edges for a lot of different types of laminate, including Formica’s Basalt Slate, which is the laminate we used. It runs about $30 for an 8 foot piece, so it would add a bit of expense to your countertops, but probably not more than $100 or so, which I think is still really reasonable.
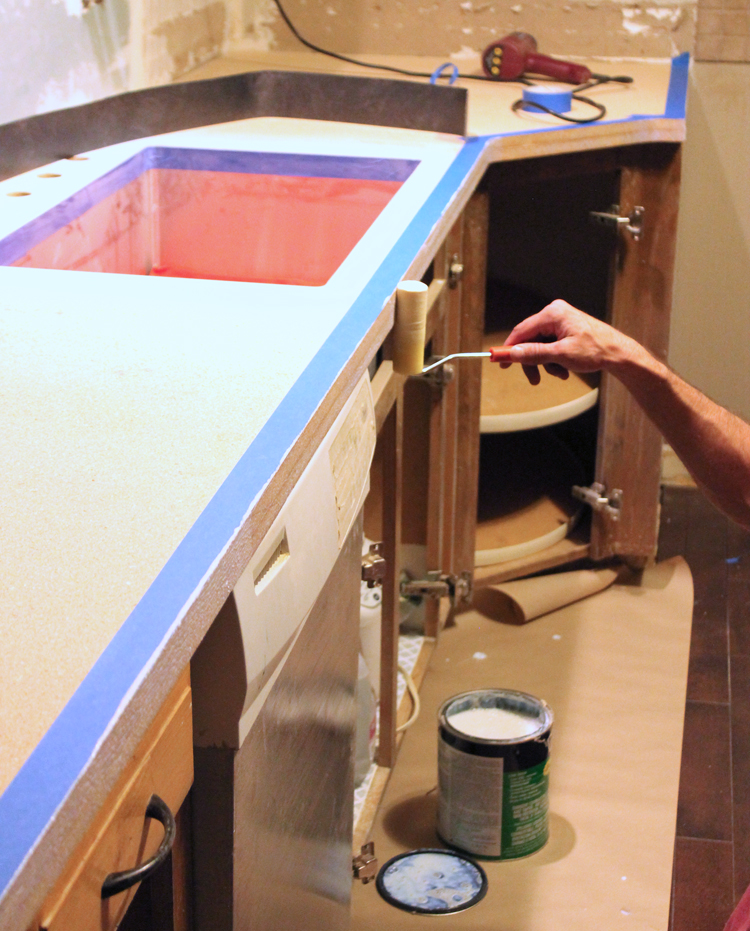
4. Adhere Sides. Before we go any further, you need to know this critical information: Contact cement seems like no big deal when you touch it with your fingers BUT once contact cement touches itself, it is glued forever. FOR-EV-ER, do you hear what I’m telling you?!? So you need to be reeeeeaaaaalllly careful as you start pressing the laminate strips to the edges of the counter. If you get off somehow, you can’t pull it back off to fix it. That’s why you leave so much overhang. It’s your safety net. Start on one end and gradually smooth the piece down the entire length of the countertop side.
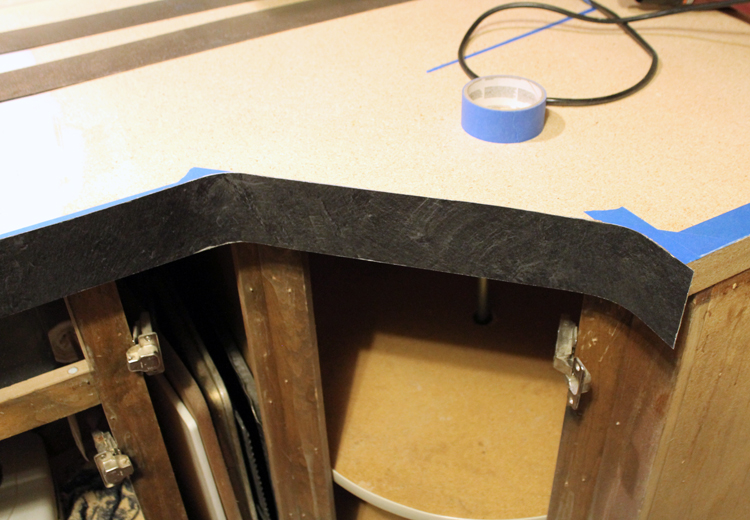
We have an angled corner cabinet, so we had to curve the laminate strips. We did this using a heat gun before any glue was involved. If you have any curves or rounded edges, here are some resources you might want to check out: Heating Laminate to Bend and Curving Around an Outside Radius
5. Route Around The Edges. Using a laminate bit, run your router around the edges of the countertops to trim off the extra laminate. You may need to do several passes to get the edges flush with the wood. I also suggest doing a test run on scrap material so you don’t mess up on your actual countertops.
6. Glue Counter Tops. After all of the edges of your countertops are covered in laminate and routed flush with the wood, it’s time to put glue on the top surface. Roll contact cement on both the back of the laminate and the countertop. Let dry 30 minutes.
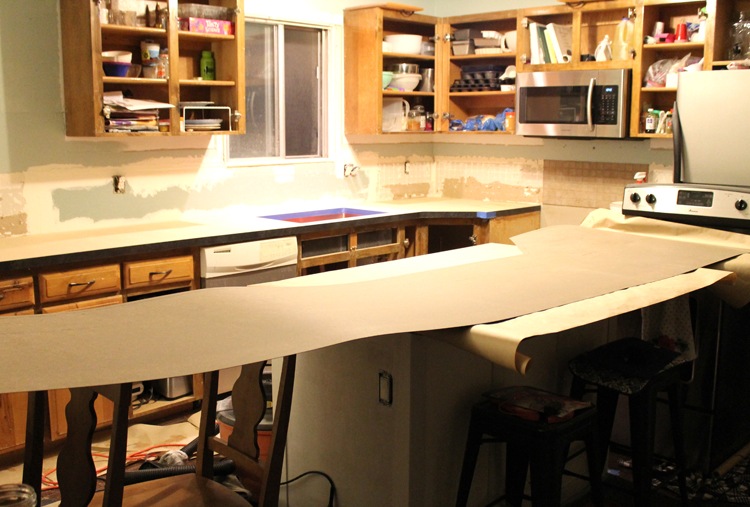
7. Cover Countertop with Dowels. This step is crucial. Remember how I warned you that you have exactly one chance with contact cement? Place dowels ever 3-5 inches across the entire surface of your countertop. The dowels won’t stick to the contact cement and will prevent the laminate from sticking to the MDF until you want it to.
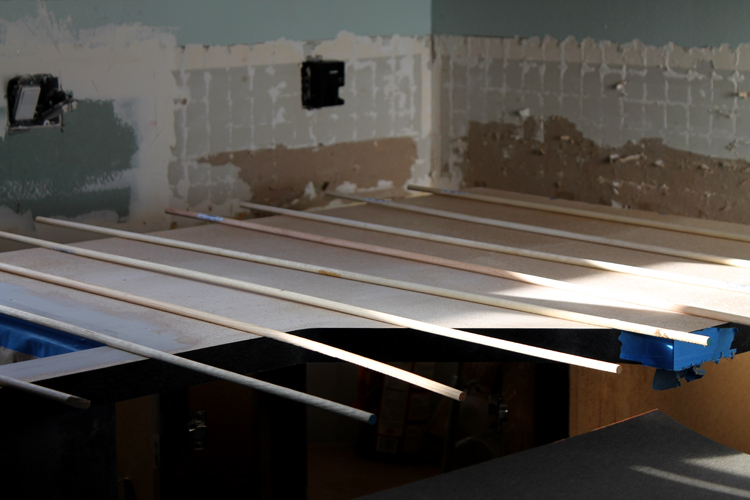
8. Bond Laminate to Wood. Place the laminate sheet on top of the dowels. Make sure everything is lined up correctly with the wood. Carefully begin pressing the laminate to the wood, leaving plenty of laminate overhanging on all sides. Start in the middle and work to one side, then do the other side. Remove the dowels as you go.
9. Route Around The Edges. Trim off the extra laminate with your router bit, just like you did on the countertop sides before.
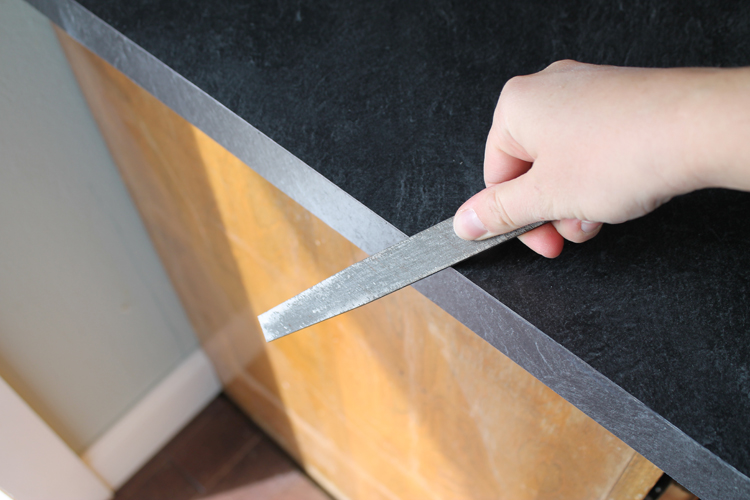
10. File Edges. The edges of your freshly cut laminate will be sharp, so file them down with a metal file at a 45 degree angle.
Check out our new countertops! I am so pleased I could squeeeeeeaaaaaallllll!!
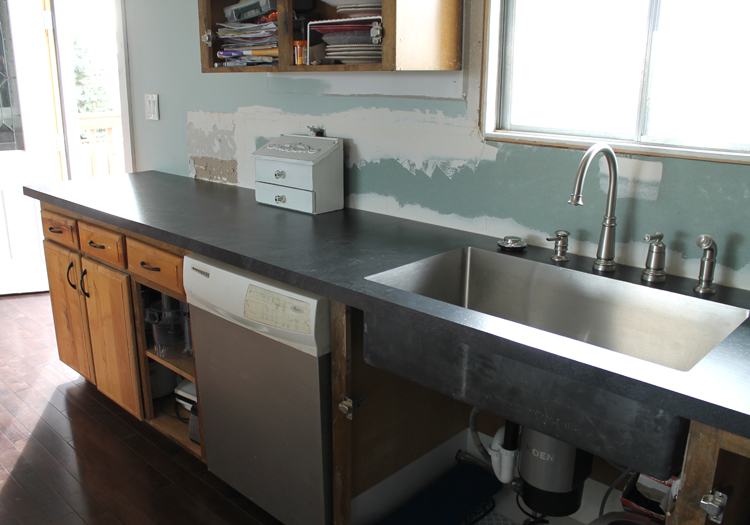
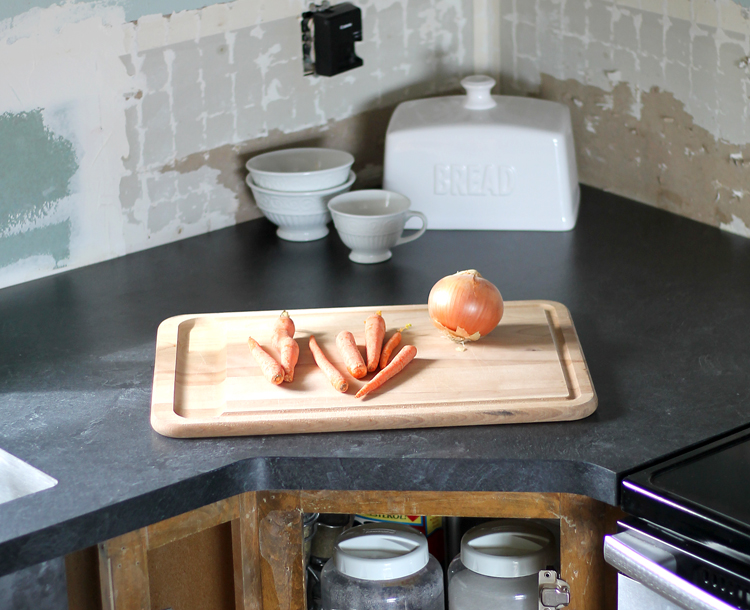
They sure do make the cabinets look awful, don’t you think? Haha.I don’t profess to be an expert at laminate countertop installation. Here are the resources I found most helpful. If you are serious about DIY-ing your laminate countertops, I’d read through all of the links before you get started.
See Jane Drill YouTube Tutorial
Here’s some insider information, the down-low if you will, on what it was like installing our own laminate countertops:
- We love the finished countertops. I would choose the same color and style of laminate again in a heartbeat. It does not look cheap at all! It cleans up beautifully, has natural movement and doesn’t show smudges or wipe marks. I think it looks a lot like honed marble or slate.
- This project was definitely one of the harder and more stressful DIY’s we have attempted. There’s a learning curve using the router and we have a few places where we chewed through the colored layer of laminate or accidentally knicked it. Nothing a black marker couldn’t fix, but I want to give you all the info… the good, the bad, ALL of it.
- We messed up. Yep. Royally. One fateful Saturday some time well past midnight, after working on the kitchen for 12+ hours and not being completely right in the head, we laid the laminate down crooked on the main section of our countertop. Remember how I said you get one chance with contact cement? I know from experience, because we ruined a piece of laminate and had to special order a new one, which left us without a kitchen sink for a week, cost us an additional $70 and left us scraping off dried up contact cement for hours so that we could prep the MDF for the second try.
- I love the price. The total was $470 for new countertops (that includes the extra piece of laminate we had to buy after making our big mistake). Even with the mistake, I’ll take it! And let me just remind you that we have a lot of countertop in our kitchen. The main section is 12’8″ long plus we have a 3’x5′ island too. Our DIY laminate countertops cost 90% less than granite!
- I just about threw a hissy fit when I realized that we would have to have a seam in our countertop. I thought my life was ruined. I thought you would walk into the kitchen and say, “Nice kitchen. Except for that seam. It’s glaring at me like a neon sign.” Laminate sheets only come in 12 foot lengths and our longest stretch of countertop is 12’8″. I was ready to chop 8″ off my base cabinets. Luckily I have a rational husband who assured me it would be fine. And guess what? It’s fine. It’s hardly noticeable, really. No neon sign! Plus, we placed the seam under the spot where I keep my dish drying mat. So I never even notice it. Do you see it in the picture below? Very non-neon sign-ish, wouldn’t you agree?
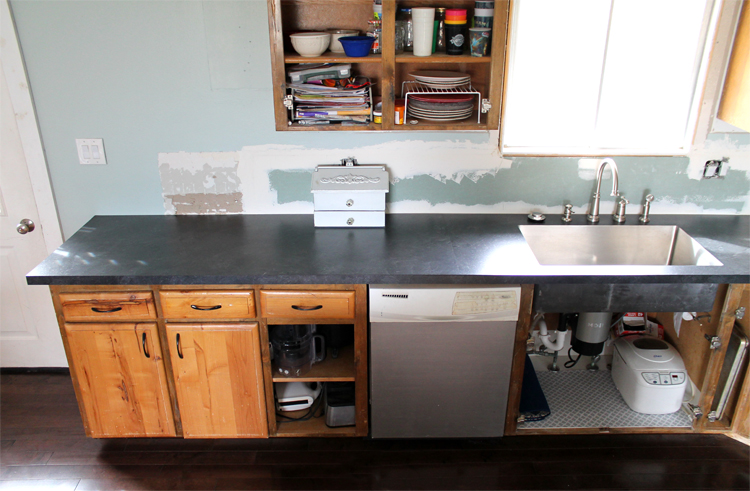
I really wanted those fancy edges that they make for laminate now, but that’s not something you can DIY. I was really worried that I would have those ugly brown lines around my edges and then every time I’d walk into the kitchen those brown lines would be like little neon signs too. Guess what? No neon sign again! The only thing that bothered me about my edges was that you could see a bit of the white center layer of the laminate. So I got out my permanent marker and fixed it and now my edges look great.
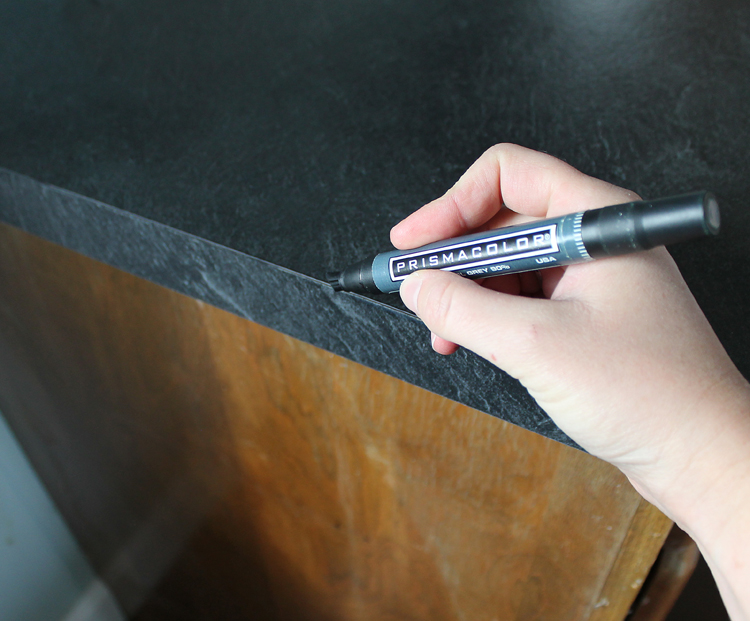
So here’s the summary…
1. I’m happy with the finished product. It’s pretty, inexpensive and easy to clean.
2. It was a hard DIY because of the huge 12’8″ section we have in our kitchen. Smaller would have been much easier. Our island was a breeze.
3. I would absolutely do it again.
UPDATE: We’re five plus years down the road from when we first remodeled our kitchen and we are still SO glad we went with laminate countertops. They have a few tiny dings here and there, but because of the color we chose and the natural color variation, they are not very noticeable at all. And I bust out my permanent marker to touch up spots sometimes too. Five years later, we’d choose the same thing again 100%
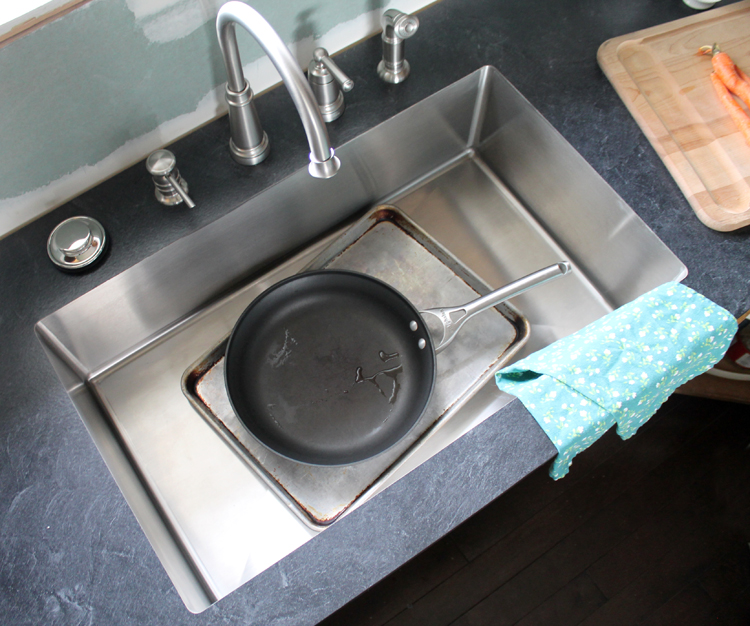
Did you happen to see my new undermount sink in some of the pictures? Oh, baby. I love this thing! Did you know you can install an undermount sink in laminate countertops? Isn’t that the most amazing thing you’ve ever heard!? It’s a Karran sink made for laminate countertops. Read all the gory details about the sink installation HERE.
Are you thinking about DIY-ing your laminate kitchen countertops? I’d be happy to answer any questions you have!
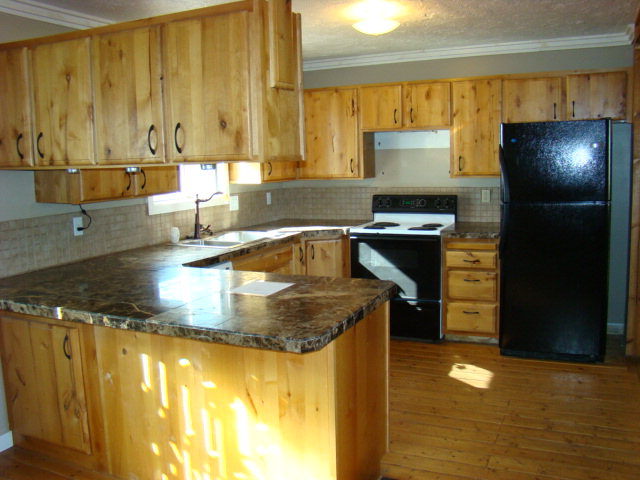
Here’s where we started in this kitchen remodel:
And here’s where we are today:
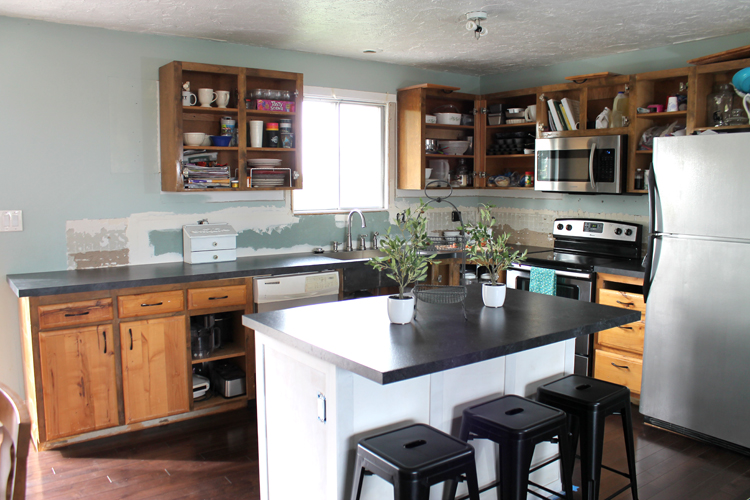
Click here to see the finished kitchen remodel!
I was NOT compensated for this post in any way. We researched the available options and chose what we thought was best. I always give you my honest opinion, whether I’m working with a company or not.

Comments & Reviews
Wow, it looks SO good! I admire you for being brave enough to do this!! And I love the contrast with the white cabinets and dark countertops.
Thanks! I think a big part of DIY is having courage (or stupidity) and being willing to take a chance that things WON'T work out.
It looks fabulous! We are retirement age and when redoing our kitchen, thought about granite (or marble which I love); but it would have cost us an extra "year" to work. I understand Granite is on way out, we used Formica and had edges cut at 45 degree angle and they "look" like granite. People way over invest in their kitchens. Think of how your granny or great granny cooked and what their kitches looked like!
Amen Barbara! Glad you didn't have to work that extra year 😉
Oh, my gosh! I need new counter tops in my kitchen so badly, but I just cannot afford ANY of the alternatives. As you said of your house, my 1100 sq.ft. little ranch won't support the cost of any kind of stone, which is fine with me. I'd be totally happy with laminate. But, I still can't afford to have them professionally built. The only thing is my partner is not a carpenter in any sense of the word. Plus, we don't work that well together! I like "perfect" or as close as possible and he's happy with "good enough". Not a great match. So, as much as I would like to use this economical option, I probably will have to hire them done–or not do them at all. Darn! But, who knows, there might be a third option that I don't know about yet. I really appreciate your post, tho', because I've learned there is a way not to spend more than you need to and have really nice, new counter tops.
Thanks for your post.
Naomi! Thanks for taking the time to share this with me. It makes me so happy! Yes, you CAN have nice things on a budget and it's so refreshing to hear that in a world that is all about spend, spend, spend.
I understand your situation with DIY projects. My husband and I have had a big learning curve working on projects together. 😉 That's hte nice way of saying sometimes we fight.
One option you could look into is buying pre-built laminate countertops, then cutting them down to fit your kitchen. It would really depend on how standard your layout is, etc. but it could be a good solution. Here's a link to what I'm talking about:
http://www.homedepot.com/p/Hampton-Bay-Valencia-8-ft-Laminate-Countertop-in-Typhoon-Ice-495252V8/204342691
Basically, it saves you all the gluing and routing. You just have to cut it to the right shape and add end caps.
It's worth looking in to anyways. Good luck with your project!
Can i do this to an existing laminate counter top? Just adding a new layer?
Yes, I believe you can… depending on what kind of edge you have. I don't think you could apply new laminate over a rounded or ogee edge.
Did you use the router to cut around the corners for the sink? How did you measure that part?
Yes, we used a router. I wrote an entire article about the sink because it had a very detailed installation process. You can find out more here: https://www.thecraftpatchblog.com/2016/10/an-undermount-sink-in-laminate.html
How did you attach the bottom of the countertops to the cabinets? I'm really confused on that part.
That's a great question, Sam! We attached the mdf to the cabinets with L-brackets. One side of the L was attached to the underside of the countertop and the other side of the L was attached to the wood inside the cabinets. We used lots and lots of L brackets to make sure that countertop isn't going to move anywhere.
Is the laminate a durable product? Like water proof, and how will it do with heat like placing a hot pan down. Also what can I clean it with? With something like bleach work?
Laminate is pretty durable, but it’s not indestructible. It can be scratched and you can’t set hot items directly onto it. I don’t use bleach on my countertops. I use Lysol instead.
I went to Pinterest looking for ideas to hide a seam on the laminate countertop we just installed and it turns out it’s the exact same Basalt Slate! What is the marker you used? I feel like a regular Sharpie will be too black, but I could be overthinking it. Thanks!
I used a gray alcohol marker that I had. If you go to the craft store, you should have lots of choices for colored permanent markers.
I am actually having my Formica countertops built. I too do not want an attached backsplash. Instead, we want to tile the wall behind it. The person we are dealing with said that they have been a contractor for 40 years and highly suggests that we get the built in backsplash due to the potential mosture/water that may get under the formica. Have you had any issues with damage around your sink area?
I disagree with your contractor! If you want your laminate countertops to look good, definitely ditch the built in backsplash. If you caulk the seam between your tile backsplash and the laminate counters, you won’t have problems. Our kitchen is several years old now and it’s just fine. Right behind our faucet, the caulk has yellowed a bit from water, but I plan to re-caulk it, no biggie.
How did you do the outside corners on your countertop?
I can’t find a good explained anywhere.
What questions do you have specifically? We did the side bands first, trimmed them off with the router, then laid the top piece and trimmed it down. Our corners are perfectly square.
Hi Jennifer!
Love this post. I am in the process of planning out a kitchen remodel and cannot afford stone, etc. Can you tell me did you use Formica brand or another brand laminate? I am also SO thrilled that you mentioned the undermount Karran sink. This is great news! I thought I was going to have to settle for a drop in sink with the laminate countertop. Thanks for all the helpful info.
Yes, our laminate was Formica brand.
great kitchen
Laminate is and can be a wonderful solution in many applications, BUT . . . No, no hot items on the surface, ever. Having remodeled several older homes, I can tell you this is a common problem — scorch marks and burns from pans and cigarettes. No, bleach and abrasives are NOT good for laminates. Good old soap — and modern multi-surface cleaners are DETERGENTS, not soaps — are the best bet. Also available again after a long absence, is a WONDERFUL product called Jubilee Kitchen Wax. Your Grandmother used it for 50 years with NO problems. Look for it. A sheet of laminate on an old hollow-core door laid over 2 small file cabinets makes an instant desk. What didn’t get mentioned, and is VERY important: YOU MUST HAVE EXCELLENT VENTILATION WHEN USING CONTACT CEMENT. Seriously. This stuff can cause brain damage when concentrated. DON’T replace your countertops in January when the house is closed up. Plan on ventilating well during, and up to 48 hours AFTER working with it. I have 20 year old faux black marble laminate in my kitchen that was NOT cared for properly — edges not butted tightly, scoured with abrasives, hot items set on it — and it needed replacement ten years ago. It looks like doo doo. I have seen 50 year old laminate laid well, and cared for that didn’t need a thing. I do NOT recommend the laminate curving and running up the wall to make a back splash — if not done correctly, that interior radius curve will start to crack and crumble. It also looks VERY dated, and screams, “I was too cheap and lazy to bother with an attractive and functional backsplash!” Take your time, use the right tools, get a trivet for hot pans to sit on, ventilate, and you will learn to love laminate.
Was there a reason you attached the sides before the top? It seems like every other blogger laminates the top and then the sides.
Thanks.
I watched a video from the manufacturer and that’s how they did it, so I just followed their instructions. I think it looks better this way because the seam is more on the front than on the top.
That makes sense! Thanks!
This is great I was looking all over to see how to laminate wood, I recently started to remodel my kitchen, I put in new drywall and insulation put up my cabinets so know i am ready for the counters I love the way your kitchen looks thank you for sharing this.
Hi,
Great pictures and instructions on laminate counters. I was wondering about the side next to the backsplash wall. Did you also cover that edge of the mdf with laminate to prevent moisture from swelling the mdf or did you use some other sealant? The kitchen I’m doing has a window behind the kitchen sink so I can’t use the counters with the built in backsplash. I’ll have to make them flat as you did.
We added our tile backsplash after the counter went in and sealed the seam with caulk.
I have the same corner cabinet. I chose the same countertop… but it only comes in 25”x12’
So how did you do that whole angled corner countertop. Do you have two more seams there?
The piece of laminate sheet that we bought was wider than that. We don’t have a seam near the angle. We were able to end it at the edge near the oven and trim around the angled cabinet. Hope that makes sense!
Look online. The sheets are sold up to 5’x12′. You can order from HD online or cabinet warehouses. The decorative edges are not too complicated to install. Just takes some time and they only come in 8′ pcs, so you may have to scarf joint them like a pc of trim. Just be sure if you use the decorative edge pcs to have plenty of wood glue squeeze out (use an exterior glue for water resistance) to ensure it is sealed against water.
Could you explain how you cut and finished the MDF (before adding the laminate) for the smooth inside curved angle over the corner cabinet? Thanks.
We used a jigsaw to cut the curve, then sanded it until smooth.
How do you get the router to trim all the way to the edge of your countertop ends at a wall?
You have to do that part BEFORE you attach the countertops back to the cabinet boxes.
Hi there!! I am interested in how well these have held up. What do they look like now? I am wanting to resurface my current countertops with this laminate sheeting. We use an air fryer very often and sometimes a crockpot. Will that be okay? Is it just direct heat that is the issue? Thank You in advance.
Hi Tiffany! They’ve held up surprisingly well. We have a few dings here or there and a few light scratches, but we don’t have any heat-related damage yet… cross your fingers for me! I use my crockpot and rice cooker directly over the countertops often with no problem, but everyone in the family is pretty careful about putting hot pans on hot pads, so we haven’t had those issues. I would 100% do the same countertops again. They’ve been great, they’re easy to clean and they were SOOOOO much cheaper than stone!
Hi Jenifer ,
Thanks for the blog . My kitchen top has got oven which caught fire last week and the flames blackened the edges of the top . Its Grey in colour and would like to know if i can just do that small patch . I am a renter and cant afford to change the entire top.
Thank you .
Sam
Without seeing your space in person, I don’t really know. The problem with doing only one small section is that you will end up with seams.
GREAT JOB! You have helped me decide (finally) after 6 months to attempt this project. Very informative. Although, I must admit I am very nervous about the seams. Thanks!
So much more inexpensive. Well worth the work! Looks very good.
Your counters look fab! I’m doing an133 inch x 42 inch island, sink (Krause under mount). Looking at Formica Calacatta marble. Appears to me a sheet would be big enough to do island without a seam? I don’t want the look of “the black edge” where the sides meet the top. A professional, who does Formica would be the person doing it. Do you think there is enough material to cover the entire surface & glue/roll it on & over the edges without getting the black edge? I see how you glued on edges first, I’m thinking to do this like wrapping a present, or cake fondant, but I obviously have no clue if this would be possible or if its that flexible. If not would caulk or something else hide the black edges? Thanks!
You definitely cannot bend laminate to curve down around the edges. It just can’t do that–it’s too rigid. They make custom specialty edges that you may want to look in to if you’re worried about the edge being a different color. You should be able to do that size of island without any top seams though.
Love the info, why do you use MDF vs good quality plywood? We’ve had premade countertops for years and the only problem we’ve had is with the MDF around the dishwasher and in front of the sink, it is starting to crumble and come apart on the front edge. I’m assuming that its because of the steam when its opened and a bit too much water being used to clean the front of it.
Thank You.
MDF is the industry standard. I suspect it has something to do with the natural swelling and shrinking that occurs in any wood product.