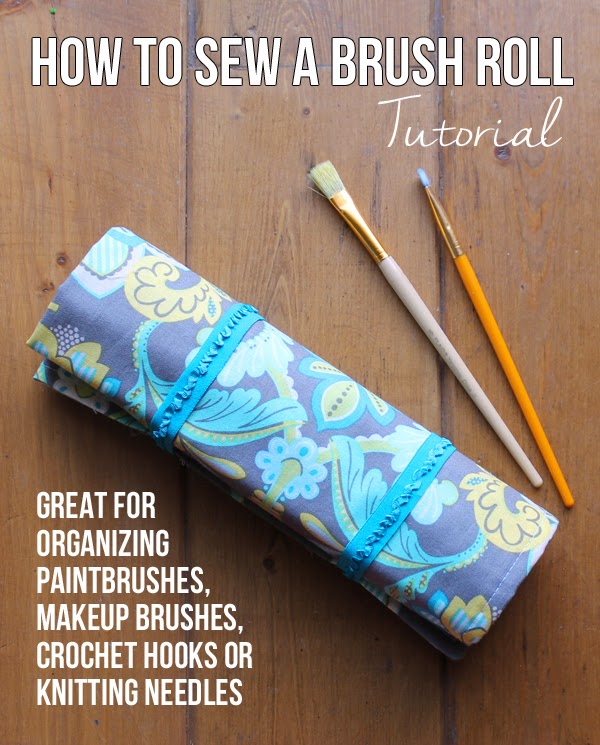
Learn how to sew a simple brush roll to organize paintbrushes, crochet hooks, makeup brushes, etc.
Hello! Today I’m sharing a super handy sewing project that even beginners can handle. I’m going to show you how to sew a brush roll!
Brush rolls are the perfect way to organize paintbrushes, makeup brushes, crochet hooks, knitting needles, colored pencils, pens… anything, really!
Today I’m making a brush roll for a friend who is a watercolor artist and I’m going to show you step-by-step how to make your very own.
As I sewed this brush roll, I took pictures all along the way. Then my camera card got eaten by the dog… okay, not really. I don’t even have a dog. But the card did become corrupted and I lost all the pictures. Boo! So instead of as-we-go photos, you get my little computer illustrations.
Supplies Needed
- 2/3 yard of Fabric A
- 1/2 yard of Fabric B
- 1 package decorative elastic. (At my store, it was located by the thread and zippers.)
- Coordinating Thread
- Fabric Marking Pen
Instructions
1. Purchase and Gather Supplies. I purchased all my supplies at JOANN Fabric.
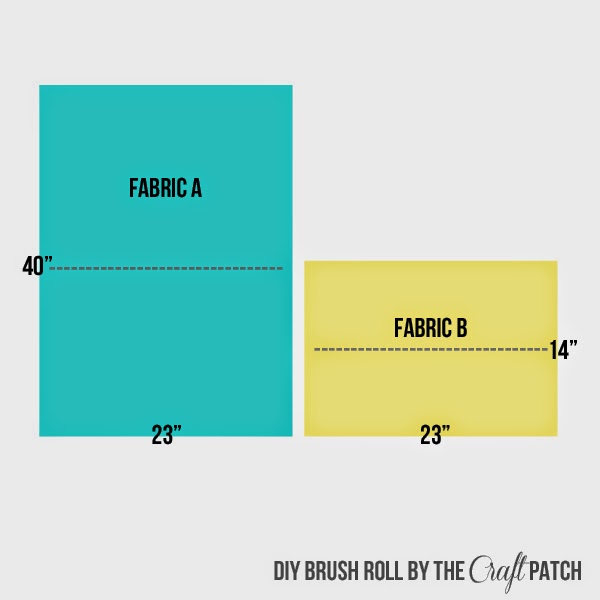
2. Cut and Press. Next, cut two rectangles: one 40x23inch and one 14x23inch. With wrong sides together, press (that means iron) the two rectangles in half along the dotted lines, as show in the illustration below:
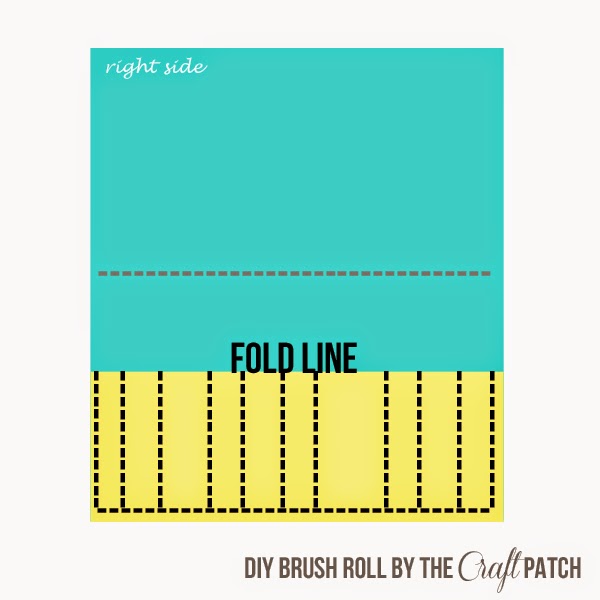
3. Sew pocket. Fabric B will become the pocket. Place the folded Fabric B on top of the flat Fabric A, matching the bottom and side edges. Pin in place, then stitch around the outside edge, leaving a 1/4 inch seam allowance. Using a disappearing fabric pen, draw straight vertical lines spaced across Fabric B, then stitch through all three layers of fabric, using the drawn lines as guides. Back stitch at the beginning and end of each vertical line.
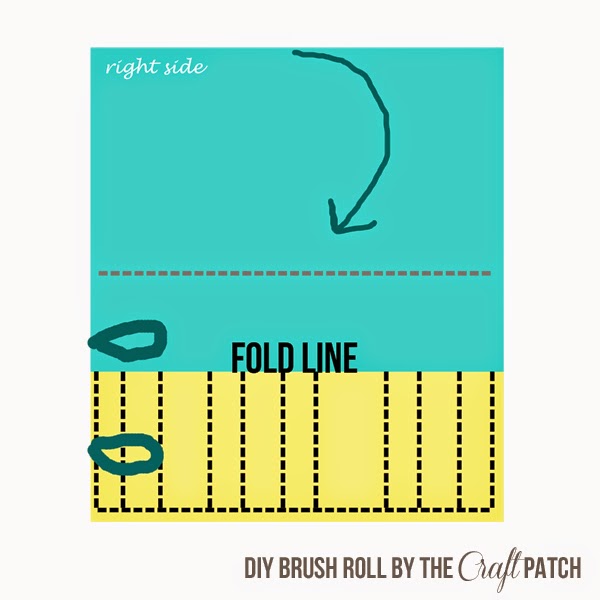
4. Elastic. Cut two 7-9 inch pieces of elastic. Fold elastics right sides together, and pin to left edge of fabric, aligning edge of fabric and ends of elastic. Stitch in place. I placed the lower elastic 3″ from the bottom edge and the upper elastic 7″ from the bottom edge.

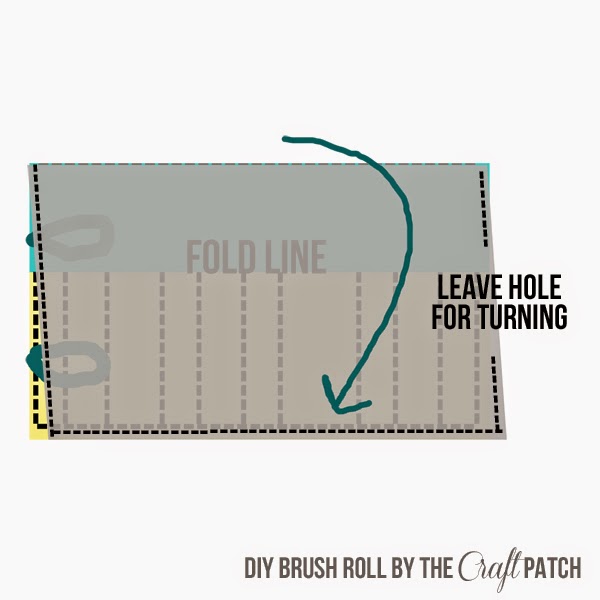
5. Sew together. Fold the top edge of Fabric A down and align it with the bottom edge. Everything will be sandwiched inside, with only the wrong sides of Fabric A showing. Stitch around the entire outer edge, using a 1/2 inch seam allowance. Leave a hole on the right side to allow for turning.
6. Finishing Up. When everything is securely stitched together, clip the bottom two corners diagonally, making sure not to cut past stitching. Turn brush roll right side out. Straighten corners and press entire project. Top stitch around the entire outer edge, making sure to catch the opening you used for turning so that it will be sewn closed.
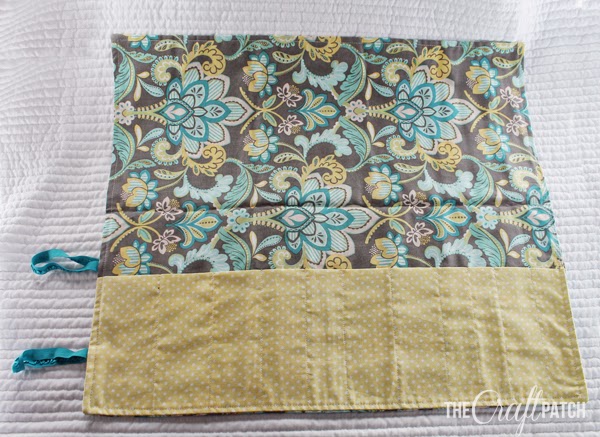
I love how my brush roll turned out! I think these two fabrics are really cute together and I can’t wait to give this gift to my friend!

Comments & Reviews
I made one of these, when I was 17 and painting in school, out of an old pair of jeans. Worked REALLY well for painting because I could just dab extra paint onto it while I was working and not worry about ruining pretty fabric. Started to look SUPER awesome after a few months of use. I regret leaving it behind when I moved Down Under. 🙁
This would probably be GREAT for colored pencils for travelling kiddos, too!
I think you've inspired me to make myself a new one.
I hadn't thought of making one out of denim… that's a fantastic idea!
Hi! Very cute project, and great job! Question- at the end, what are the dimensions of the roll when it's fully open? Since you started with 40 by 23, then folded in half, that should make it 20 by 23, and then once you fold it to roll it up, 10 inches? Because then in that case I assume your drawings weren't to scale, right? No problem with that, they were just confusing me a little, so I was just wondering.
Yes, that's right… When it's open all the way, it measures 20×23. Sorry for any confusion!
I should make one for my LARGE crochet hooks (L, M, N, P, Q). Am storing them in a bottle for now, which is far from convenient.
I made one for my crochet hooks, and it is SO nice to have them organized and visible all at once. It also makes traveling with projects so much easier!
Triangles? WHAT TRIANGLES? And.. your description about the folding is really more confusing than it needs to be…. Yikes… in the end – I think I can figure it out but VERY confusing..
Thanks for catching my typo! I corrected it to say RECTANGLES. I'm sorry it was confusing for you. Any constructive criticism to help me make it better?
I think your instructions are fine. I understand what you mean by triangles. I think you'll get a lot of lookers after they see Sandys post. I plan to make one for my brushes and another for my crochet hooks. The one you made is very pretty. Thank you for sharing your tutorial!
Gorgeous fabrics. I've made a couple to hold crafting tools for crop travel, but get some wonky lines. Thanks for the tip on the sewing marker.
I can't wait to try to make this! I got here from Sandy Allnock's blog and instantly fell in love with your site.
Is the elastic necessary?
No, not necessary. It just helps hold the roll together. You could substitute ribbon or string or just roll it up with no tie to keep it closed.
I just saw your brush roll on Sandy Allnock’s blog. What a great way to store brushes. Thank you for the tutorial!
Thank you for this tutorial. It turned out great!