Today I’m sharing an absolute favorite beginning knitting pattern. I am going to teach you how to make a pair of fingerless mitts. I’ve made several pairs now and I adore them! I wear them when I’m typing, when I’m playing the piano, when I’m texting on my phone. They keep my hands warm while keeping my fingers free. I think everyone needs a pair. Seriously. They are just the best!
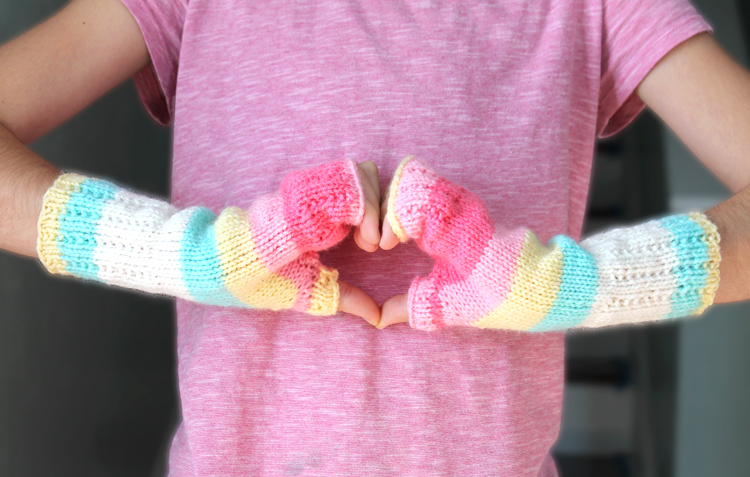
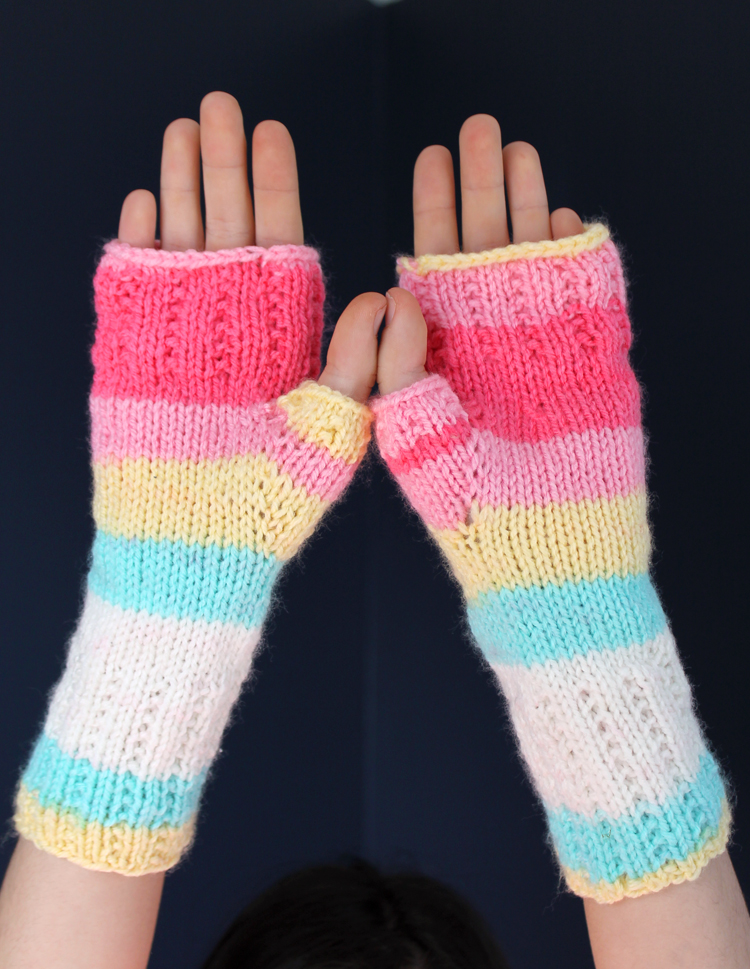
I made a colorful striped version for my tween daughter:
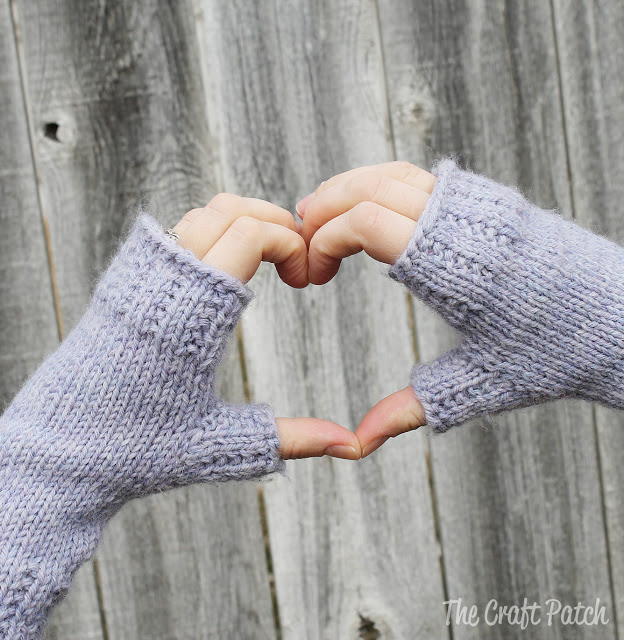
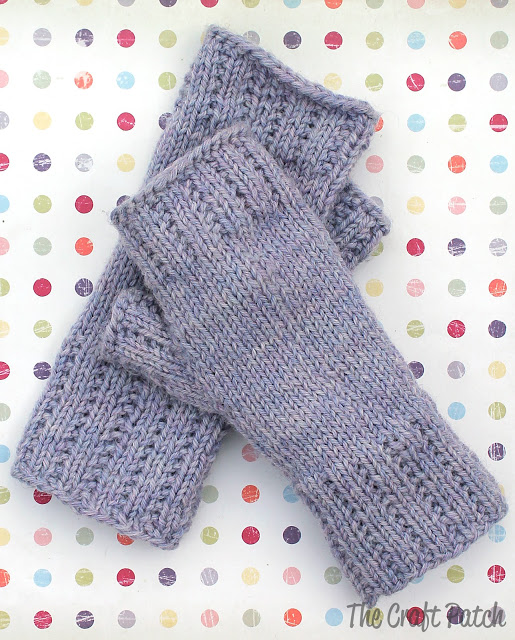
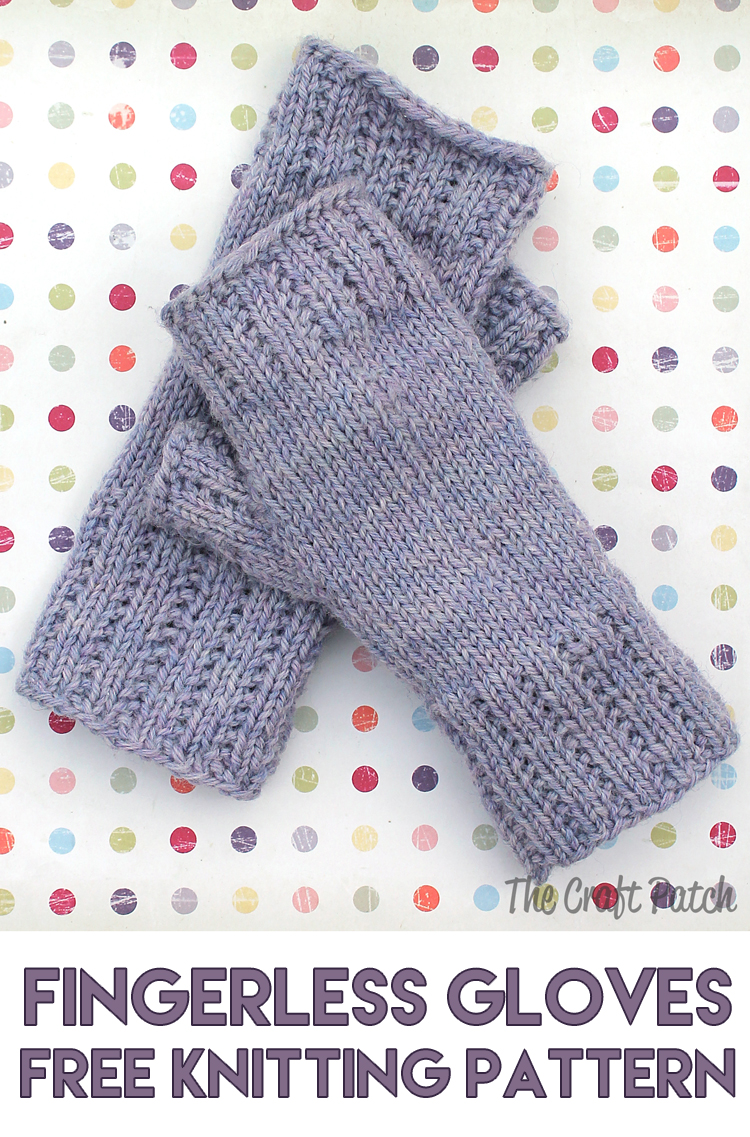
A luxurious lavender merino wool pair for myself:
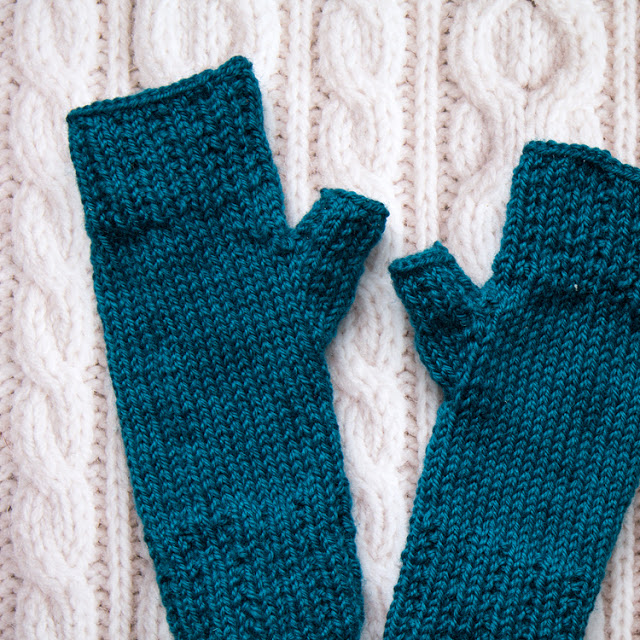
And a teal wool pair for my sister:
Let’s start by talking about yarn choice. Use my affiliate links below to see what the yarn labels look like so you can find what you want in the yarn aisle. Don’t use junky yarn for these gloves! If the yarn is scratchy (I’m looking at you, Red Heart!), it will bother the delicate skin on your wrists. If the yarn is cheap, it will pill and look icky over time. Sometimes it’s worth splurging on good yarn. Just do it. YOLO.
The lavender mitts are the ones I made for myself. I used Cascade 220 Merino Wool yarn in Lavender Heather. The subtle color variety is gorgeous and I have been SO impressed with how they have worn over time. I wear them pretty much every day in the winter and they still look new. This yarn is a favorite and is worth the cost. Highly recommend!
The blue gloves are made from Paton’s Classic Wool that I bought at Joann, but I couldn’t find it on their website, so HERE is the link on Amazon. They were not quite as soft as the Cascade yarn, but more easily available and still pretty nice. The plus for this yarn was the pretty sheen.
The Lion Brand Self-Striping Yarn turned out really cute, but the gloves are pilling a bit since my daughter has used them so much. I wouldn’t use this yarn again. If I’m going to put in the time to knit, I want the mitts to last.
Okay, let’s walk through each step of the project. I will include a printable PDF of the pattern at the end of the post, so feel free to scroll down if you want to skip the tutorial section.
Cast on 34 stitches and divide evenly onto three DPN’s. Join to work in the round. (33 stitches)
Work in broken rib stitch to create the bottom cuff. I knit approximately 24 rounds for the striped gloves to make extra long cuffs, but you could do fewer and still make a nice sized cuff.
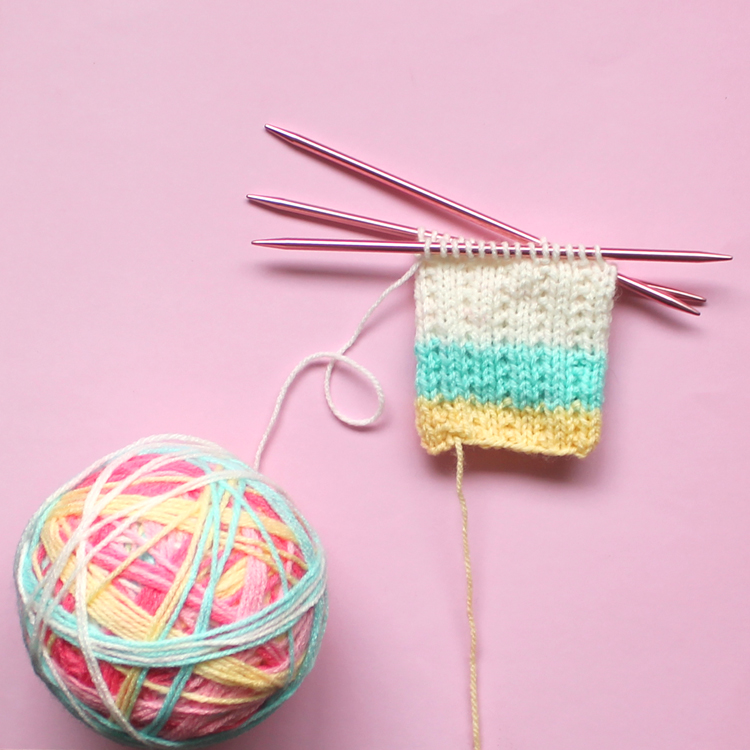
Switch to a knitting stitch for about 1.5 inches or about 10 rounds.
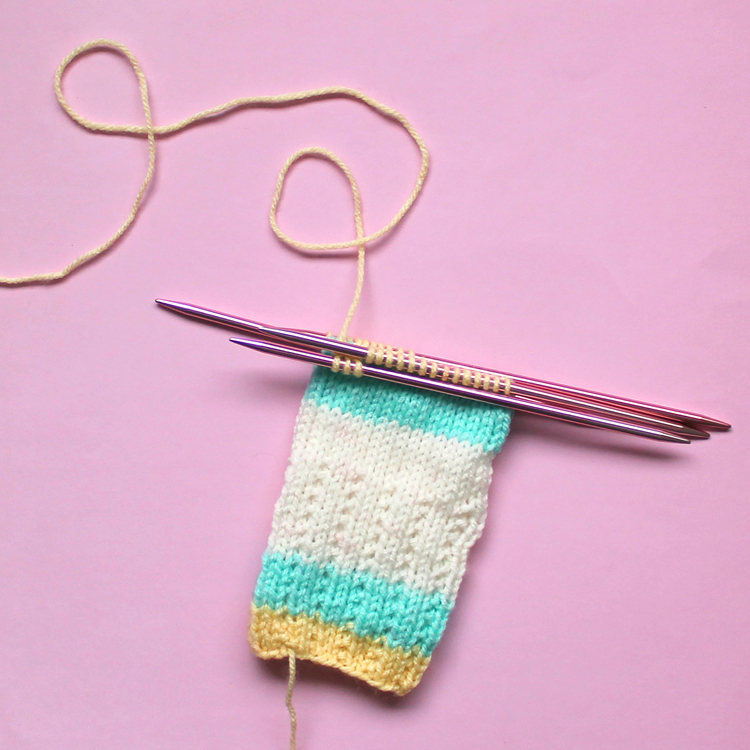
This is what knitting in the round on double pointed needles looks like:
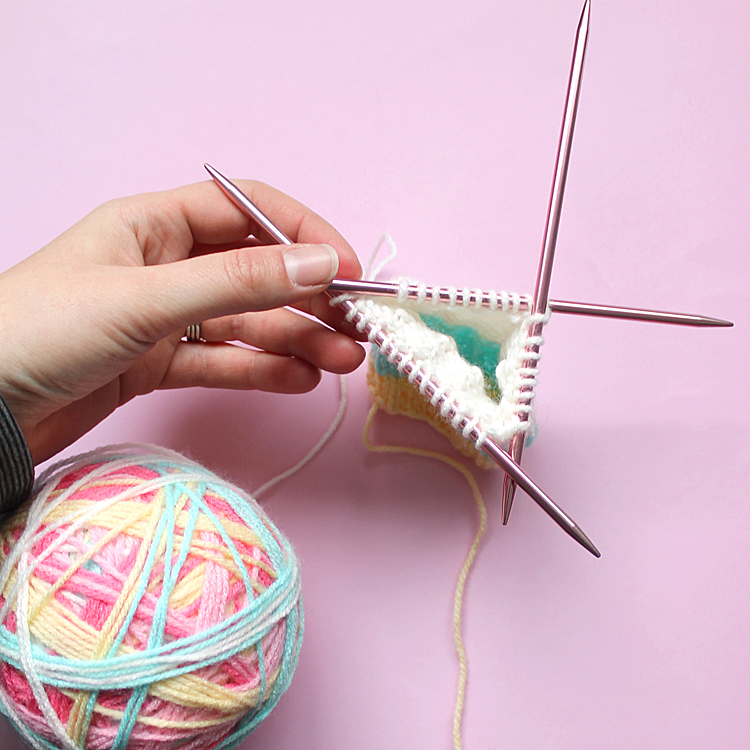
Make an increase for the thumb gusset section.
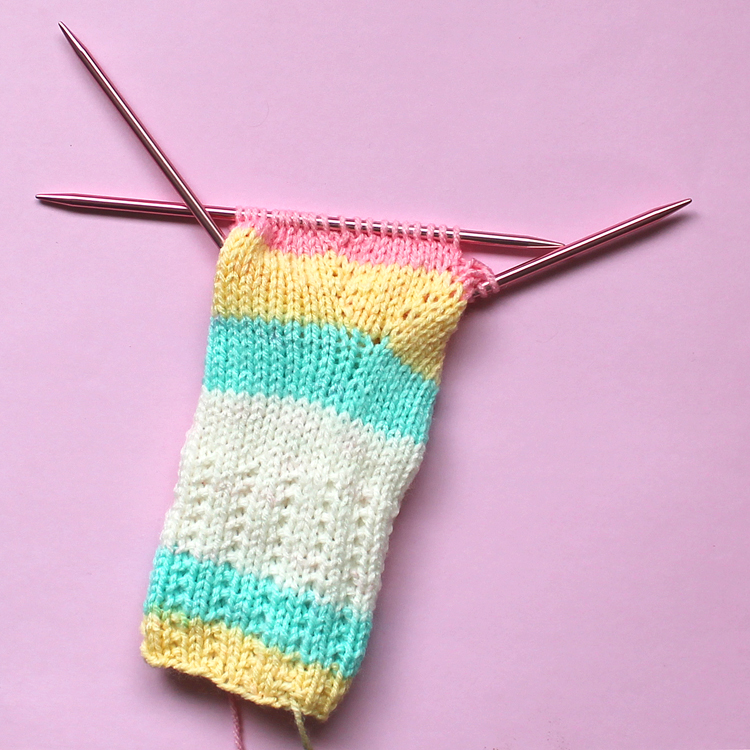
Thread a scrap of contrasting yarn through the needle, then use it to slip the 11 stitches within the “triangle” of the gusset onto the yarn. Cast on 4 stitches, then join and knit around the main part of the glove, leaving the 11 stitches on the scrap yarn alone.
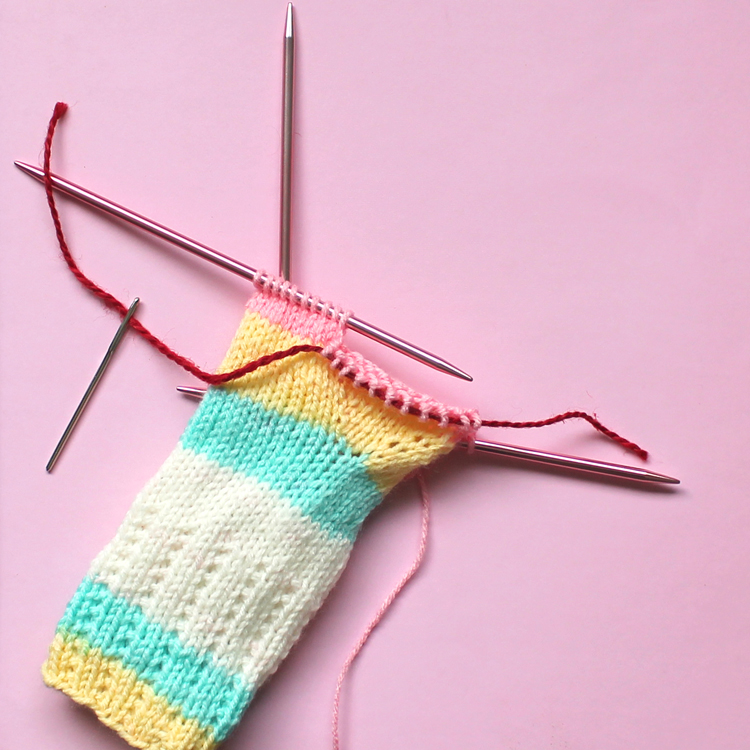
Round 12 and 13 decrease just a bit right above the thumb hole. Then you knit 5 rounds. Switch to the broken rib stitch for 12-14 rounds. Bind off using a stretchy bind off method.

Now it’s time to go back and finish up the thumb. Divide the 11 stitches from the scrap yarn onto two DPN’s.
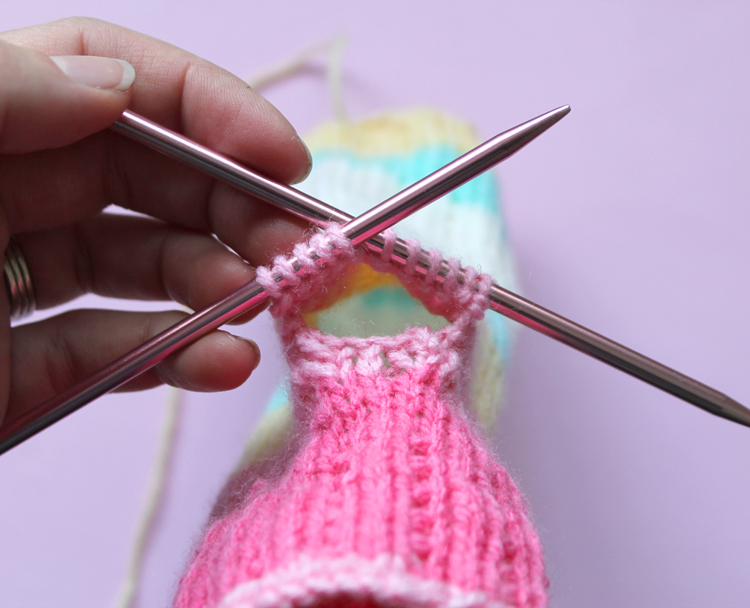
Using a third DPN, pick up four stitches from the open edge of the work.
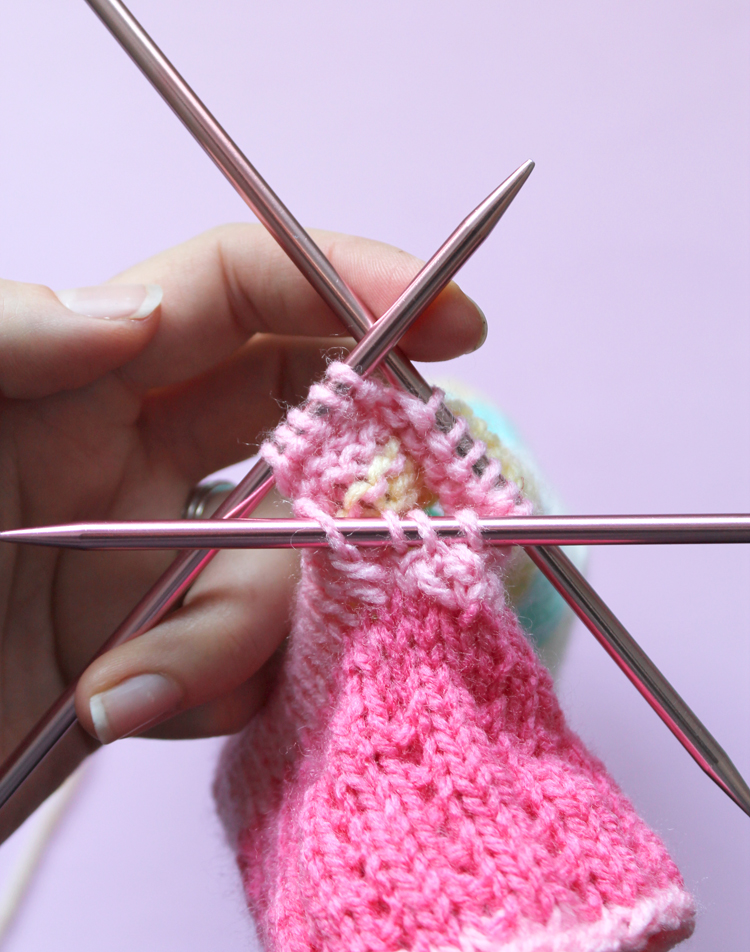
Knit around in the broken rib stitch for about 6 rows. Bind off. Check for any holes along the thumb area and use the cast-on tails to “sew” them closed.
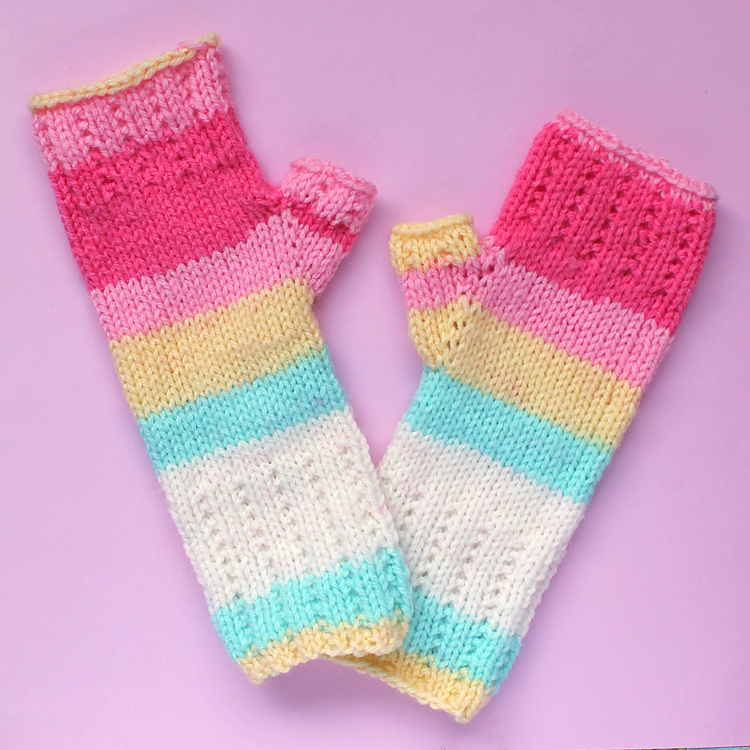
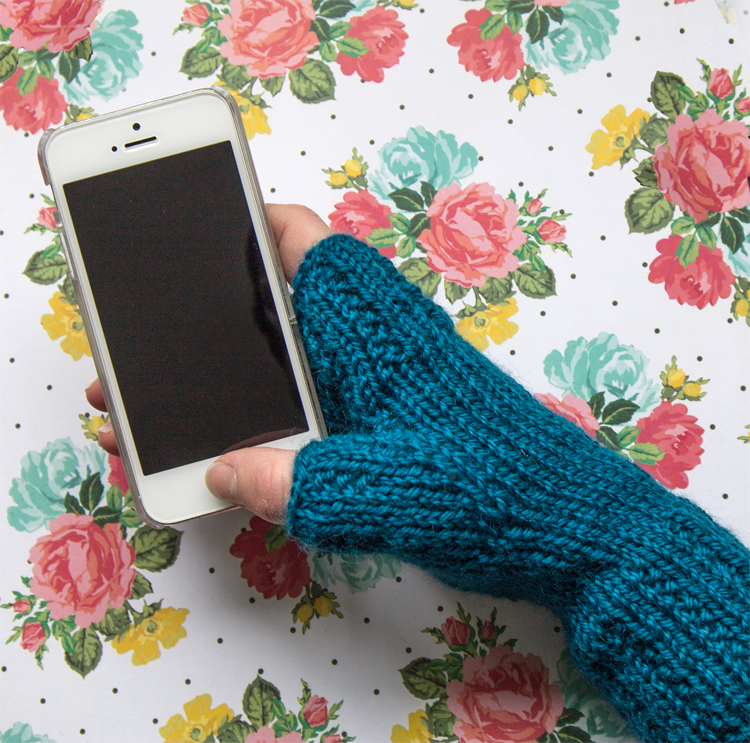
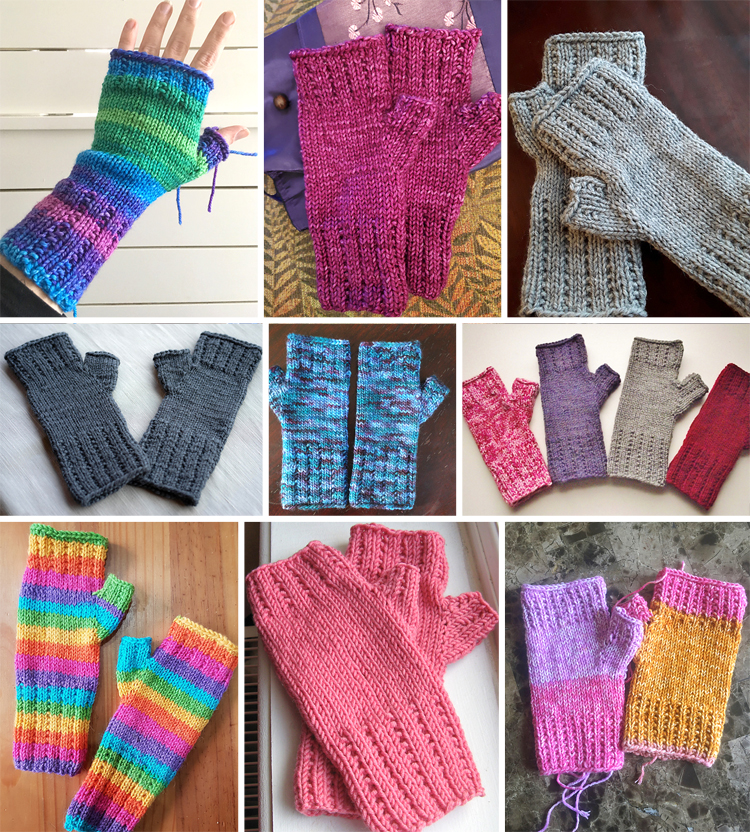
So many of you have made these gloves. Thank you for sharing your photos! It’s so fun to see all of the different variations.
Materials Needed
- Worsted Weight Yarn
- Lion Brand Self-Striping Yarn in Tutti Frutti
- Paton’s Classic Wool Worsted
- Cascade 220 100% Merino Wool in Lavender Heather
- Size 7 double pointed needles (DPN’s)
- Scrap yarn in a contrasting color
- Large Eye Needle
Stitch Abbreviations
Broken Rib Stitch: Knit all even rows. K2 P1 odd rows
m1r: Make a right side increase by picking up the bar between stitches from back to front, then knit into the front of the picked up stitch.
m1l: Make a left side increase by picking up the bar between stitches from front to back, then knit into the back of the picked up stitch.
sl: Slip a stitch from left needle to right needle without knitting it.
psso: Pass the SL over a worked stitch off of the right needle.
k2tog: Knit two stitches together
Pattern
Cuff
Cast on 34 stitches and divide evenly onto three DPN’s. Join to work in the round. (33 stitches)
Work in broken rib stitch to create the bottom cuff. I knit approximately 24 rounds for the striped gloves to make extra long cuffs, but you could do fewer and still make a nice sized cuff.
Switch to a knitting stitch for about 1.5 inches or about 10 rounds.
Thumb Gusset
Rnd 1: M1R, K1, M1L, knit around
All Even Rows: knit around
Rnd 3: M1R K3, M1L, knit around
Rnd 5: M1R, K5, M1L, knit around
Rnd 7: M1R, K7, M1L, knit around
Rnd 9: M1R, K9, M1L, knit around
Rnd 11: Thread a scrap of contrastingyarn through the needle, then use it to slip the 11 stitches within the “triangle” of the gusset onto the yarn. Cast on 4 stitches, then join and knit around the main part of the glove, leaving the 11 stitches on the scrap yarn alone.
Top Section
Rnd 12: Knit around until you reach the last 6 stitches. Then sl1, k1, psso, k3 k2tog (you will need to move a stitch over from the right-hand needle).
Rnd 13: Knit around until you reach the last 5 stitches. Then sl1, k1, psso, k2, k2tog (you will need to move a stitch over from the right-hand needle).
Knit 5 rounds.
Switch to the broken rib stitch for 12-14 rounds. Bind off using a stretchy bind off method.
Now it’s time to go back and finish up the thumb. Divide the 11 stitches from the scrap yarn onto two DPN’s. Using a third DPN, pick up four stitches from the open edge of the work.
Knit around in the broken rib stitch for about 6 rows. Bind off. Check for any holes along the thumb area and use the cast-on tails to “sew” them closed.
Weave in ends. Repeat the pattern exactly to make the second glove.
If you enjoy this pattern, I’d love for you to pin one of the images below so others can enjoy it too! Thanks so much!


Comments & Reviews
These were my very first attempt at fingerless gloves. I love them! The pattern was easy to follow ~ thank you! I'm going to make another pair!
Yay! I'm so glad to hear it! I wear my fingerless gloves almost every day in the winter.
How do you get the design effect that look likes holes in the whole glove,I'm anxious to make this for myself.
I'm not sure what you mean, but if you follow the pattern, your gloves will look like the ones in the pictures.
Are the DPN needles #7 metric, imperial or American sizing?
US size. I had to look it up myself and cascade merino wool recommends us 7 (4,5mm)
Hi, I would like to try to knit your cute fingerless mittens.
But I can’t open and/or download the PDF version patters (“here”).
Do you have any idea the thickness of the DPN number 7, in mm is? Ik live in Amsterdam, and use mm as standard size.
Thank you so much!
Regards,
Size 7 needles are 4.5mm. The printable PDF pattern is a Google Drive document, so sometimes, especially if you are at work or on a shared computer, it won’t let you access the file.
I so what to make these gloves how many balls of wool do you need.
The Cascade yarn I used was a skein of 220 yards and I had a little leftover. Hope that helps!
Thank you! Your pattern is several steps ahead of the one I´ve been using.
Great pattern! How many rows did you use for the cuffs on the lavender pair?
I did 22 rows for the cuffs and they are nice and long. No cold wrists for me. LOL
Great pattern really enjoyed knitting them, I’m definitely going to make more. Found it very calming, Thank you for sharing.
Making a pain right now. I’ve finished the main part and am on the thumb part. I divided the 11 stitch’s and picked up 4 more but don’t have any yarn to knit with? Did I do something wrong? Please help.
It’s really hard to tell what’s wrong without seeing it. If you don’t have yarn to knit with, you definitely did something wrong. Did you pick up 4 stitches from the wrong side? The 11 stitches will kind of just hang out there in space for now until you come back at the end to fix them, so you just ignore them and keep knitting around them. Does that help at all?
I finished the hand portion. Went pack to the 11 stitches decided them on two needles. Now where does the yarn come from for picking up the four stitches and for knitting the thumb?
You start with new yarn because you’ve already bound off at the top portion of the mitt.
Ok so how do I start, with the picking up of the four stitches? Sorry I’m such a pest… I do live the pattern, I just want to understand it…
Hi I would like to try this pattern. Can you tell me what is the size of the glove small, medium or large?
Thank you
I would say the pattern as written is medium. It’s simple to increase the size… just add an extra repeat of the pattern when you cast on.
Which needle do I slip stitches off
Hi Colleen, can you explain which step you are on a little bit more clearly so I can help you better?
Hi Colleen,
Beginner knitter here. I am knitting this (love the pattern) but have one question. I just finished the increase and slipped the 11 stitches on the contrasting yarn. I have 32 left in the round (+4 cast on), so 36 total. If we decrease by 4 stitches total, won’t that leave 32? How do you finish with broken rib? Could you please help me understand? Thanks!
I’m having the same problem and would like some help also please
It’s been a while since I made these, but I think you might lose one stitch count when you join to work in the round again, leaving 33 stitches.
I think the 33rd stitch is actually lost right in the middle of the thumb gusset. You’re making 10, but then slipping off 11.
I’m making these right now, and just read the comments to see if anyone else had mentioned this. I too ended up with 32 after the two decrease rounds, so ended up making one to complete the broken rib with 33 stitches.
YES! I’ve ripped out twice because of this! I just cast of 5 additional stitches, so after the slipping and K2tog, I ended up with 33.
I am confused about how you CO 34 stitches but you indicate there are 33 stitches.
When you connect the stitches to knit in the round, you lose one stitch, so you have to start with one extra.
I have tried a few patterns specifically looking for thumb gussets that looked and felt right. This is the best pattern I’ve found! The pattern using worsted weight is a bonus! They work up so quickly and easily. I made them last winter and they immediately became my favorite pair. I am excited to make more. Thank you!
thank You for the wonderful pattern!!
Can these be worked on circular needles rather than double point? I can not knit on double point needles for some reason! I think my brain has a double point needle blockage!!
Yes, as long as the circular needles were small enough. I feel like it would be harder on circular needles that small!
You could try using the magic loop method, I always do that when a pattern calls for DPNs because I find DPN’s really awkward. I haven’t tried this pattern yet but am about to start, will let you know how it goes!
I’ve also seen people use 2 sets of circular needles to knit in the round which is similar and possibly easier. I just don’t have enough circulars of the same size so haven’t tried it!
Hello, There is a little error in the pattern explanations. We add 10 stitches for the gusset so we need to put these 10 stitches a side ( not 11 as mentioned). That way, after the 4 decreases, we go back to 33 stitches ready for the broken ribs (multiple of 3). Just finished the first one last night, nice pattern, thanks.
Has there been a reply to this comment. I am still putting 11 stitches on a holder, not 10.
Which is correct?
Thank you
I don’t like double pointed needles. I prefer to knit with 2 needles but thanks anyways for sharing.
You can do this with two needles… just get the kind with the cord that connects them together.
Hi, Size 7 double pointed needles is that size 7mm??
No. Size 7 are 4.5mm.
Can you explain how to cast on the 4 stitches after the 11 are slipped onto the thread? what needle do the 4 extra cast on’s go? do they get knitted with the thumb or with the hand?
The four stitches make up a “bridge” of sorts to go in the crease of the thumb. The 11 stitches on the thread will be toward you and you’ll cast on from right needle to left behind those 11 stitches. Does that make sense?
I had this question too, but your answer is not totally clear to me. The yarn is on the right, and I should cast on the four stitches onto the left needle? And then when I start to knit again, I would be starting to knit into those four stitches first but that doesn’t work because the yarn is then four stitches in from the end. And how do you cast on with only one thread of yarn?
I found a video how to do this. You cast them onto the right needle first and then join in the round.
I have just finished knitting the 1st mitt using worst weight yarn. I like the feel and fit of this mitt. I plan to make more as gifts for my grandchildren. I appreciate how you have written the pattern. This is the first time that I clearly understand what the writer has said to do. Thank you for this beautiful, easy pattern.
Would you PLEASE please make a live tutorial with you talking and walking us step by step, it’s the only way I can learn and I love these.
It’s been on my to-do list… it’s just quite labor intensive to film something that takes so long to make, so I keep procrastinating it.
Love the design. However, I’m a bit confused. You say to cast on 34 stitches, but then when you say to divide among 3 DPNs, there’s 33 stitches in parenthesis. What happens to the extra stitch??
When you join the stitches into a circle, you lose one stitch. That’s how you end up with 33.
Hi! I just did them with magic loop and it works great! No danger of stitches slipping off!
Do you have a pattern for these done on Two needles rather than in the round
No, sorry!
Hello, Can you tell me please how I adjust the size for a man’s hand and a toddler’s hand?
I haven’t figured that out, but I would guess you increase/decrease the starting number in multiples of three since the stitch design is a three stitch pattern.
How much yarn is needed? Thank you
One skein was all I needed for each of the three yarns I’ve used to make these.
I apologize if you have already answered this but I could not find it.
Pattern: “Cast on 4 stitches, then join and knit around the main part of the glove, leaving the 11 stitches on the scrap yarn alone.”
What type of join do you use here so it does not create a hole or lose one stitch in the process like the initial join at the beginning of the pattern?
Thank you
I have the same question as above but see no reply. I am working on the first mitt using this pattern. I love the look of the mitt but 12 and 13 seem strange to have to take a stitch off the right needle to do as pattern says. I guess I will experiment.
WHERE IS THE PDF FOR FREE INSTRUCTIONS ???
This is so incredibly frustrating
Click on the pink bold words near the bottom of the post that say, “Download the free PDF printer-friendly version of the pattern HERE.”
Thanks
I just downloaded this lovely pattern and want to knit them for my granddaughter. She’s nearly 8 years old and quite tall but slender… I won’t be able to check them against her as she lives in a different country!
Can you give any advice on adjusting number of stitches, yarn and needle size?
Since the stitching pattern on these gloves works in multiples of 3, I think you’d have the best luck casting on 3 fewer stitches when you first start and leaving the needle and yarn sizes the same. Then you can adjust the glove length as you go by just knitting fewer rows at the top and bottom.
hi there,
thanks for your lovely pattern, but how is broken rib made?
A am not familiar with reading english knitting patterns.
Hilda from Iceland
Broken Rib Stitch: Knit all even rows. K2 P1 odd rows
Sounds great easy to read and follow.
I think this is a lovely mitt, THANK YOU, but the pattern could use some clarification.
The manner of using 34 stitches for the cast on and reducing one for the join isn’t explained, which it should be, because that isn’t the traditional join. Also, the reduction of stitches after the thumb gusset is made to continue the hand, is not correct or well explained. When I follow the instructions I have too few stitches, 32 not 33. A little update and clarification would be very helpful for new knitters.
I had the same question. Don’t know where you lose that 34th stitch if you should start with 33. I sent my question, but haven’t heard back yet. Was hoping soon as I really like the pattern, but not having to repeatedly rip out trying to find a way to only start with 33 when you have cast on 34!!
I have tried and tried to find the free PDF for the Happy Hands Fingerless Mitts. I found all the video demos, but I don’t need those. Please help!!!
Near the bottom of this post is a blue button that says, “get the printer-friendly version of the pattern here.” You should just be able to click on it.
What size needles for these please?
The materials list says size 7.
These are the Mitts that I am going to Knit for a gal who works in Bird pet shop. Long beautiful hands, but tells me always cold. Searching for something simple and use what I have in my buckets of yarn, some wool, some acrylic. need light wool for these.
Now I can get out the dpn’s and look for the wool and make a plan…. Look easy enough. Thank you for postingusing different color yarn, short and long version. I will knit long keep arms warm. 🙂